
You are using an out of date browser. It may not display this or other websites correctly.
You should upgrade or use an alternative browser.
You should upgrade or use an alternative browser.
Discontinued Pax Vaporizer by Ploom
- Thread starter frayded
- Start date
- Status
- Not open for further replies.
GraffiX
Well-Known Member
Hey again fellow Pax-minded brothers and sisters!
I've been out with a back injury (good Lord man it's always something!) for almost 2 weeks now and am bored out of my mind.
So, I decided to put together something I promised a while back:
A Pax Cleaning Tutorial!
Disclaimer: This is simply the system I've developed to clean my Pax. Don't let the verbosity of my post scare you off, I'm just trying to pack in a lot of info for those who may be new to this. This process takes about 10-15 minutes tops, and I do it once a week religiously. My Pax is like new, and I have zero problems with it.
Pre-Cleaning Tips:
- Do this with a cold Pax
- Remove the mouthpiece (step 2 below), which puts the Pax into "temperature light" mode. Allow the Pax to sit, without the mouthpiece, motionless, until the light goes off (about 3-5 minutes). This will ensure your Pax won't come on while cleaning!
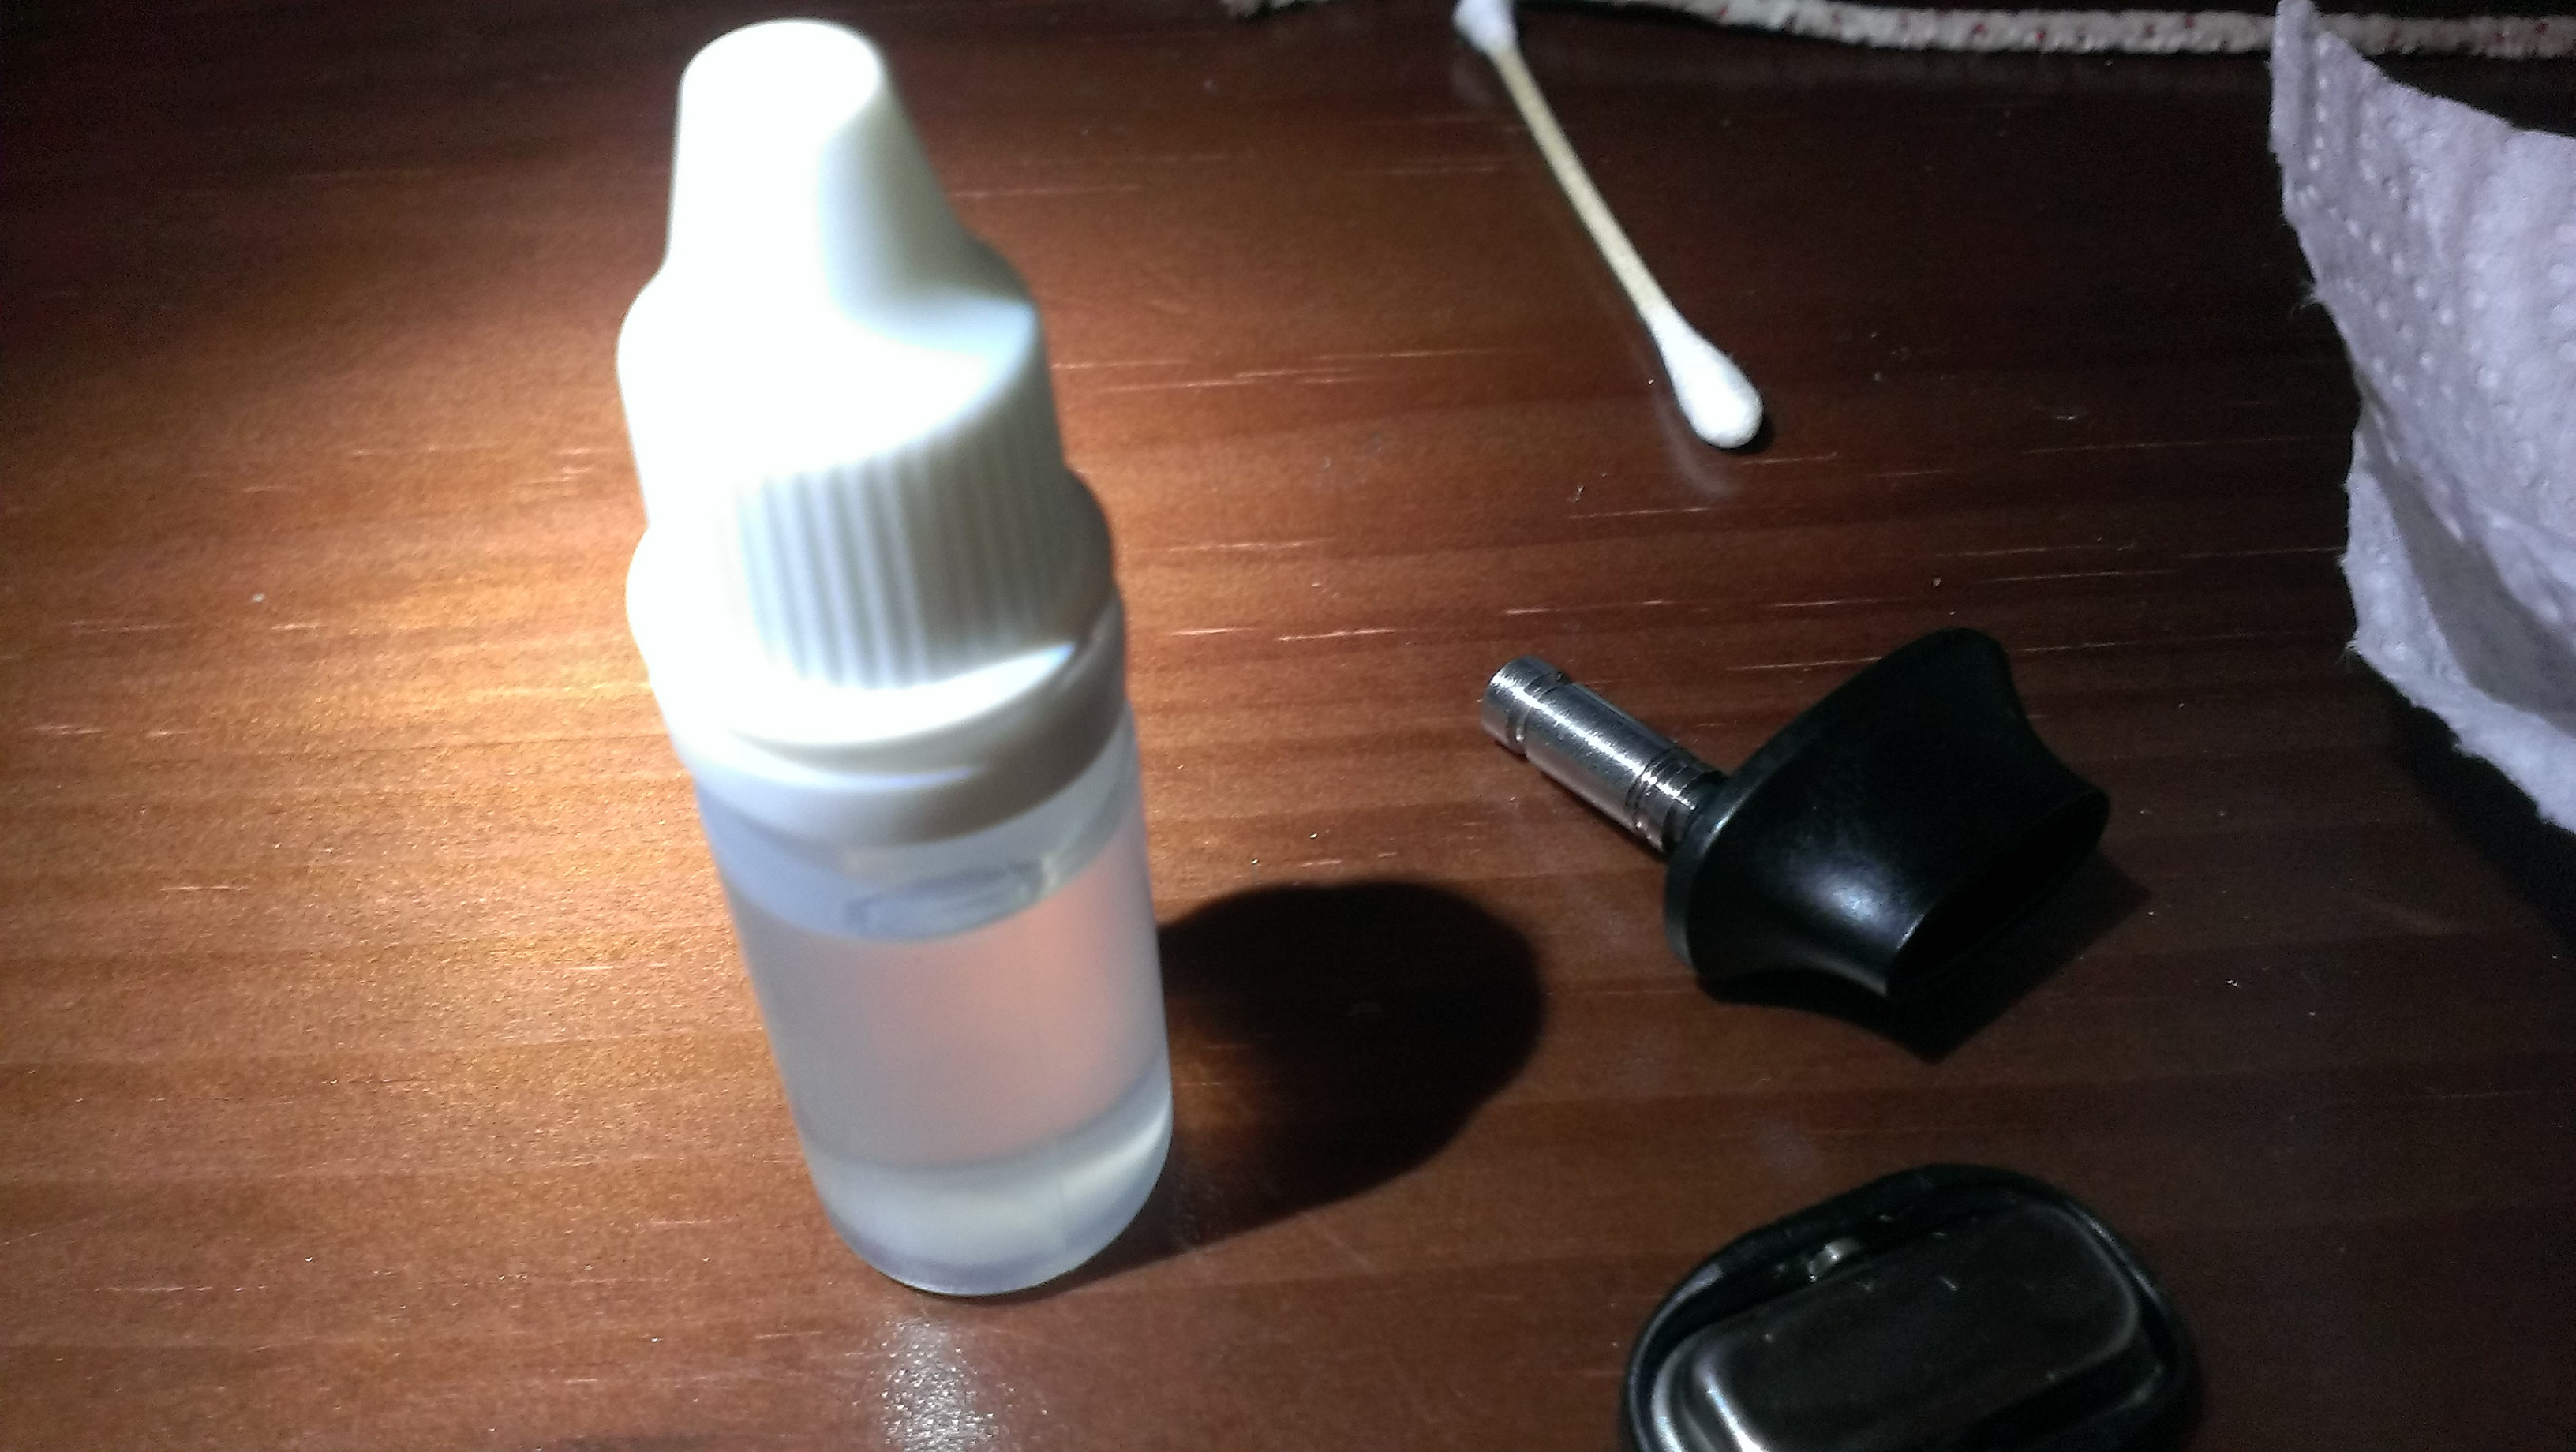
1. Here's my Pax Cleaning Kit. Seems like a lot of stuff, and perhaps it is, but it's all very cheap to buy, and in quantities that last a long time. Here's the list from left to right:
- 3 paper towels
- 3 bristled pipe cleaners
- 5 Q-Tips (these have wooden sticks, regular Q-Tips are fine, not quite as sturdy)
- 1oz shot glass
- PG Lube (this is a 1oz dropper bottle full, bought a quart on Amazon for cheap, as well as the dropper bottles)
- 1 GUM dental brush (These are the medium ones)
- 1 bit of Steel Wool (I used 00 below)
- 1 bamboo skewer
- Isopropyl Alcohol (70% works just fine, 90% is fine as well)
2. Pour 1oz of alcohol into the shot glass, remove the mouthpiece, and place it in the glass to soak.
3. Let's get that grungy resiny screen out of there! Dip the end of a pipe cleaner about 1" into the shot glass, and knock off any excess onto a paper towel.
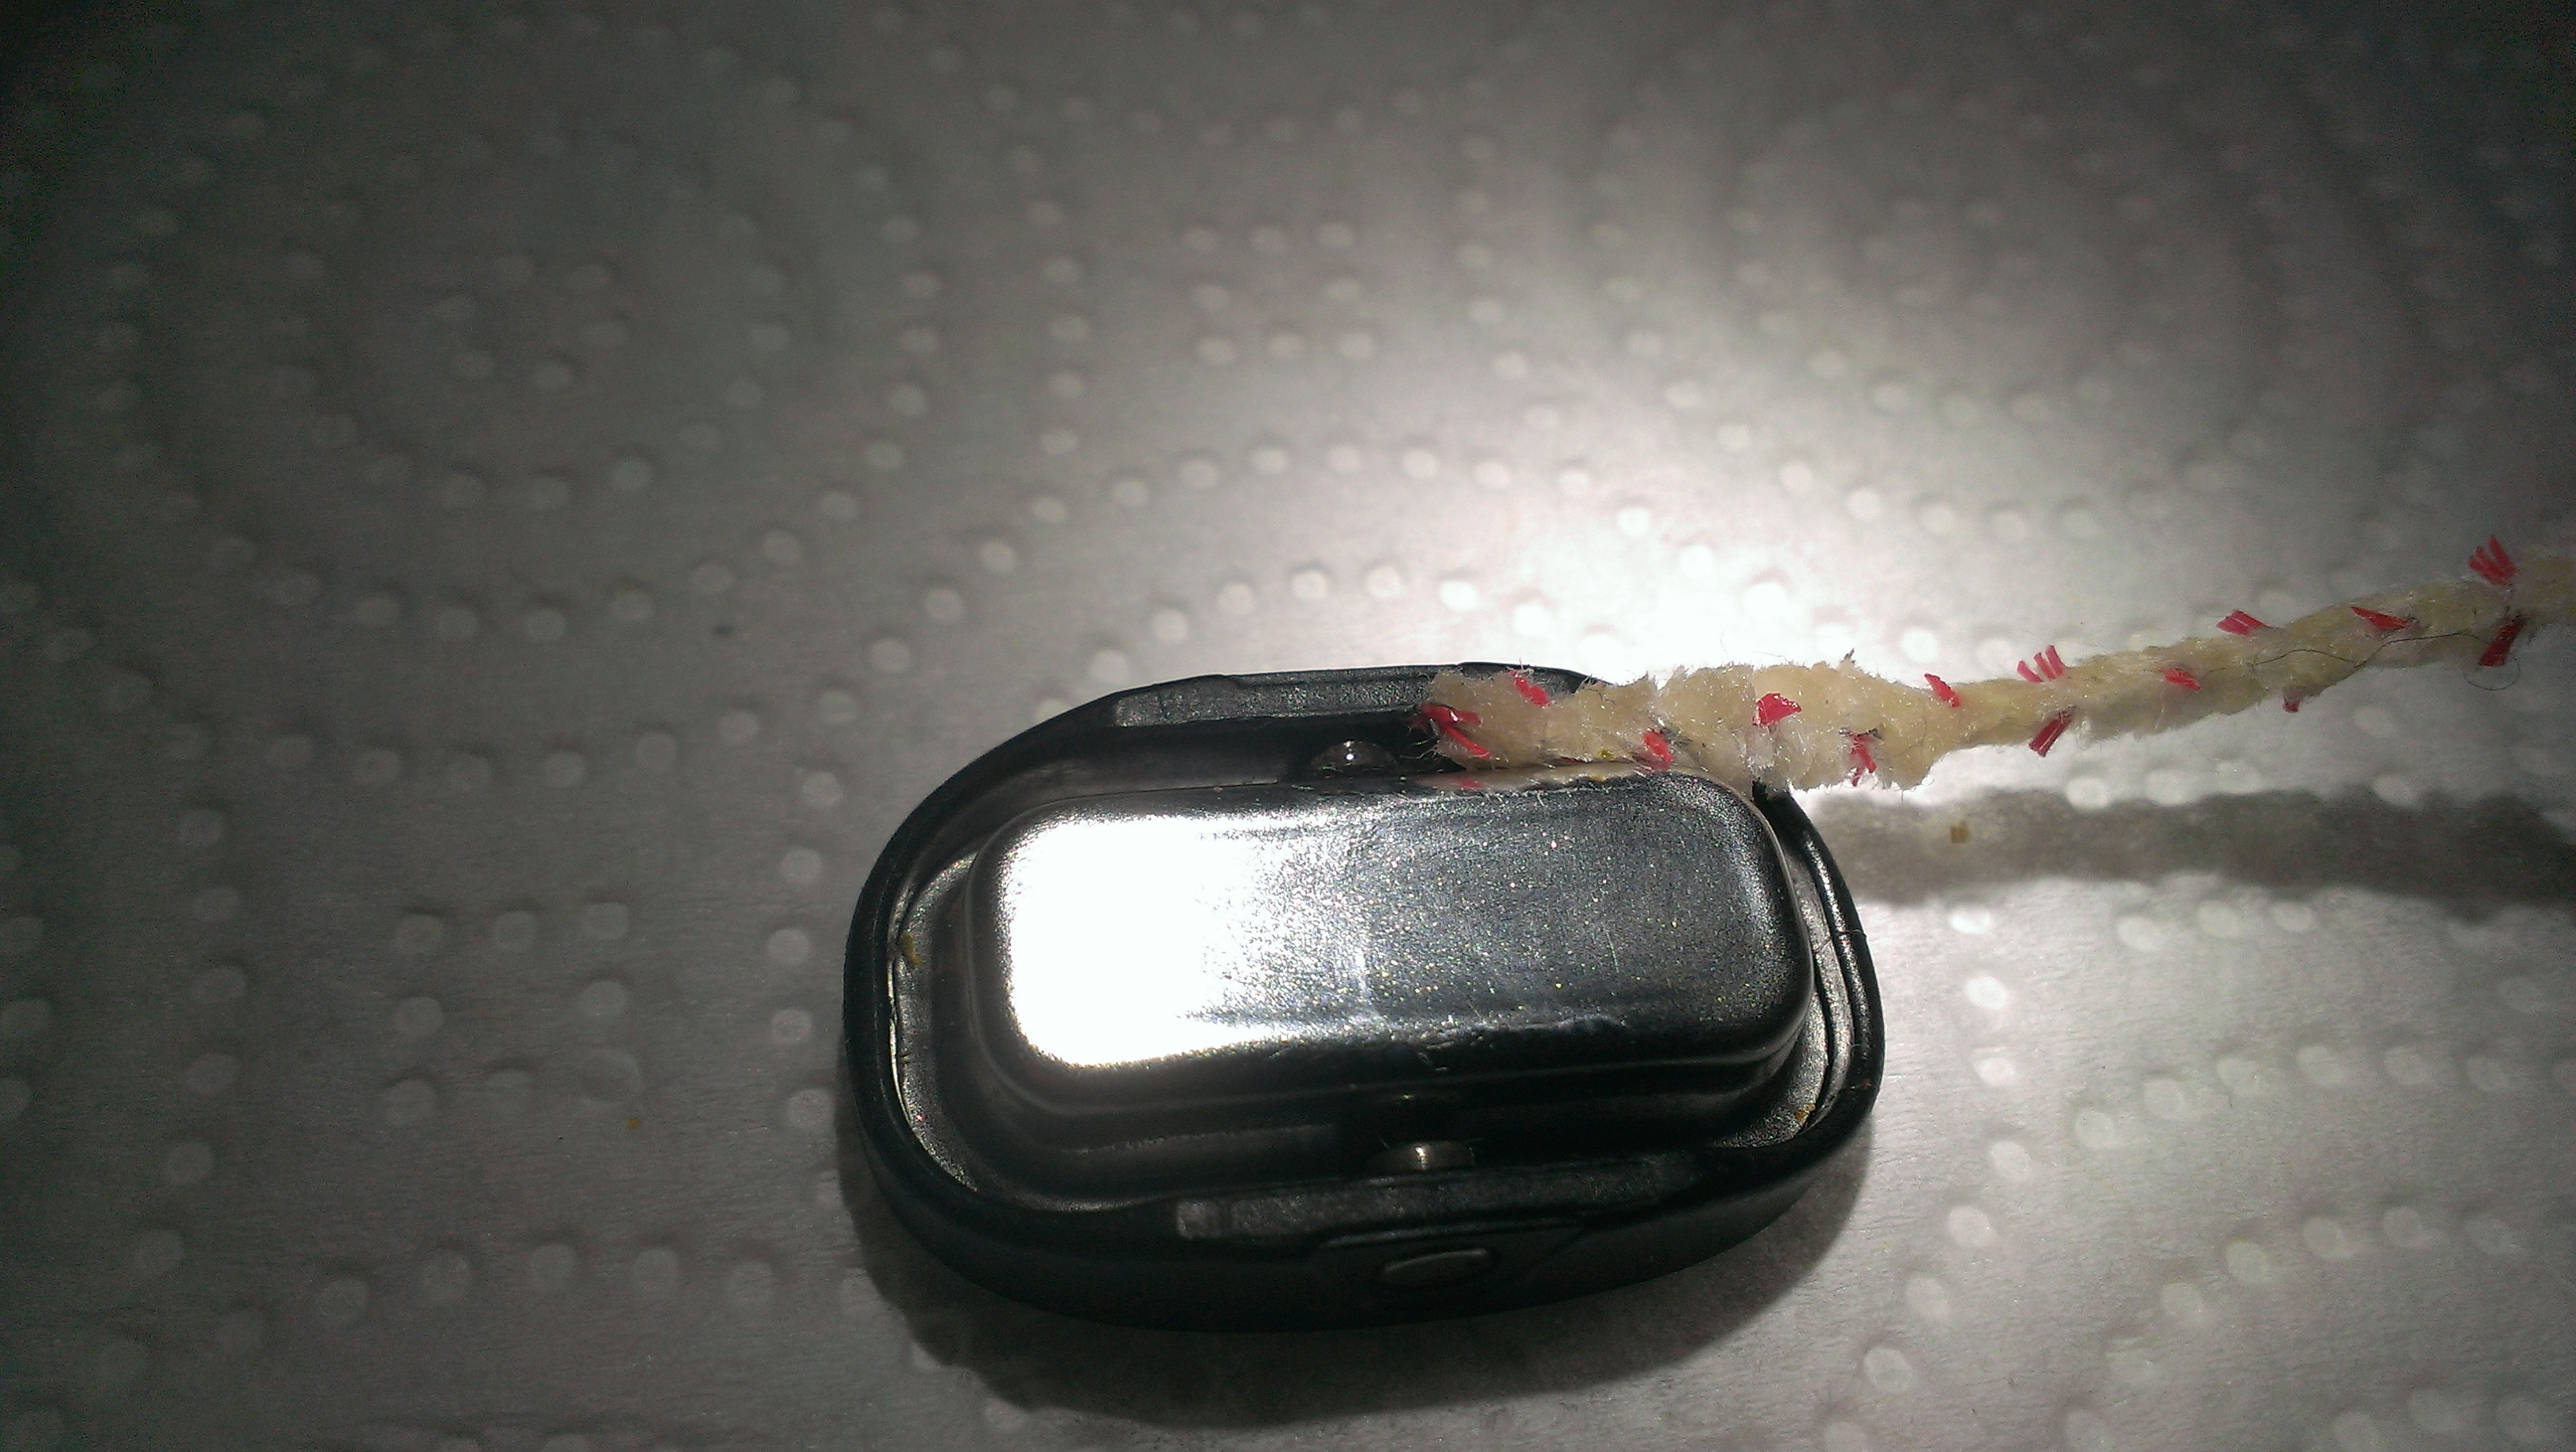
4. Remove the oven lid and set aside.
5. While holding the Pax upright, over a paper towel, push the pipe cleaner through the tube from the top, alcohol end first, taking your time...when it meets some resistance (resin), sort of pump it up and down a few times, then push it further in, same thing, until it pushes out the screen onto the paper towel. Take the screen and place it into the shot glass with the mouthpiece.
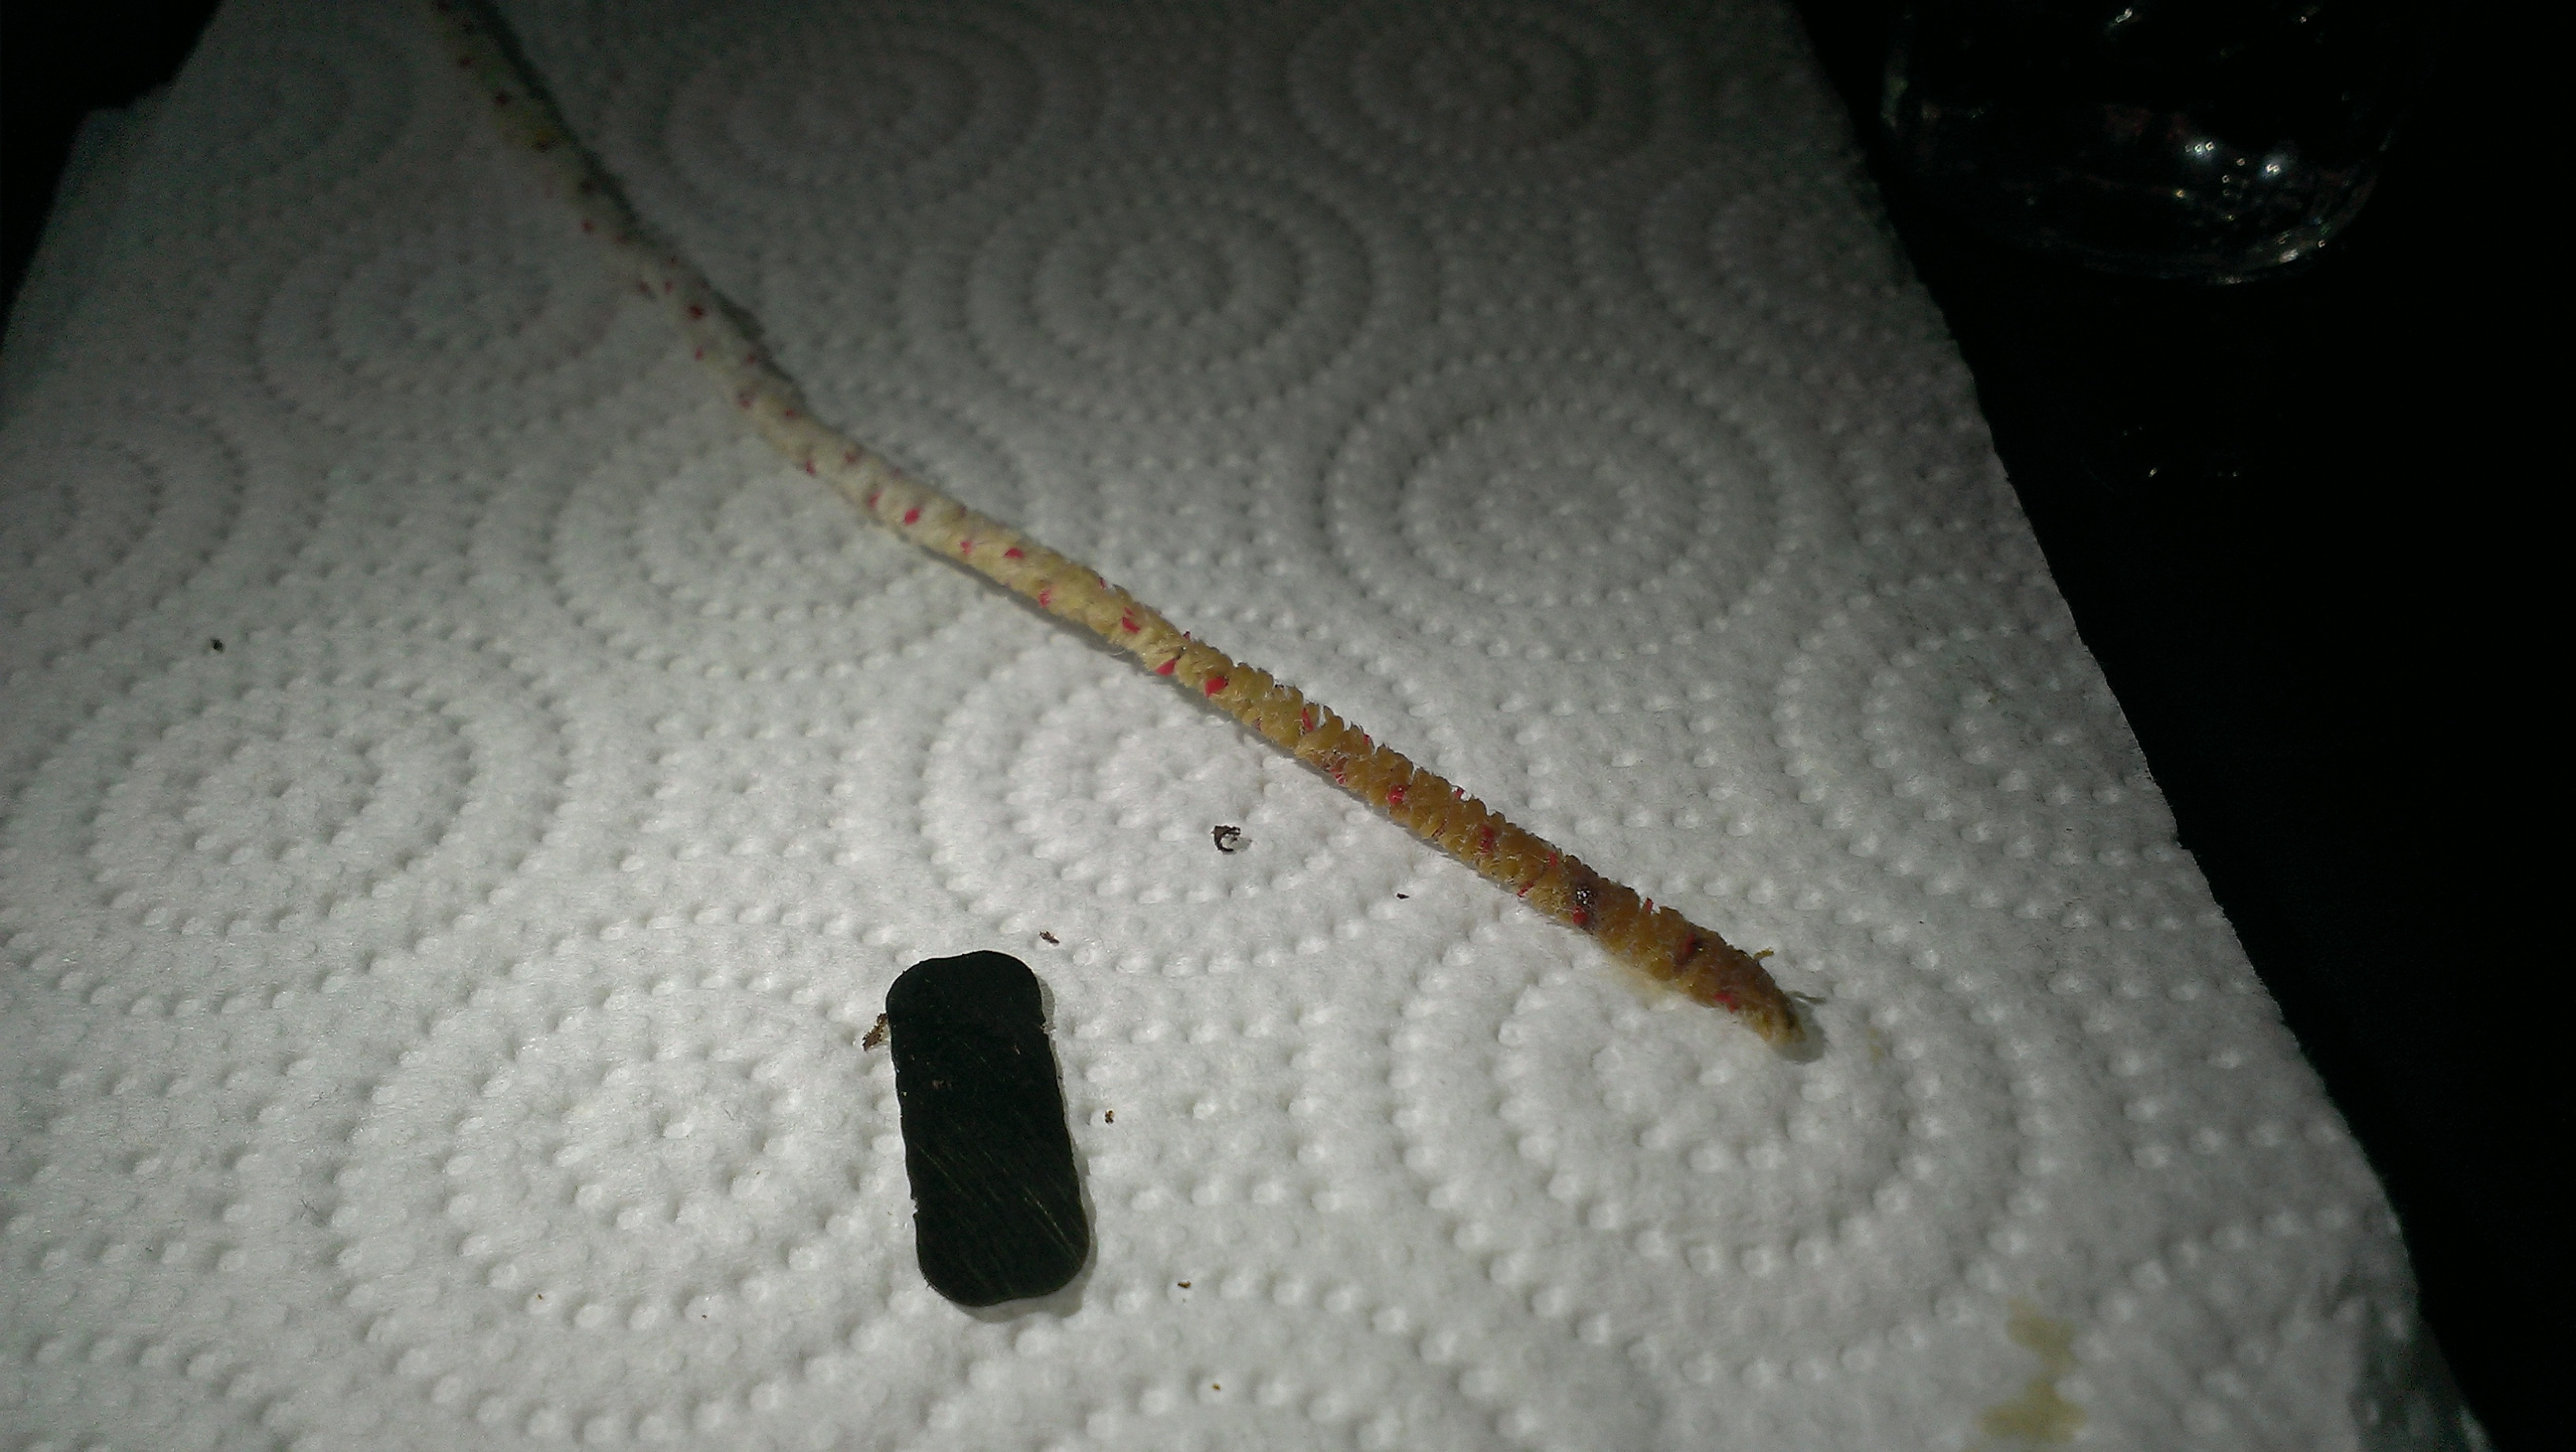
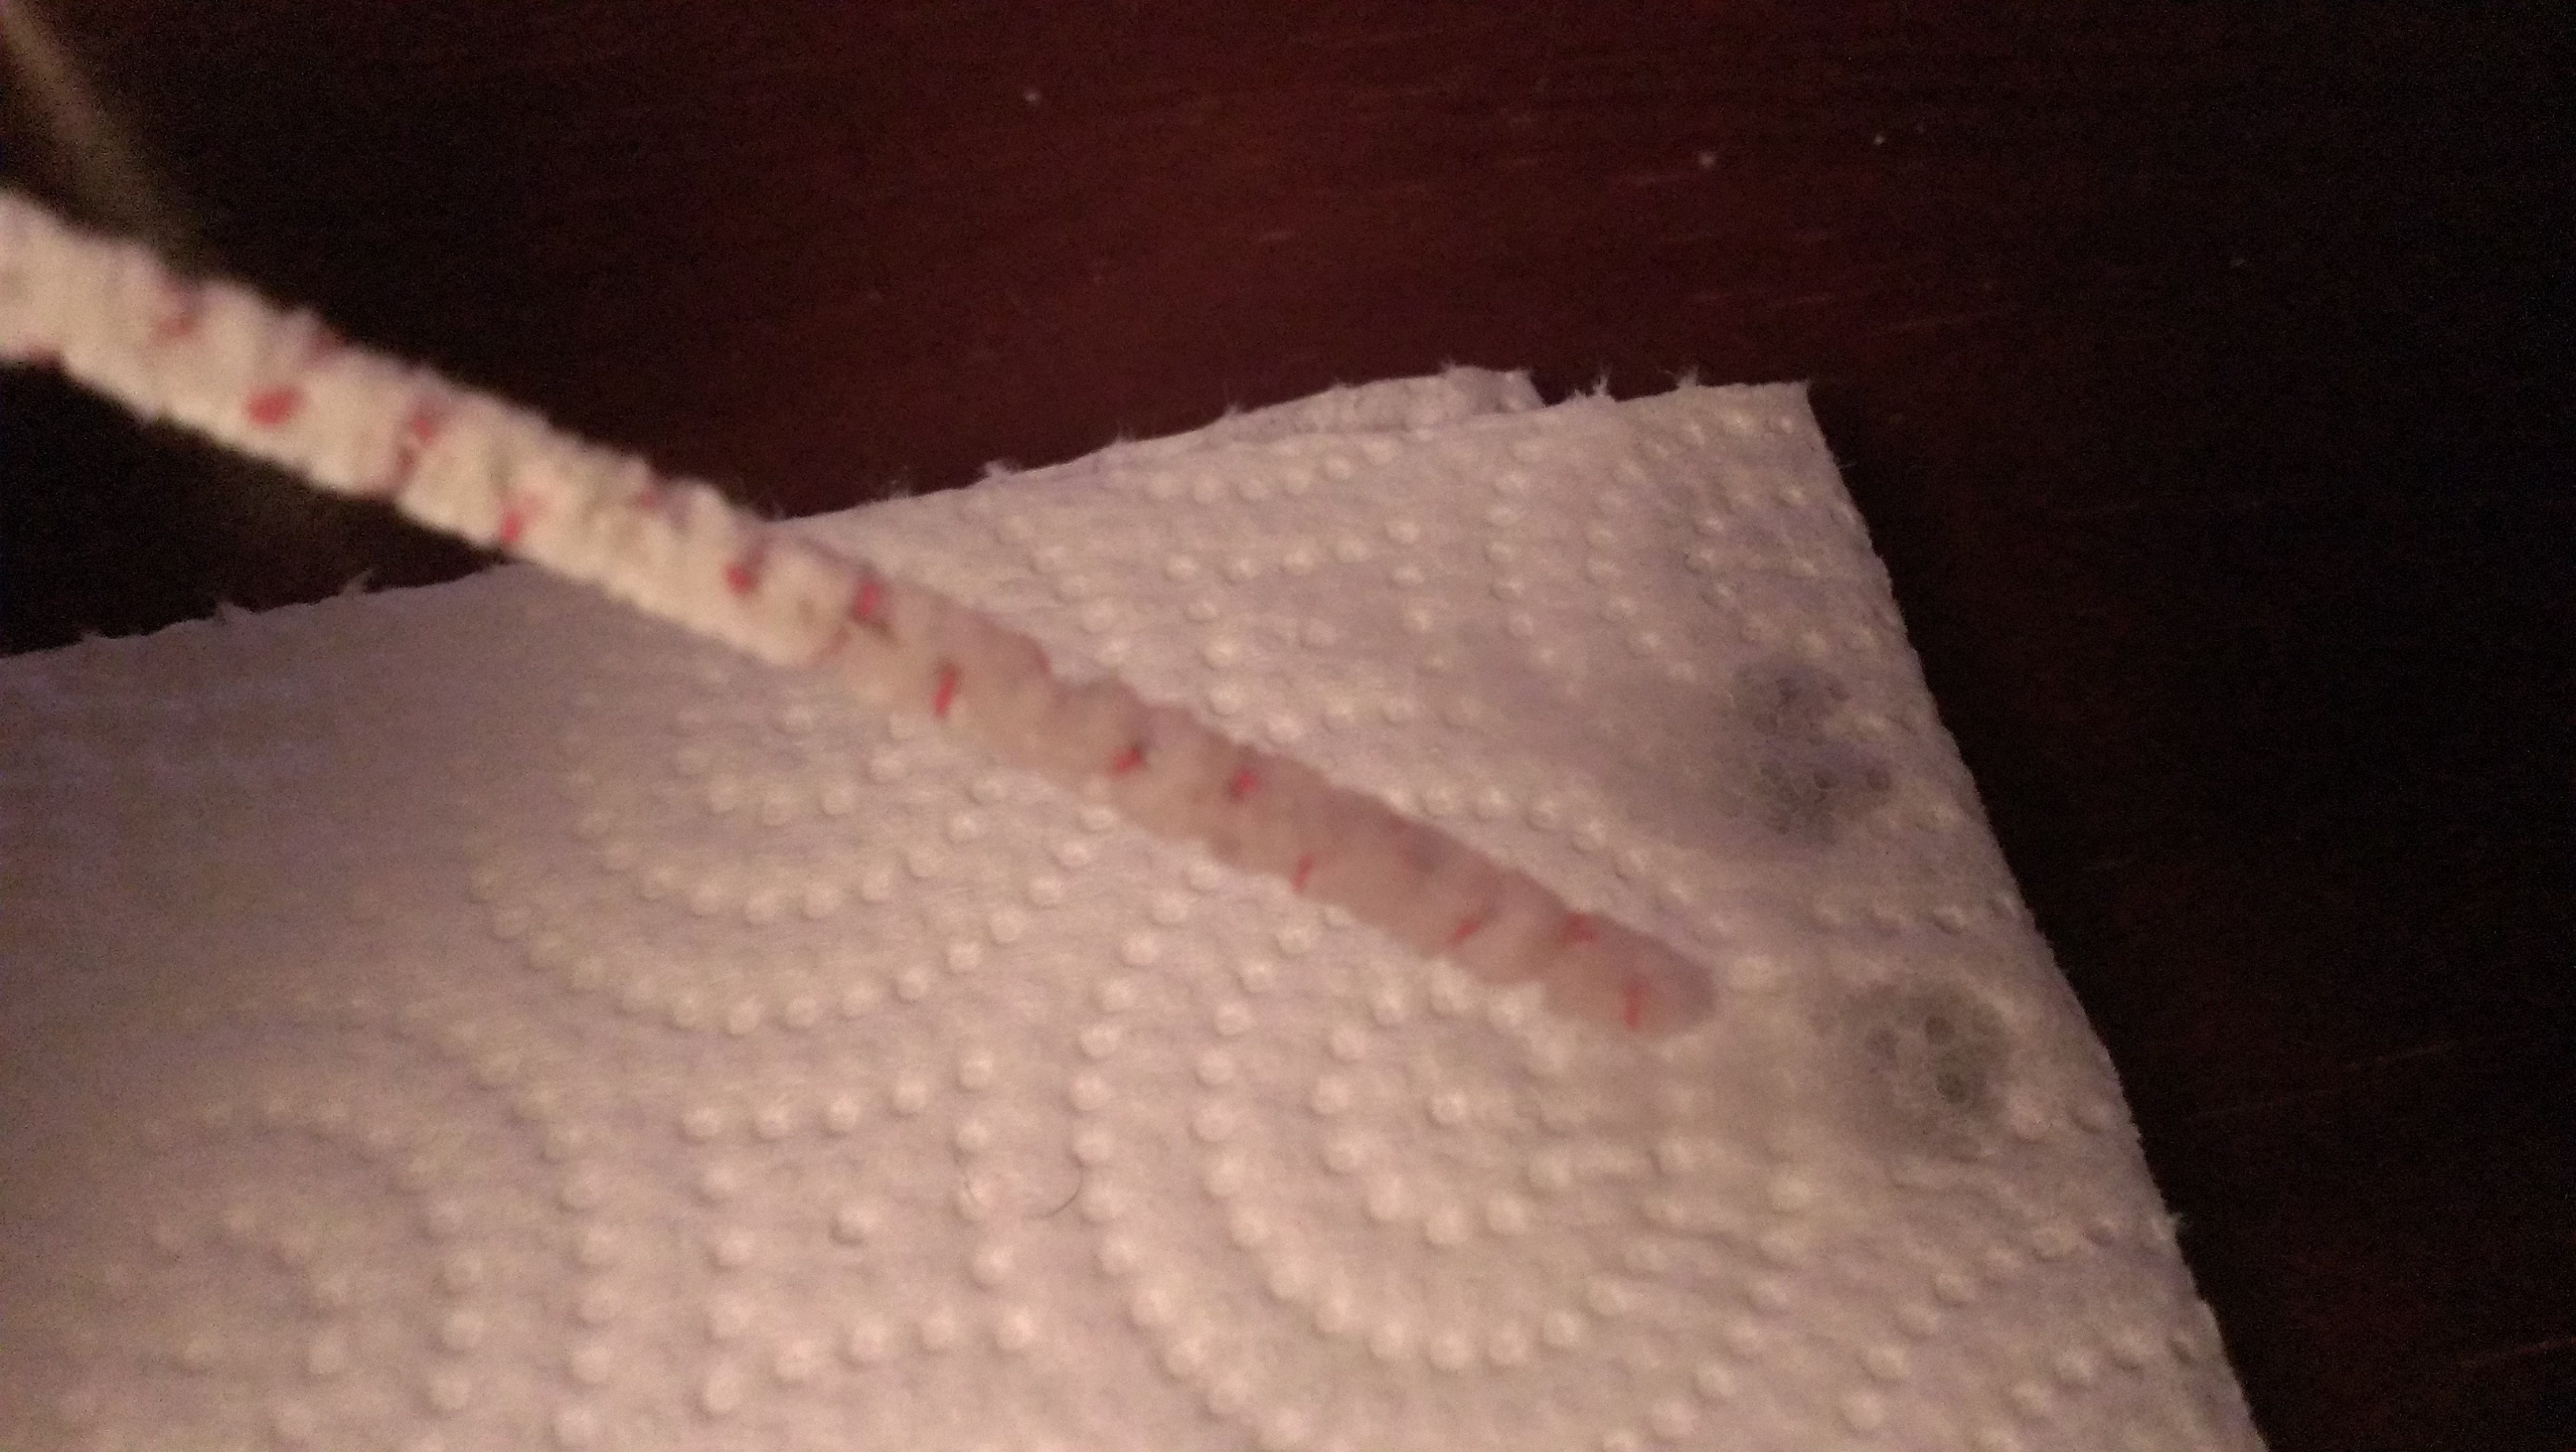
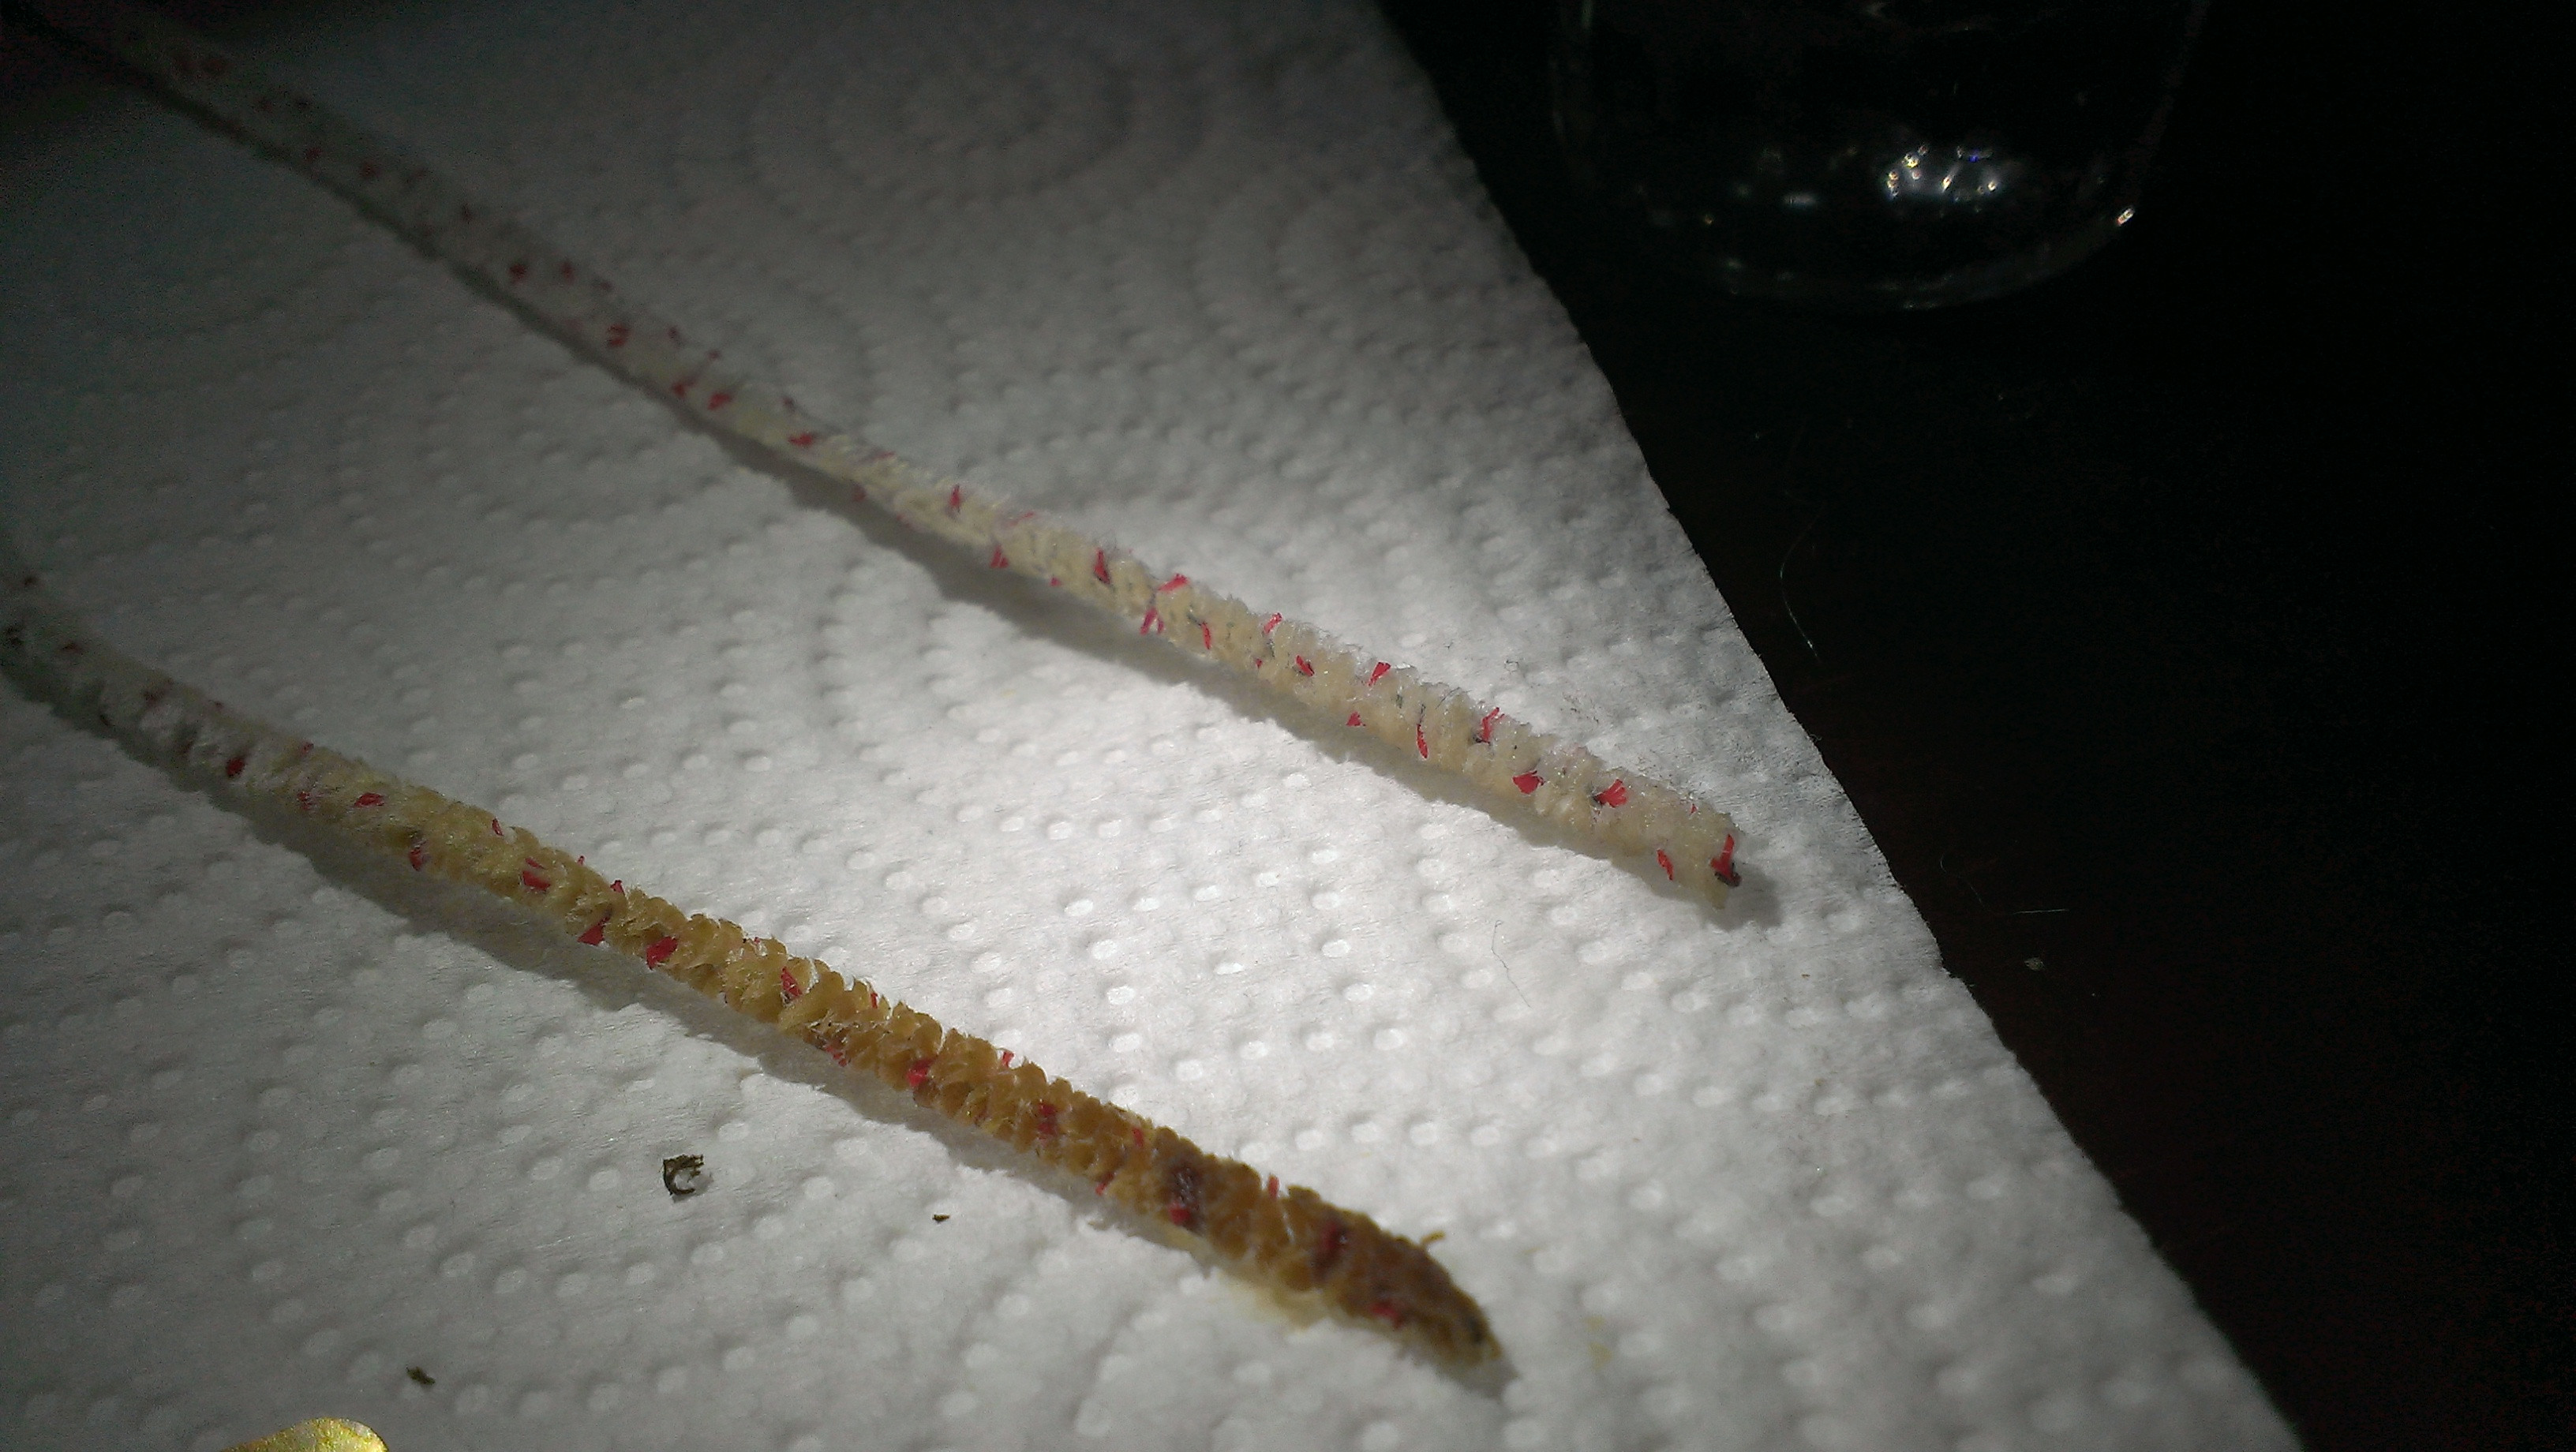
6. Continue to work the pipe cleaner back and forth for a few strokes and then push it out through the oven. You can see how much resin and crap came just from the tube:
7. Now let's clean the oven lid. Take one of your paper towels and dip a bit into the shot glass, then rub the metal surface until clean. I then take the end of a pipe cleaner, dip it in the shot glass, and clean the magnets top and bottom, as shown below:
8. You can now clean the oven with the 00 Steel Wool (stupid me forgot to take a pic of this process, but you'll see the shiny results later on!), but it's straight forward. Take a piece of the steel wool, ball it up so it fills up 1/2 the oven (left to right, not top to bottom, you want room to move it around in there!).
Dip it in the alcohol, place it in the oven, and using the bamboo skewer (pointy end), use the steel wool to scrub the sides, the corners, and the bottom "seams" (why the pointy end is important). Don't be afraid, it won't scratch the oven, and in fact, you will find that it's just like new when you're done! If you don't get it all, take a breath, do another dip in the shot glass, and do it again, you'll get the hang of it. The Bamboo skewer is important because it holds up to the somewhat-sideways pressure you will apply getting the sides of the oven, and down into the corners. The Q-Tips, even the wooden ones, didn't seem to hold up well.
**IMPORTANT** You may notice that there are little particles from the steel wool, both collected on the magnets that hold the oven lid in place, as well as a few stray strands in the oven. Damp a bit of paper towel with alcohol, and remove this leftover stuff. Use a Q-Tip to remove it from the oven if needed. Take a pipe cleaner, dab it in the shot glass, and run it through from top to bottom that one last time, and take one last wipe of the oven with a clean paper towel or Q-Tip to ensure there is no steel wool particles in the draw tube or anywhere else.
9. Now back up to the top of the Pax! Dip the GUM brush into the shot glass, remove any drips, and insert it into the area between the tube and the body of the Pax. Use up and down motions to scrub away any resin in there. Start at "noon", scrub, move to 2 oclock, scrub, move to 4 o'clock, scrub, etc. As you're doing this, fee free to re-dip the brush and clean it on a paper towel as needed, 2-3 times during this process is normal. Follow up with the same process, only use the clean end of a pipe cleaner. Go easy on the alcohol during this process, and do NOT drip any into the temp button! If you do, use a Q-Tip and/or corner of paper towel to dab it up as best as you can.
Don't be afraid to push down relatively far while scrubbing. If you're doing it right, you will be depressing the spring in there. It is NOT necessary to remove the spring, and you can see in the pic below how deep I'm pushing into the crevice with those bristles.
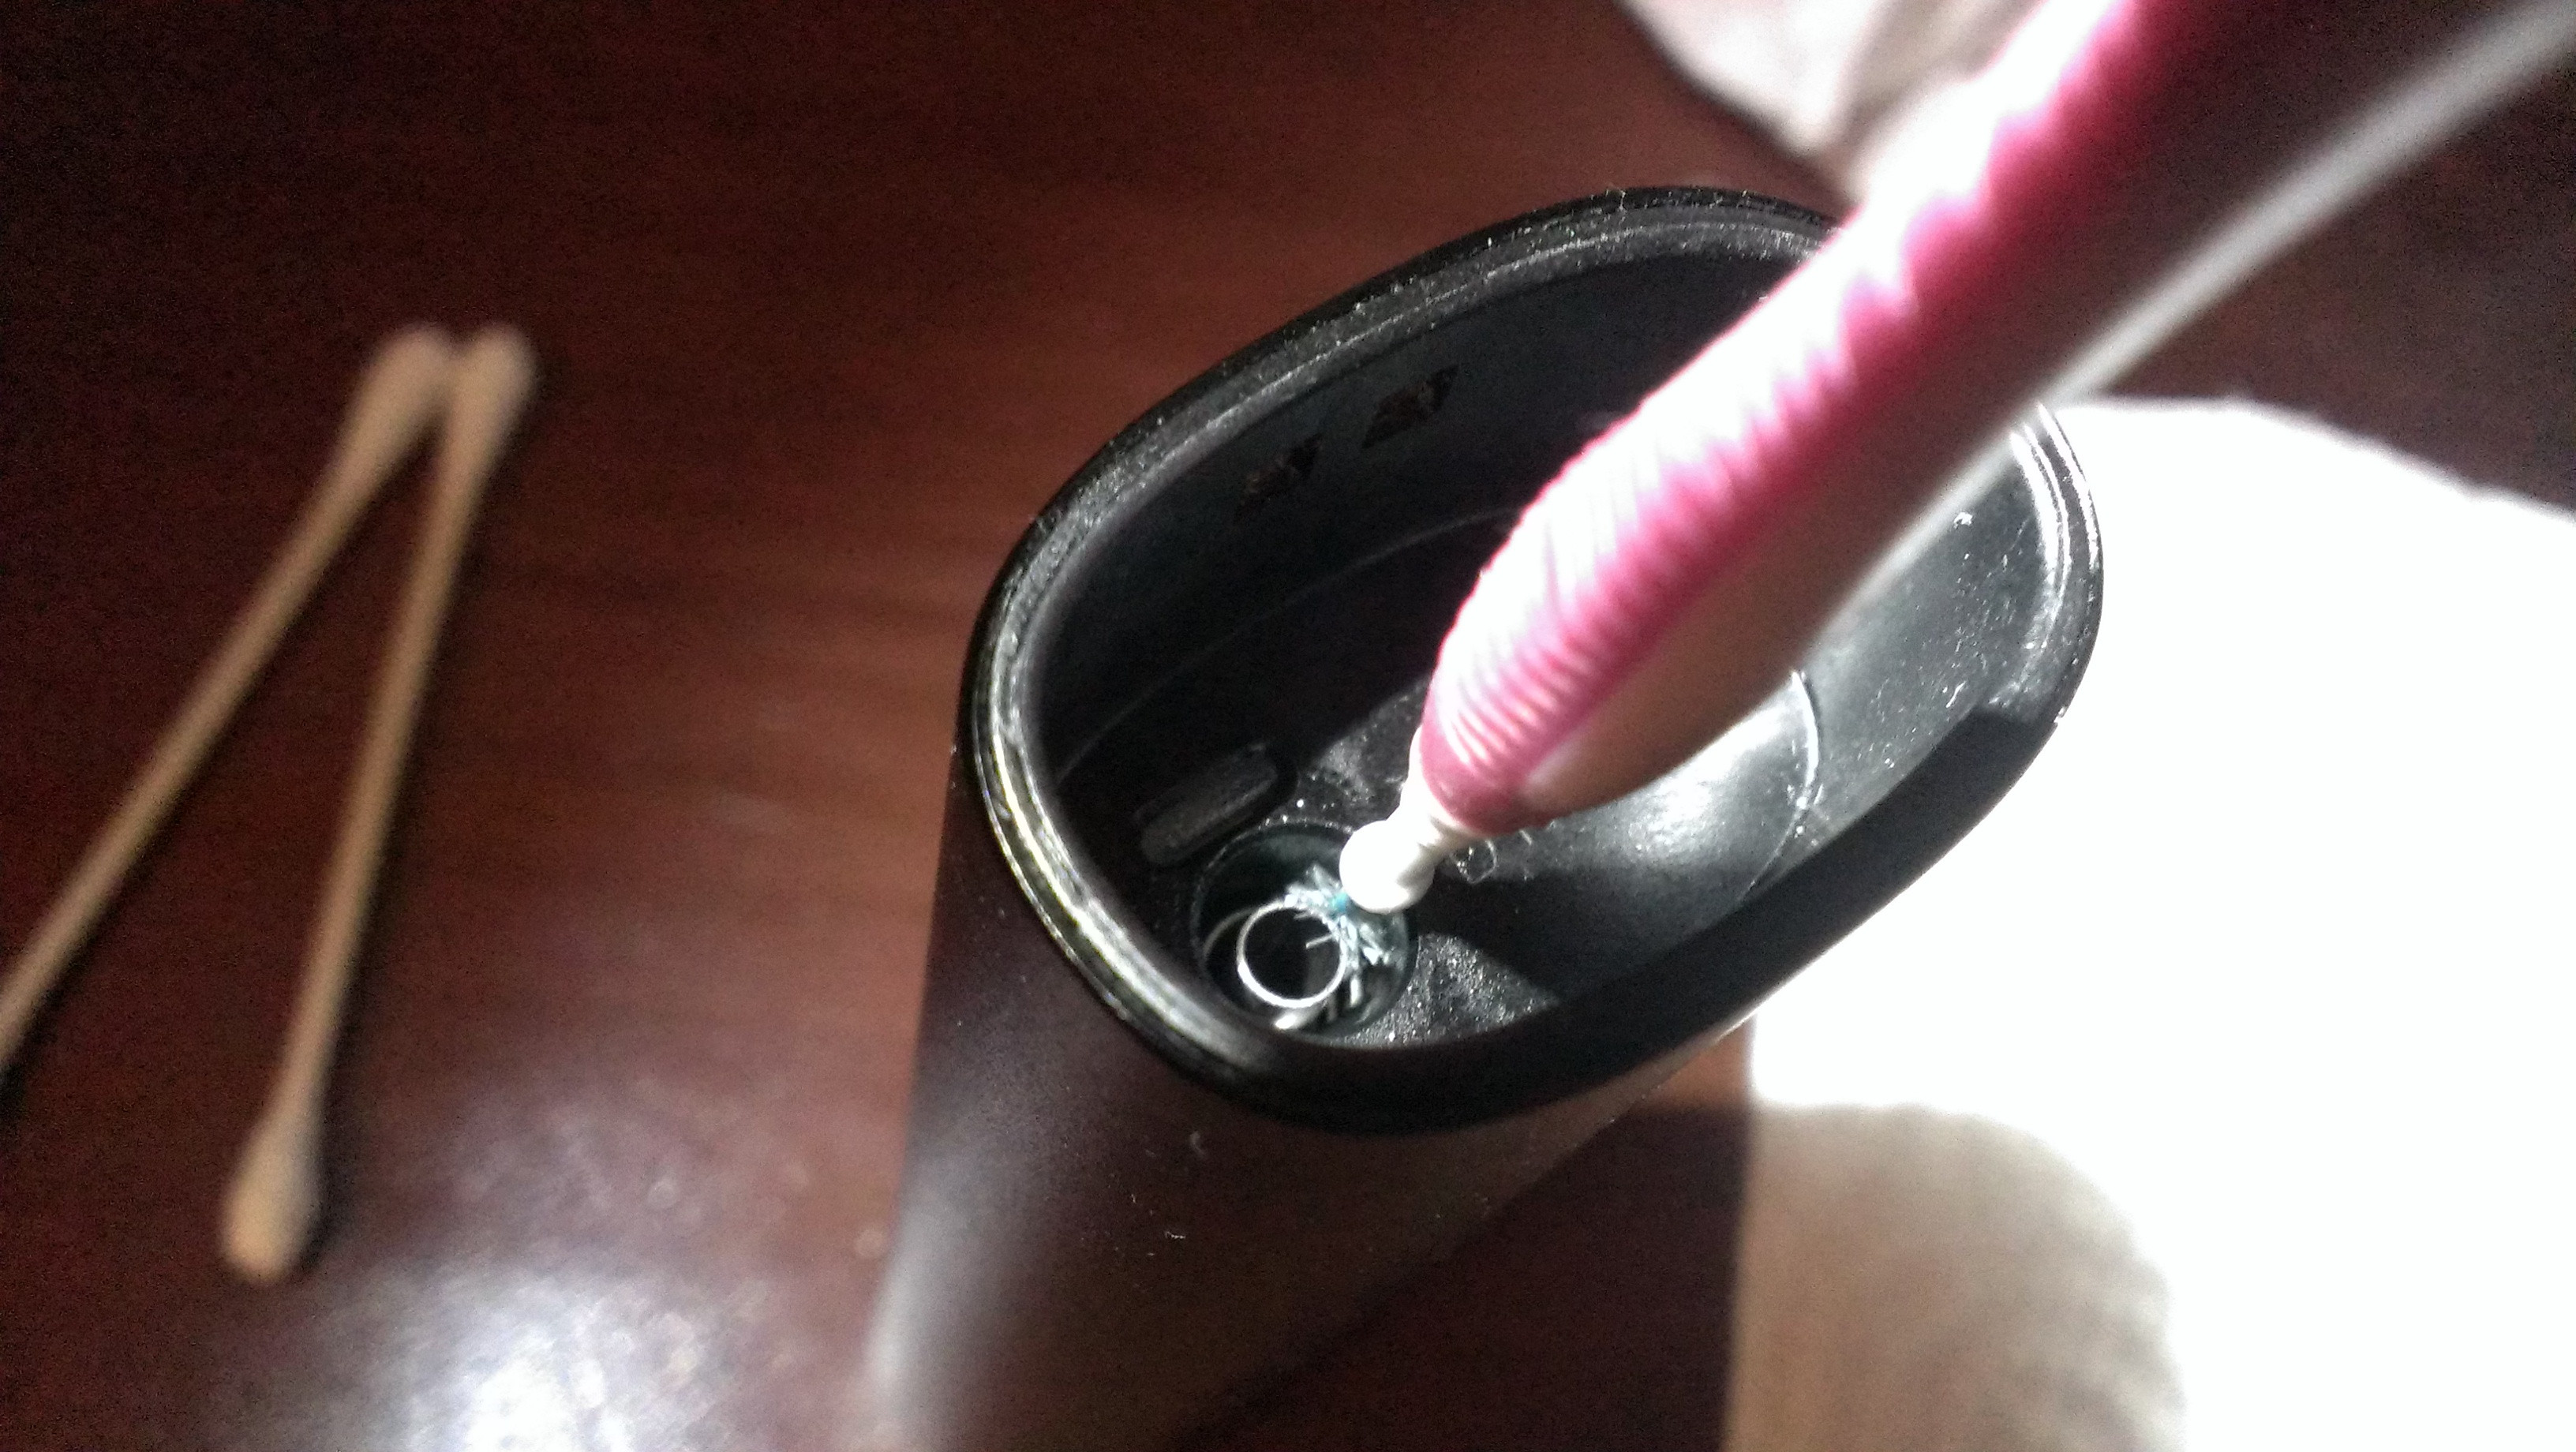
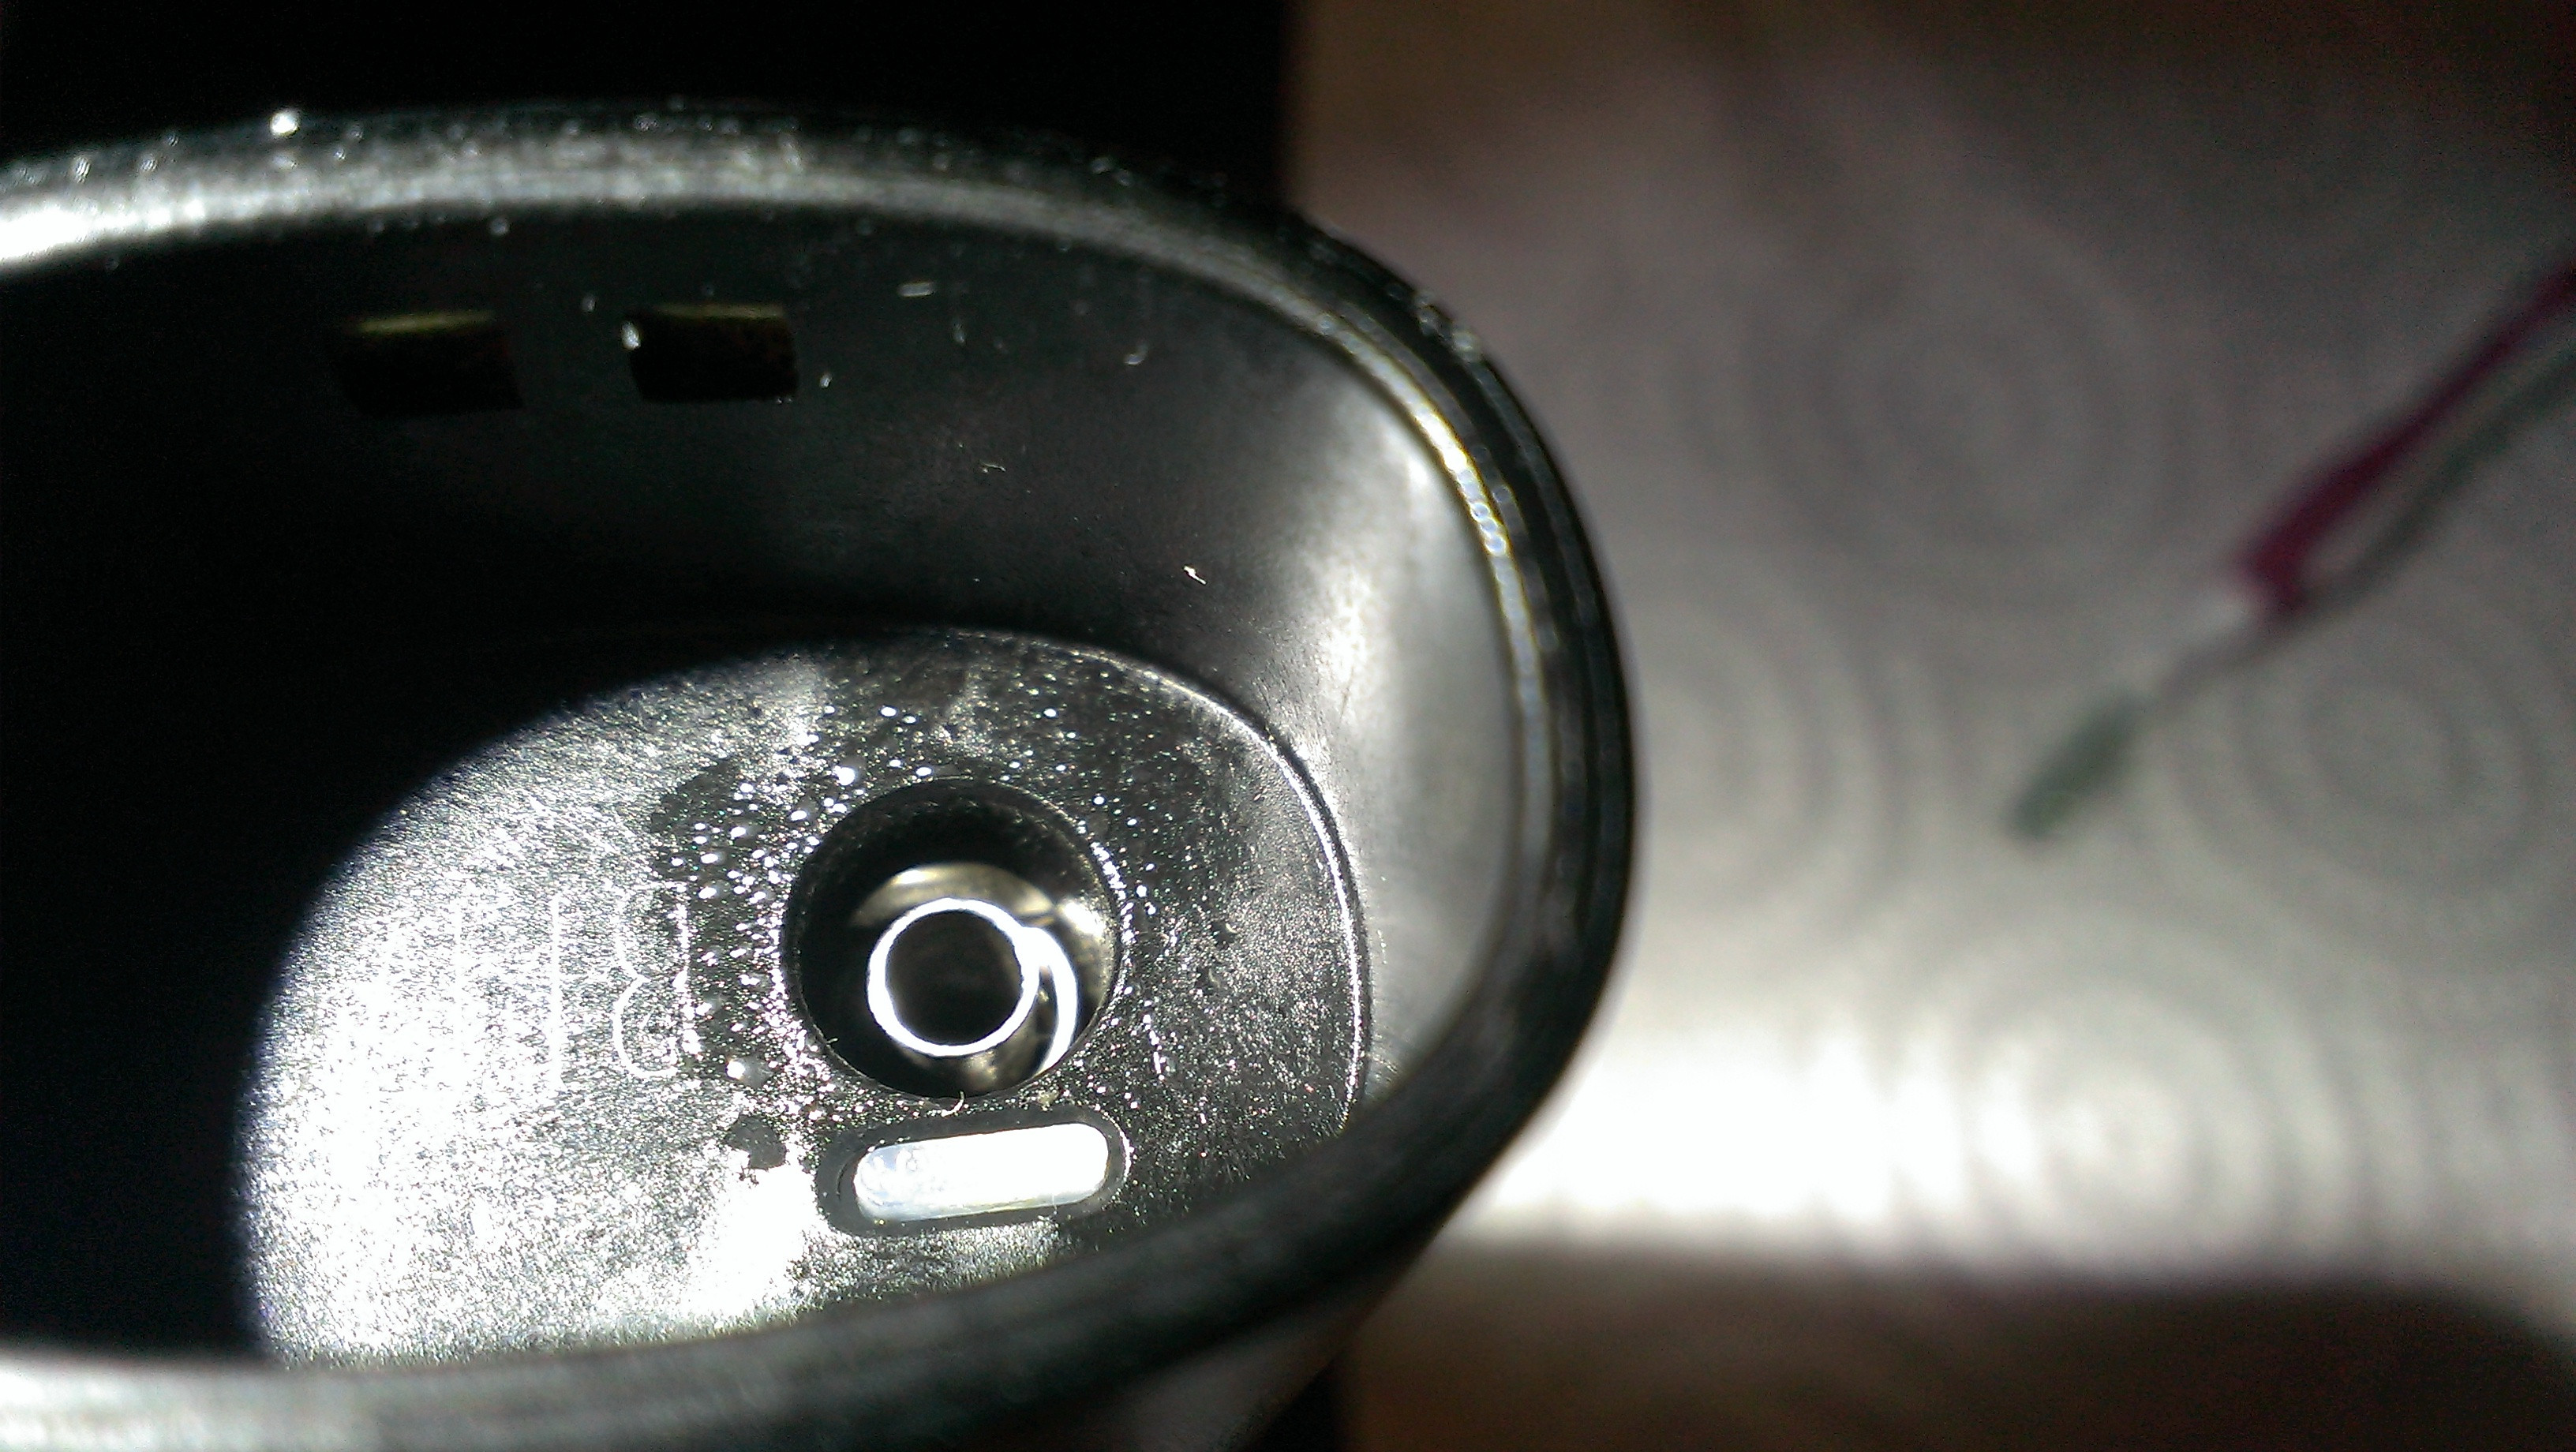
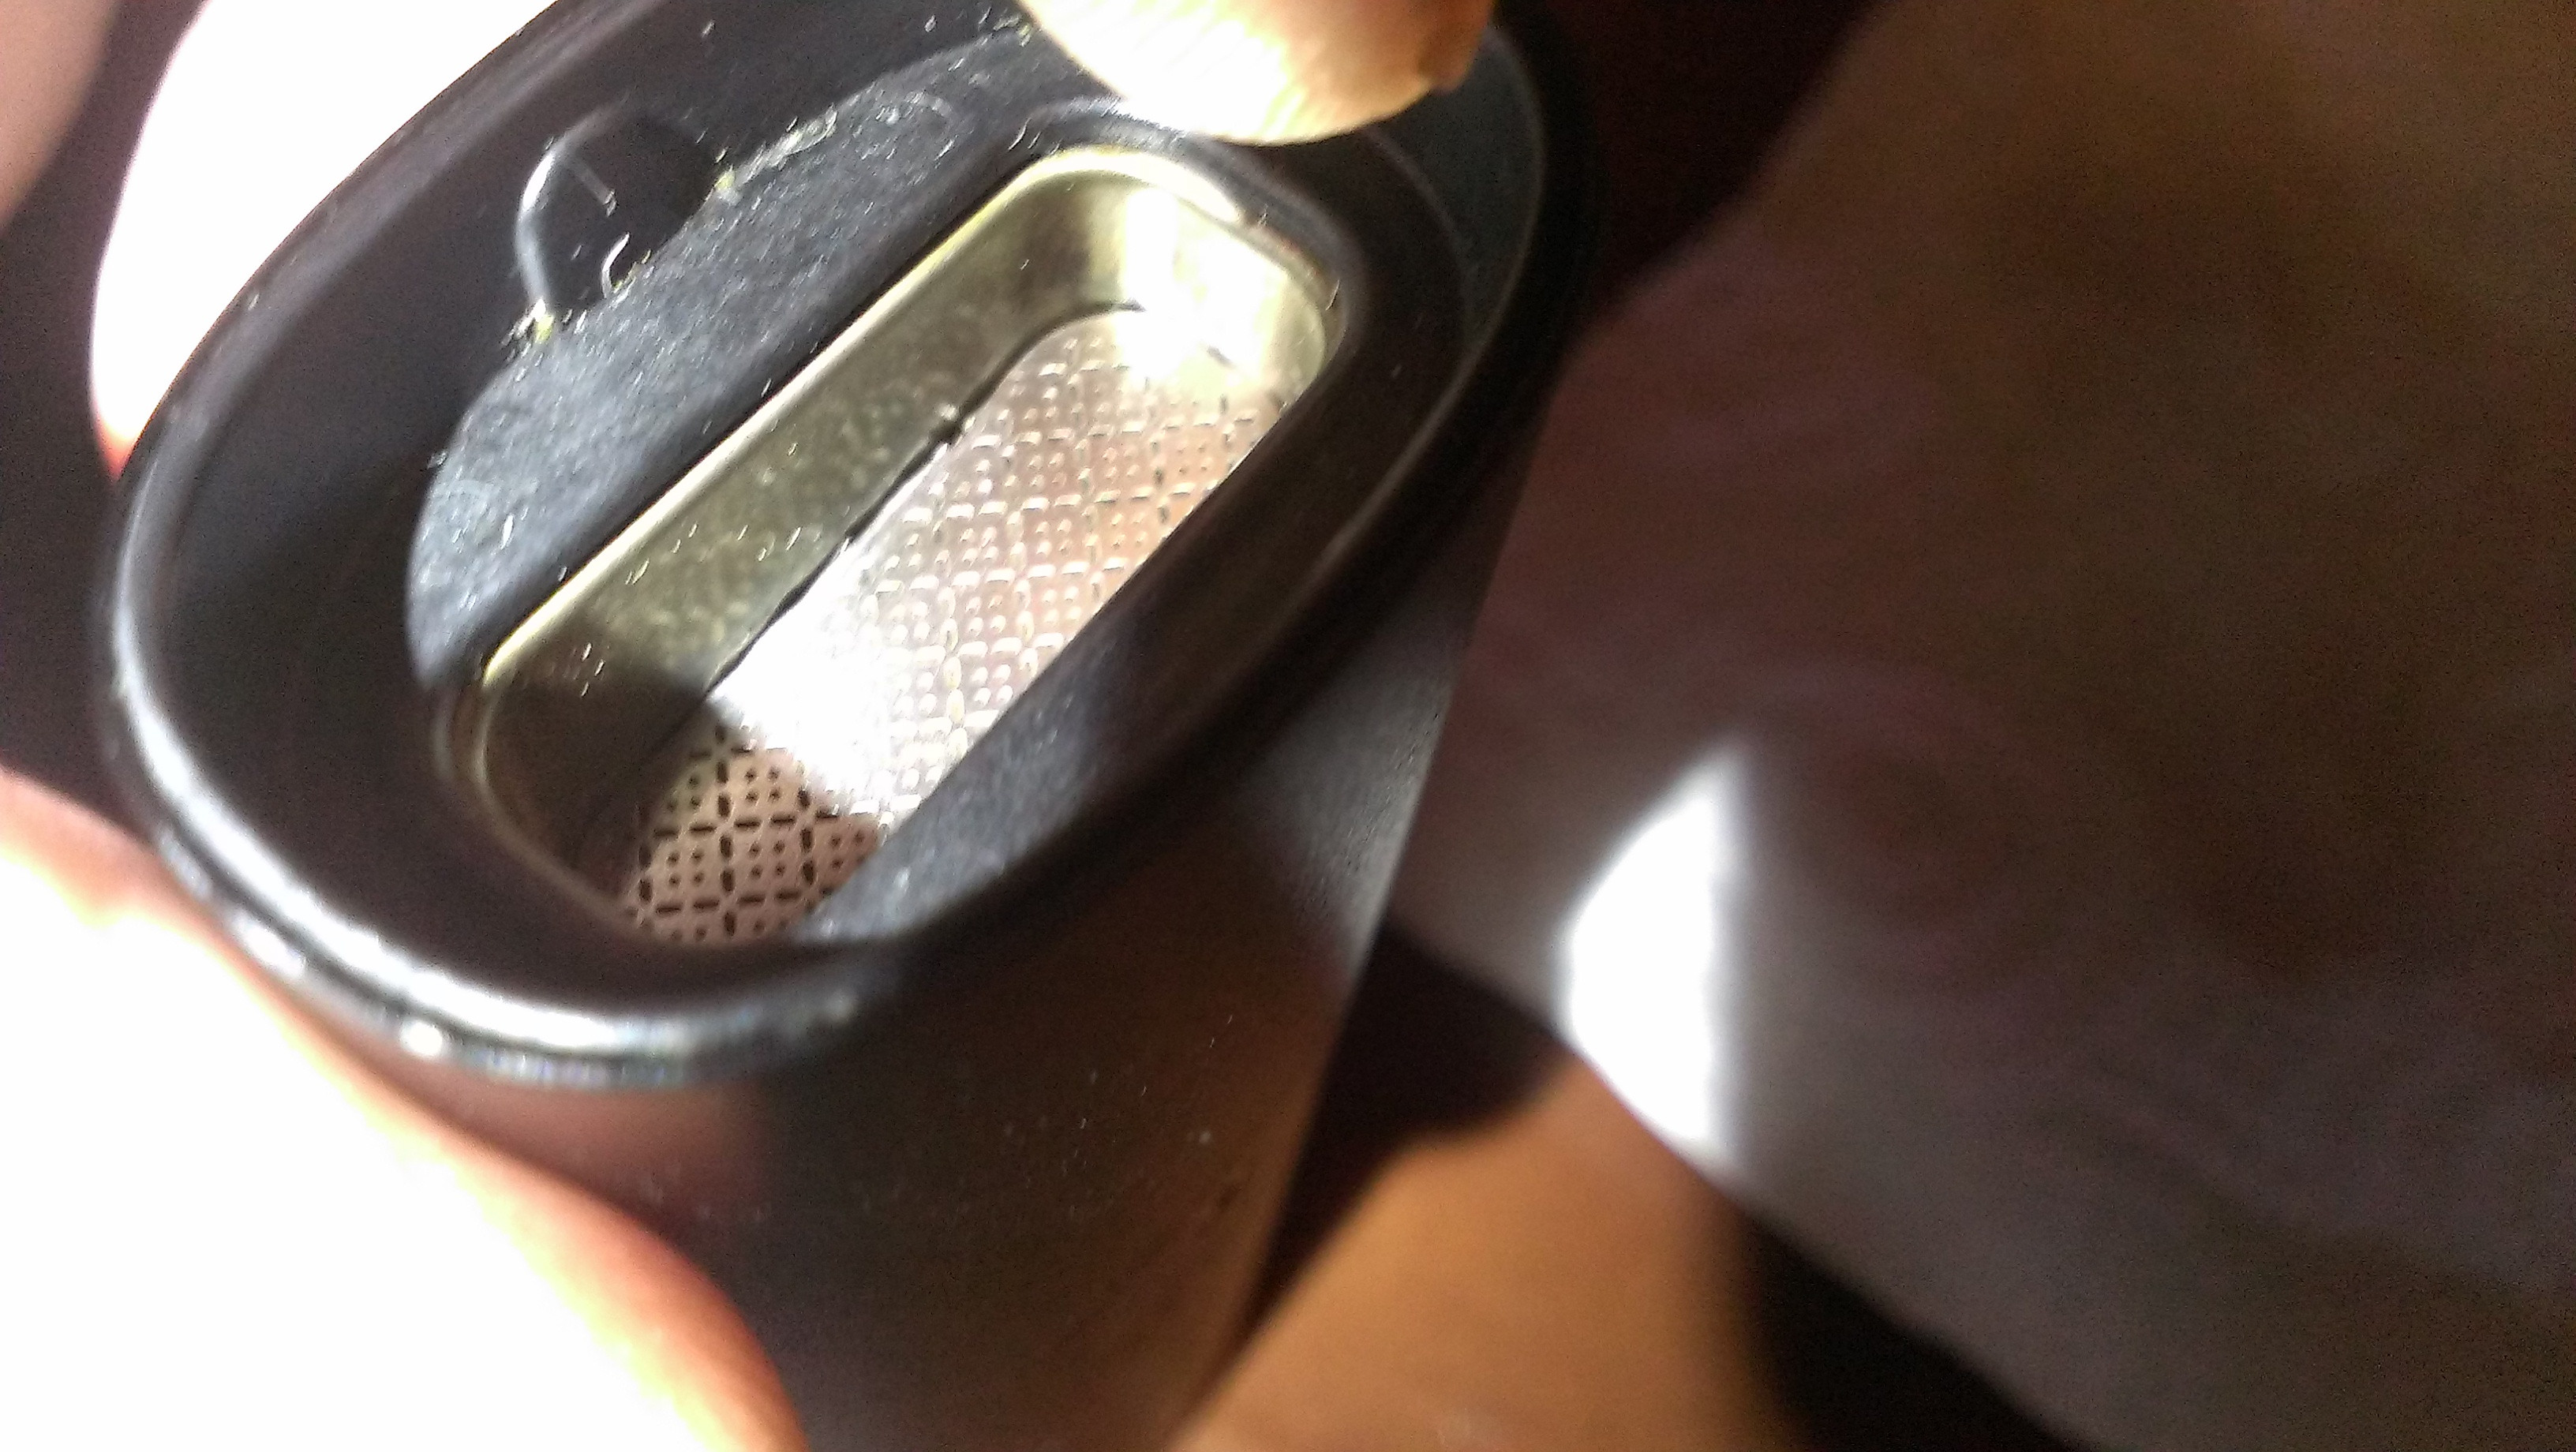
If you look down in that area, you can see the shinyness in the pic below, as well as some of the residue around the opening after cleaning...use a paper towel to gently dab this up./ I also at this time take a paper towel, dab it and make SURE there are no drips, and run it around this area..the sides, and around the hole, but BE CAREFUL and do NOT get alcohol in the temp button. When I say dabbed and no drips, it's really important here to understand a little goes a long way. Just enough to take the stank out of that mouthpiece housing.
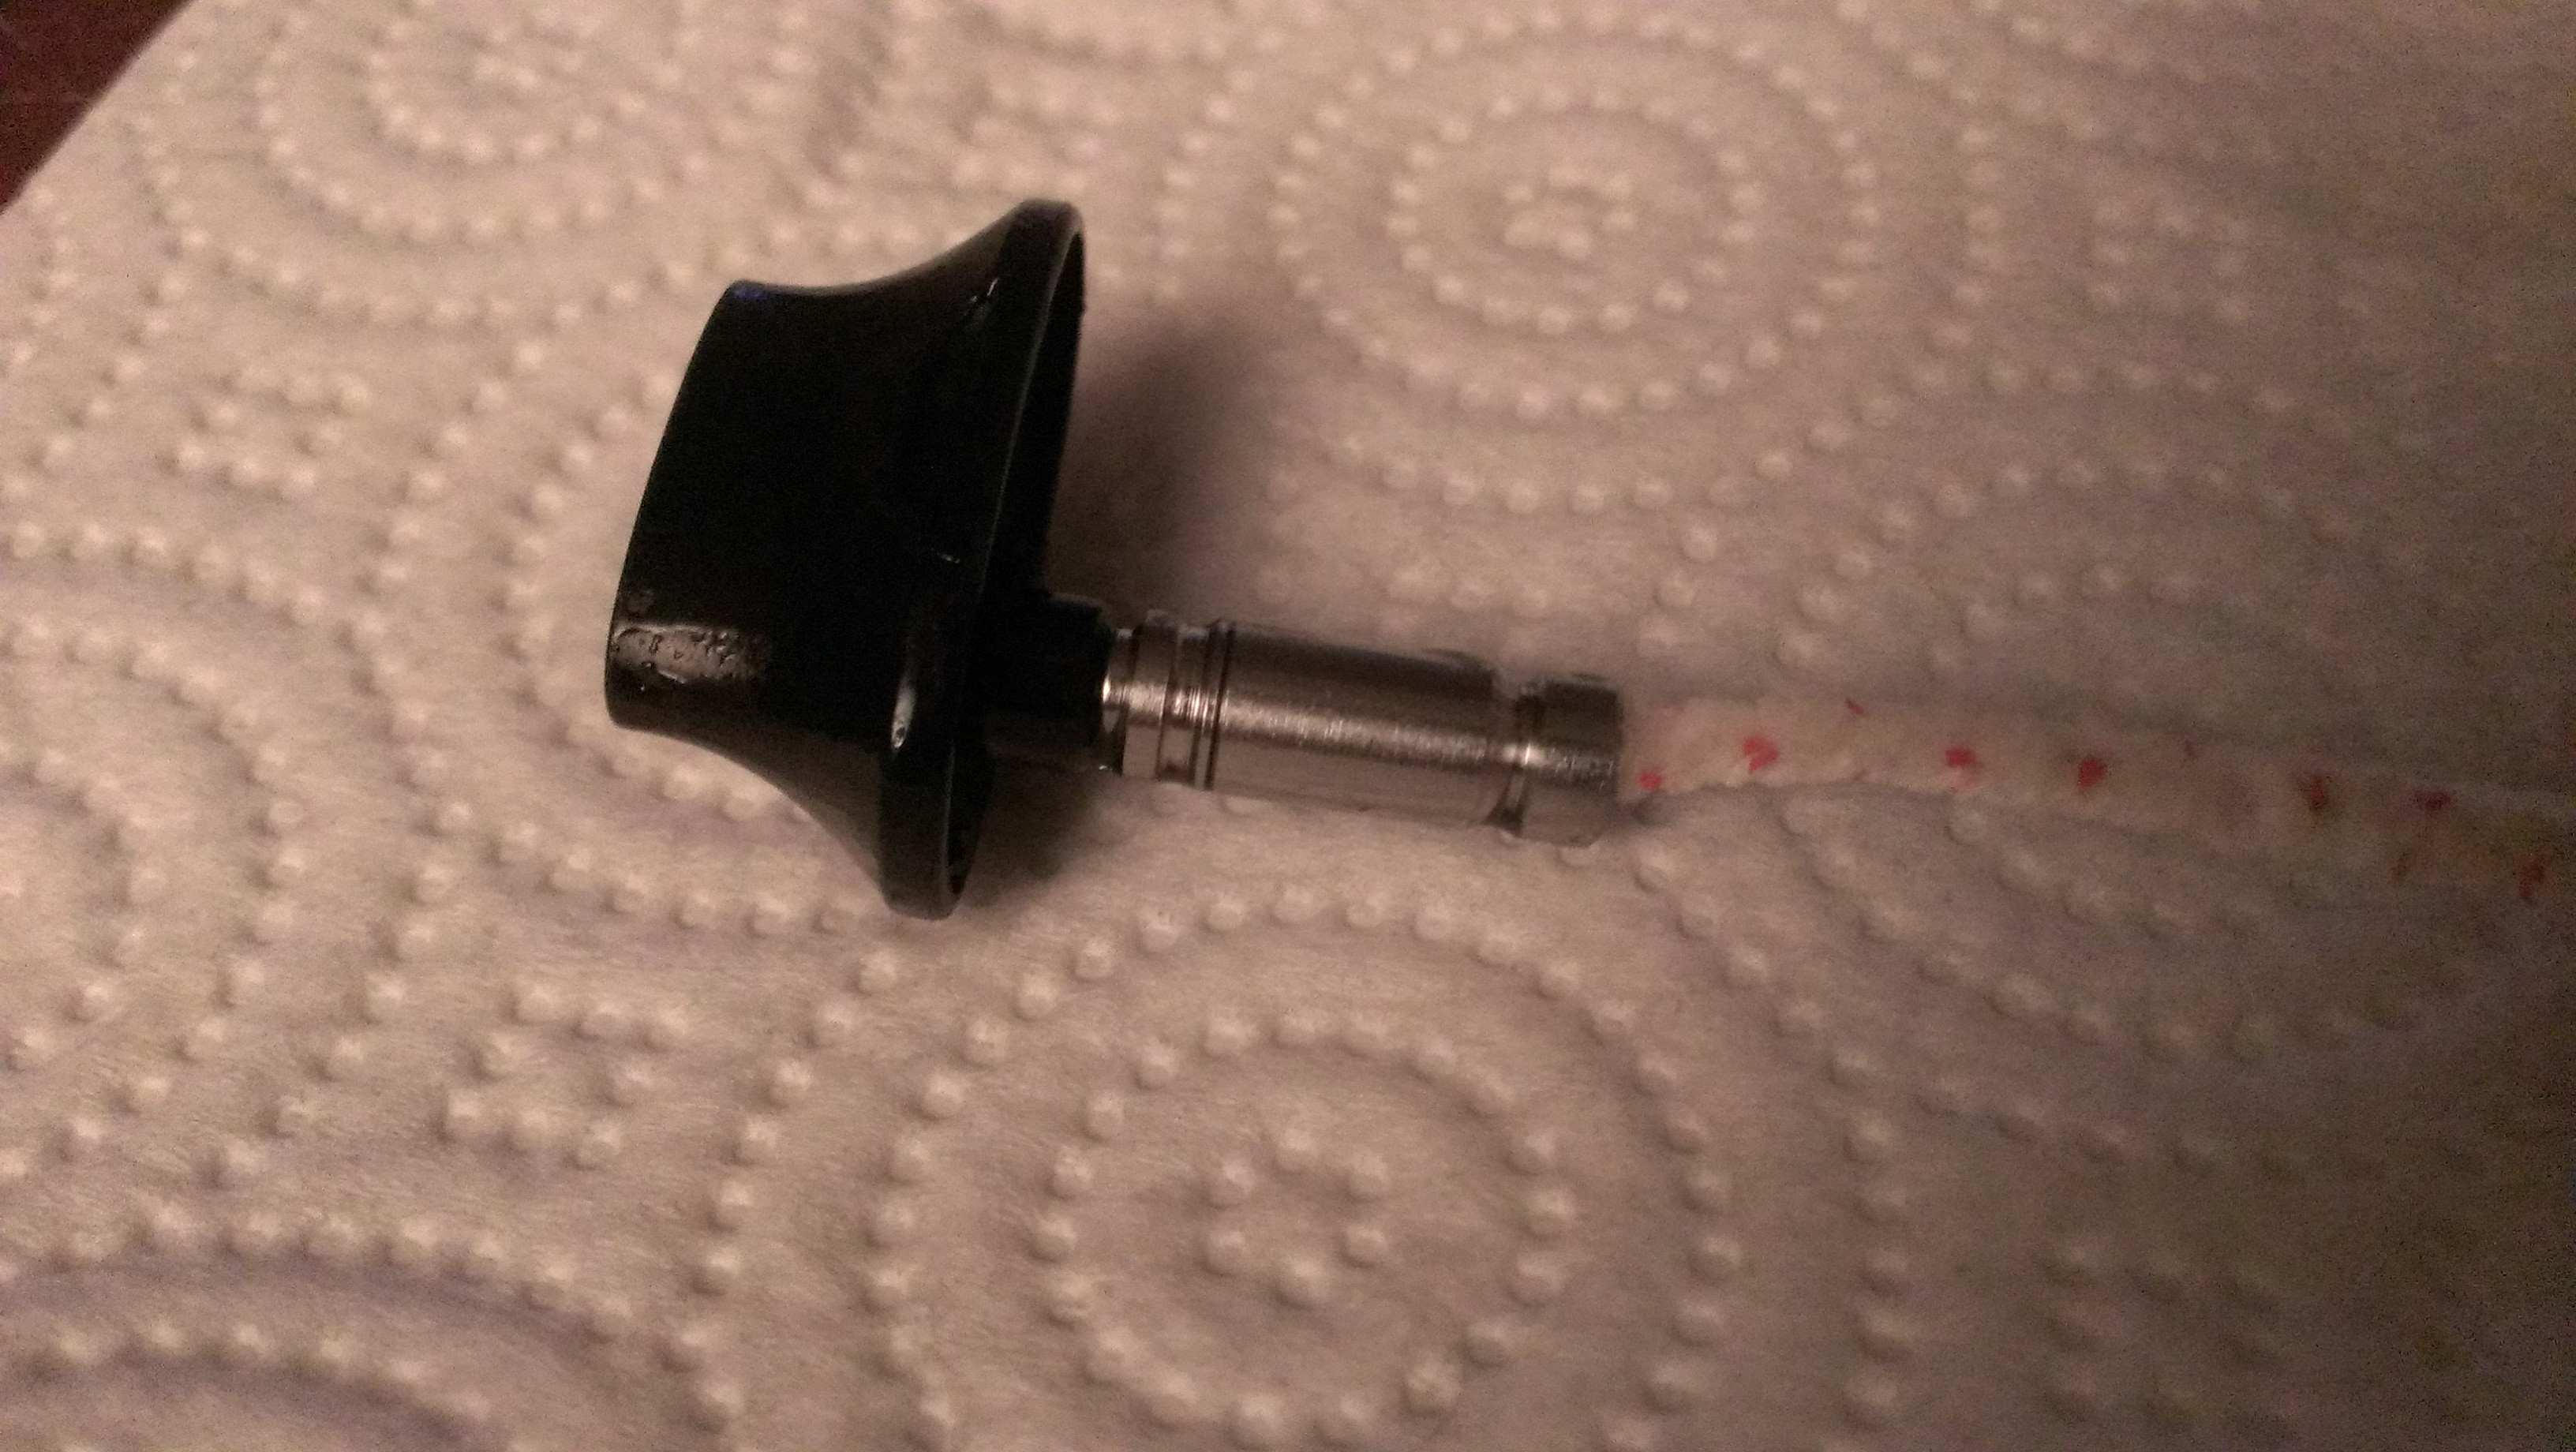
10. Let's clean the mouthpiece. Pull the mouthpiece out of the shot glass, and drain it onto a clean paper towel, wiping it dry. Double over the end of a clean pipe cleaner about 2", dip into the shot glass, and push the doubled up end up into the mouthpiece from the bottom as shown below. Ream it out back and forth, turning it, and getting it all the way up in there when reaming:
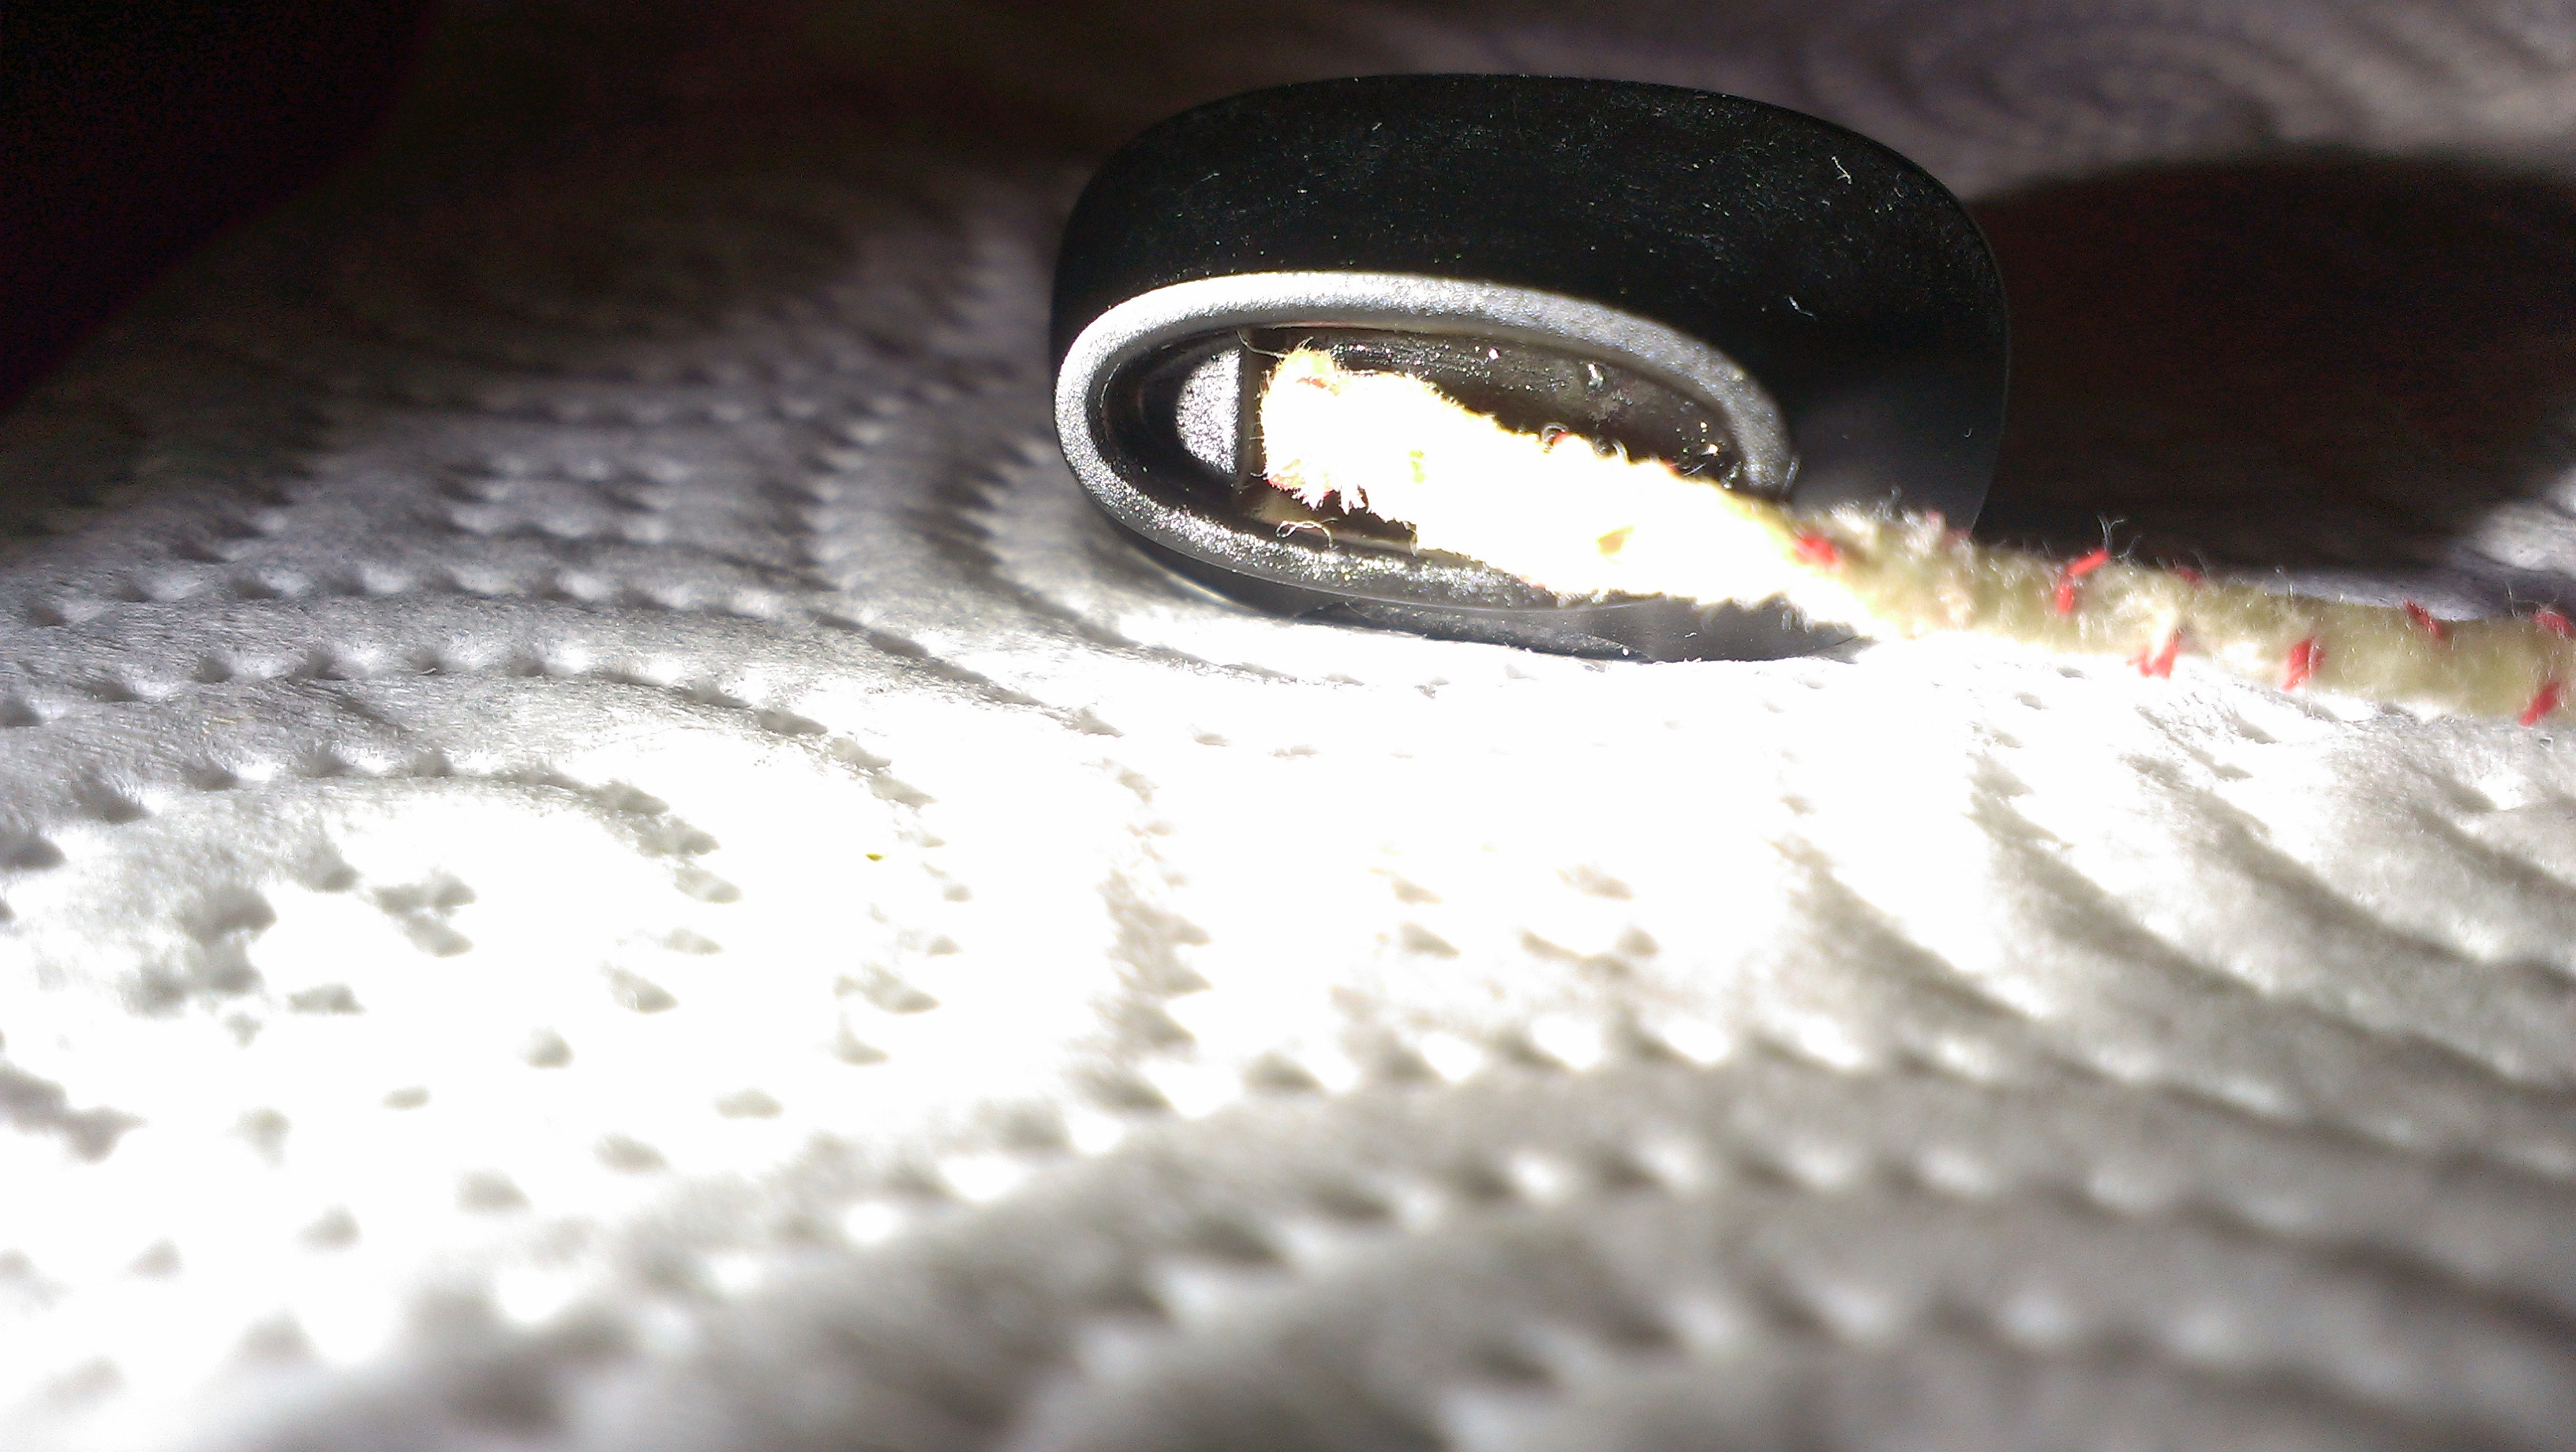
11. Take the other end of that pipe cleaner, dip it in the shot glass, and ream out the top opening, as shown below, again, twisting and getting it in a deep as you can. Take a Q-Tip and dip it in the shot glass, and use it to clean the rest of the depression of the mouthpiece area. Scrub it good, and use a dry towel or Q-Tip to dry and clean it up.
Continued...
I've been out with a back injury (good Lord man it's always something!) for almost 2 weeks now and am bored out of my mind.
So, I decided to put together something I promised a while back:
A Pax Cleaning Tutorial!
Disclaimer: This is simply the system I've developed to clean my Pax. Don't let the verbosity of my post scare you off, I'm just trying to pack in a lot of info for those who may be new to this. This process takes about 10-15 minutes tops, and I do it once a week religiously. My Pax is like new, and I have zero problems with it.
Pre-Cleaning Tips:
- Do this with a cold Pax
- Remove the mouthpiece (step 2 below), which puts the Pax into "temperature light" mode. Allow the Pax to sit, without the mouthpiece, motionless, until the light goes off (about 3-5 minutes). This will ensure your Pax won't come on while cleaning!
1. Here's my Pax Cleaning Kit. Seems like a lot of stuff, and perhaps it is, but it's all very cheap to buy, and in quantities that last a long time. Here's the list from left to right:
- 3 paper towels
- 3 bristled pipe cleaners
- 5 Q-Tips (these have wooden sticks, regular Q-Tips are fine, not quite as sturdy)
- 1oz shot glass
- PG Lube (this is a 1oz dropper bottle full, bought a quart on Amazon for cheap, as well as the dropper bottles)
- 1 GUM dental brush (These are the medium ones)
- 1 bit of Steel Wool (I used 00 below)
- 1 bamboo skewer
- Isopropyl Alcohol (70% works just fine, 90% is fine as well)
2. Pour 1oz of alcohol into the shot glass, remove the mouthpiece, and place it in the glass to soak.
3. Let's get that grungy resiny screen out of there! Dip the end of a pipe cleaner about 1" into the shot glass, and knock off any excess onto a paper towel.
4. Remove the oven lid and set aside.
5. While holding the Pax upright, over a paper towel, push the pipe cleaner through the tube from the top, alcohol end first, taking your time...when it meets some resistance (resin), sort of pump it up and down a few times, then push it further in, same thing, until it pushes out the screen onto the paper towel. Take the screen and place it into the shot glass with the mouthpiece.
6. Continue to work the pipe cleaner back and forth for a few strokes and then push it out through the oven. You can see how much resin and crap came just from the tube:
7. Now let's clean the oven lid. Take one of your paper towels and dip a bit into the shot glass, then rub the metal surface until clean. I then take the end of a pipe cleaner, dip it in the shot glass, and clean the magnets top and bottom, as shown below:
8. You can now clean the oven with the 00 Steel Wool (stupid me forgot to take a pic of this process, but you'll see the shiny results later on!), but it's straight forward. Take a piece of the steel wool, ball it up so it fills up 1/2 the oven (left to right, not top to bottom, you want room to move it around in there!).
Dip it in the alcohol, place it in the oven, and using the bamboo skewer (pointy end), use the steel wool to scrub the sides, the corners, and the bottom "seams" (why the pointy end is important). Don't be afraid, it won't scratch the oven, and in fact, you will find that it's just like new when you're done! If you don't get it all, take a breath, do another dip in the shot glass, and do it again, you'll get the hang of it. The Bamboo skewer is important because it holds up to the somewhat-sideways pressure you will apply getting the sides of the oven, and down into the corners. The Q-Tips, even the wooden ones, didn't seem to hold up well.
**IMPORTANT** You may notice that there are little particles from the steel wool, both collected on the magnets that hold the oven lid in place, as well as a few stray strands in the oven. Damp a bit of paper towel with alcohol, and remove this leftover stuff. Use a Q-Tip to remove it from the oven if needed. Take a pipe cleaner, dab it in the shot glass, and run it through from top to bottom that one last time, and take one last wipe of the oven with a clean paper towel or Q-Tip to ensure there is no steel wool particles in the draw tube or anywhere else.
9. Now back up to the top of the Pax! Dip the GUM brush into the shot glass, remove any drips, and insert it into the area between the tube and the body of the Pax. Use up and down motions to scrub away any resin in there. Start at "noon", scrub, move to 2 oclock, scrub, move to 4 o'clock, scrub, etc. As you're doing this, fee free to re-dip the brush and clean it on a paper towel as needed, 2-3 times during this process is normal. Follow up with the same process, only use the clean end of a pipe cleaner. Go easy on the alcohol during this process, and do NOT drip any into the temp button! If you do, use a Q-Tip and/or corner of paper towel to dab it up as best as you can.
Don't be afraid to push down relatively far while scrubbing. If you're doing it right, you will be depressing the spring in there. It is NOT necessary to remove the spring, and you can see in the pic below how deep I'm pushing into the crevice with those bristles.
If you look down in that area, you can see the shinyness in the pic below, as well as some of the residue around the opening after cleaning...use a paper towel to gently dab this up./ I also at this time take a paper towel, dab it and make SURE there are no drips, and run it around this area..the sides, and around the hole, but BE CAREFUL and do NOT get alcohol in the temp button. When I say dabbed and no drips, it's really important here to understand a little goes a long way. Just enough to take the stank out of that mouthpiece housing.
10. Let's clean the mouthpiece. Pull the mouthpiece out of the shot glass, and drain it onto a clean paper towel, wiping it dry. Double over the end of a clean pipe cleaner about 2", dip into the shot glass, and push the doubled up end up into the mouthpiece from the bottom as shown below. Ream it out back and forth, turning it, and getting it all the way up in there when reaming:
11. Take the other end of that pipe cleaner, dip it in the shot glass, and ream out the top opening, as shown below, again, twisting and getting it in a deep as you can. Take a Q-Tip and dip it in the shot glass, and use it to clean the rest of the depression of the mouthpiece area. Scrub it good, and use a dry towel or Q-Tip to dry and clean it up.
Continued...
GraffiX
Well-Known Member
12. Lube up the mouthpiece as directed by Ploom. I pull the collar on the mouthpiece stem up toward the top of the mouthpiece, drop on scant drop of PG into the gap on the shaft, and move that collar back and forth a few times with the tip of the dropper, then smear the rest down the side of the mouthpiece shaft. I also place another scant drop into the end of the tube, ensuring it goes inside.
Now replace the mouthpiece onto the Pax and give it 10 clicks off/on to move the lubrication around evenly.
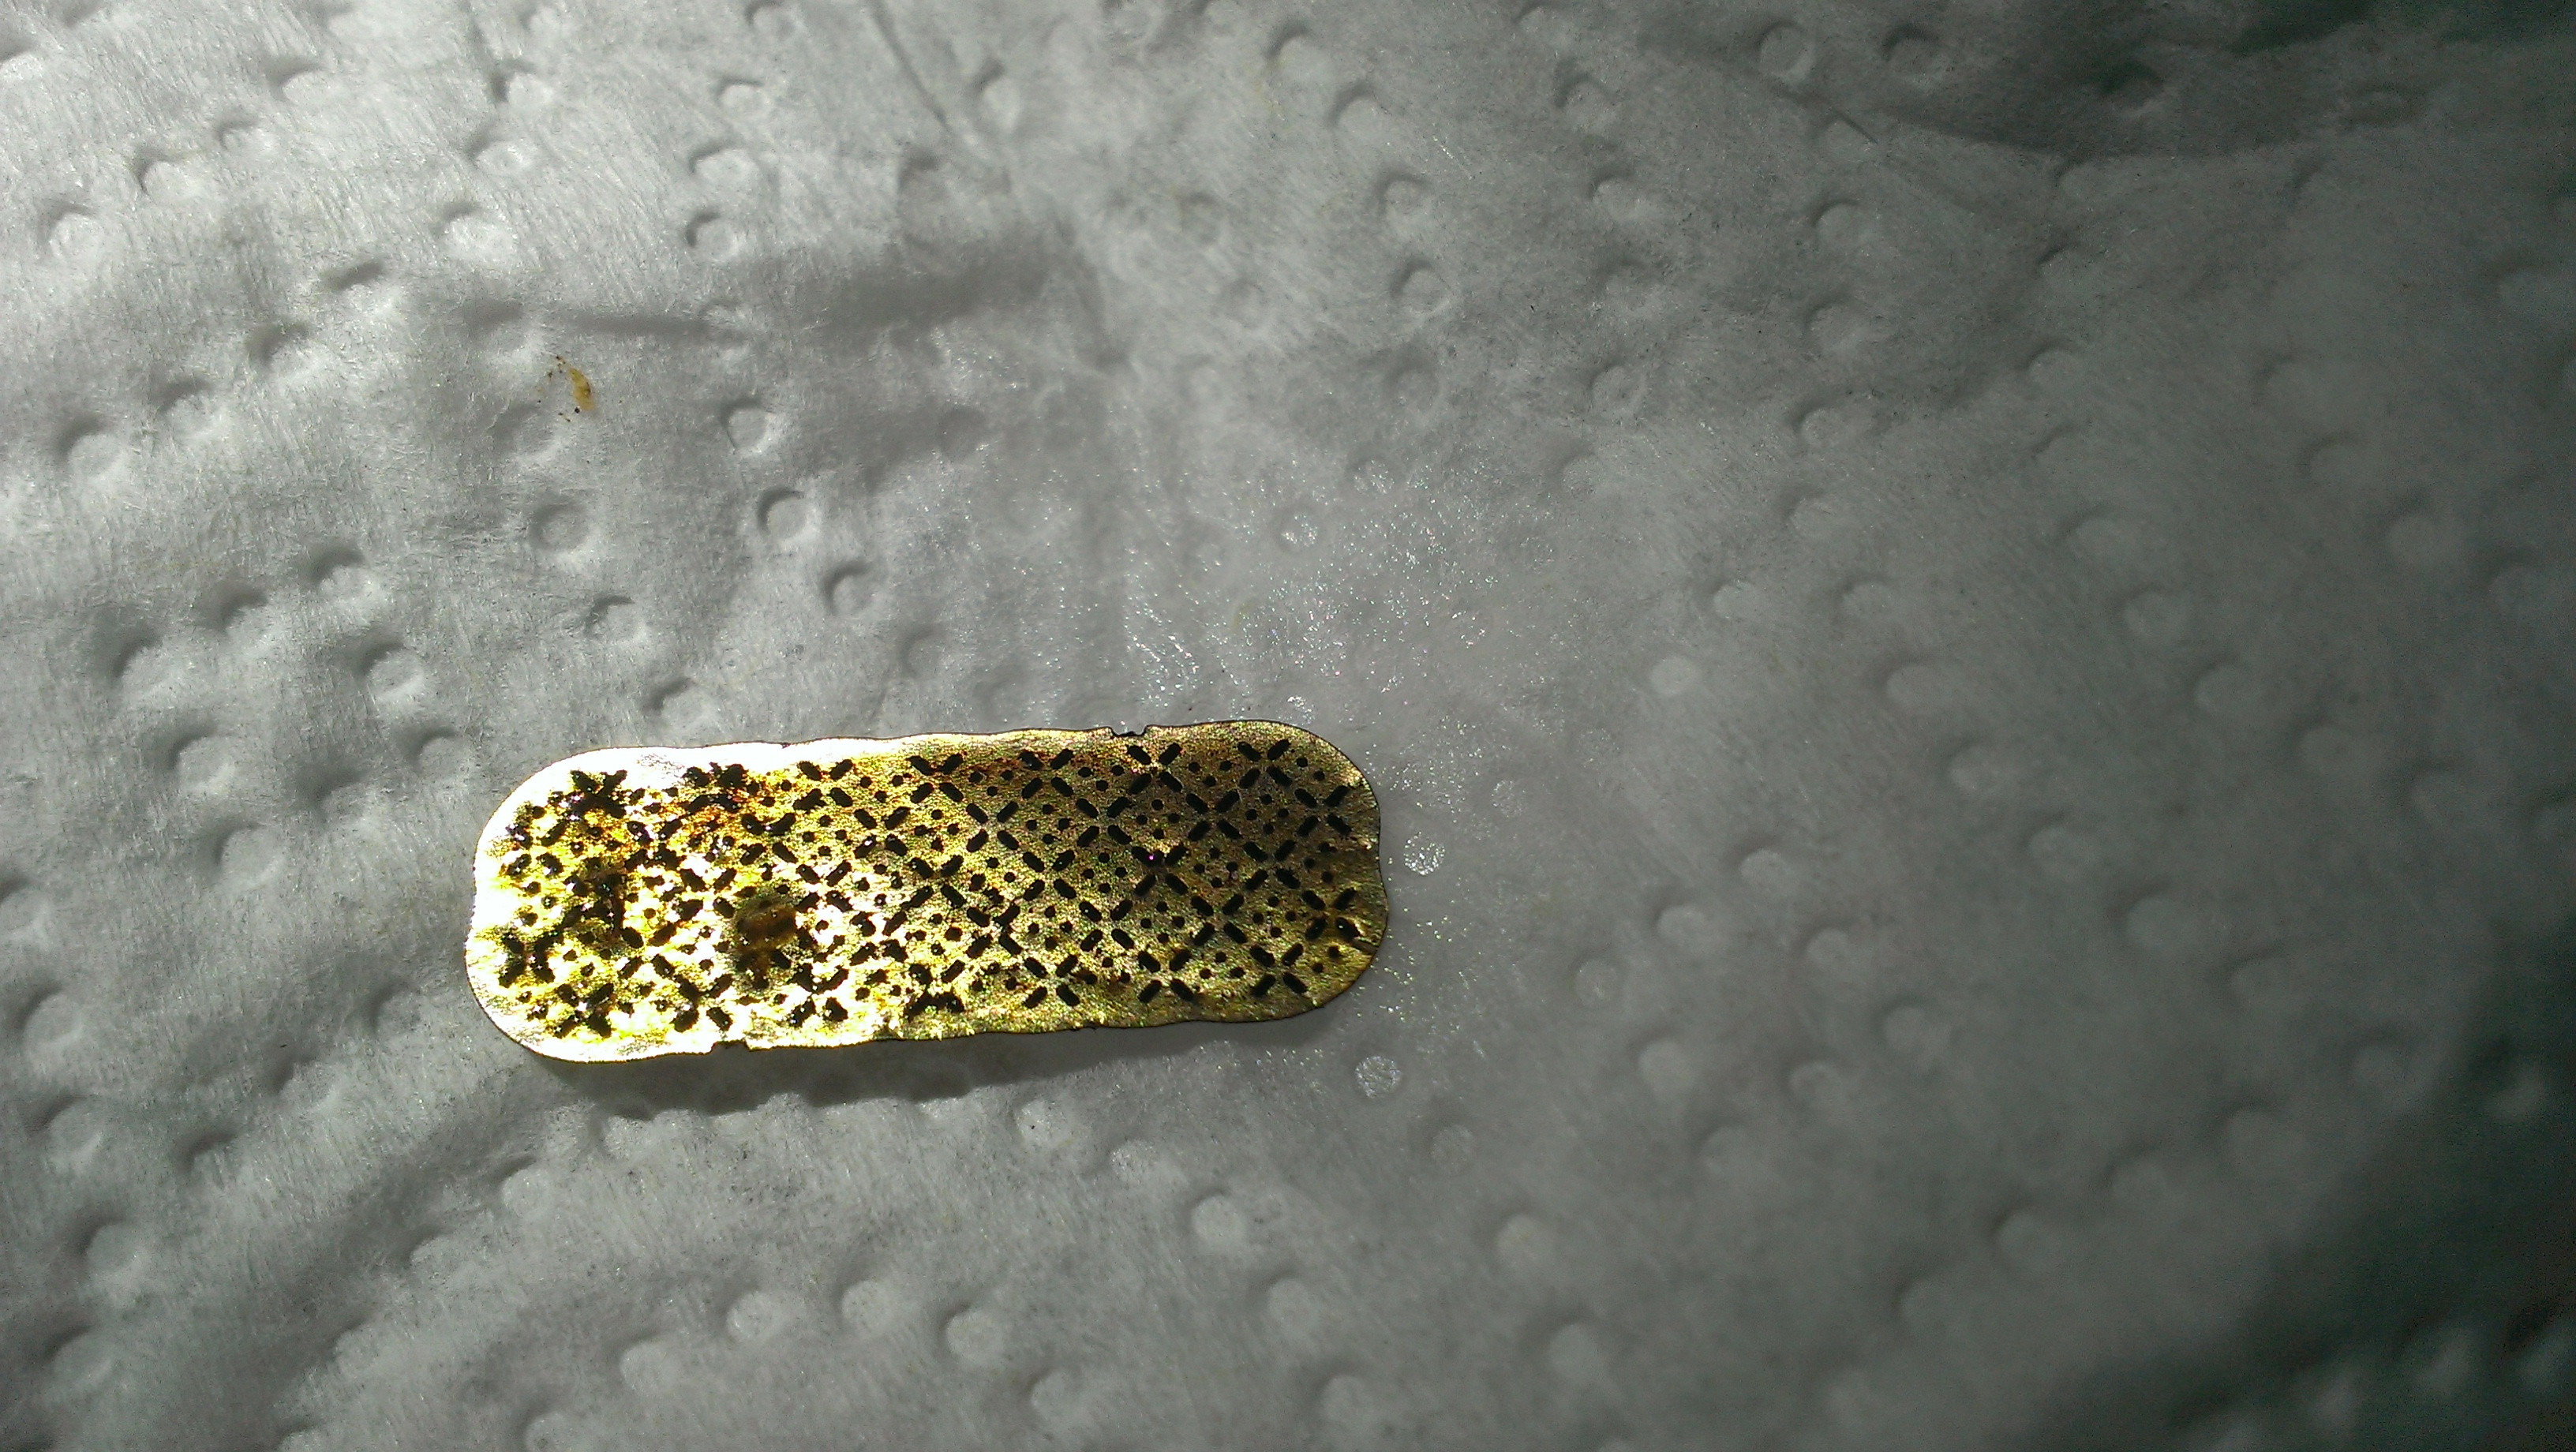
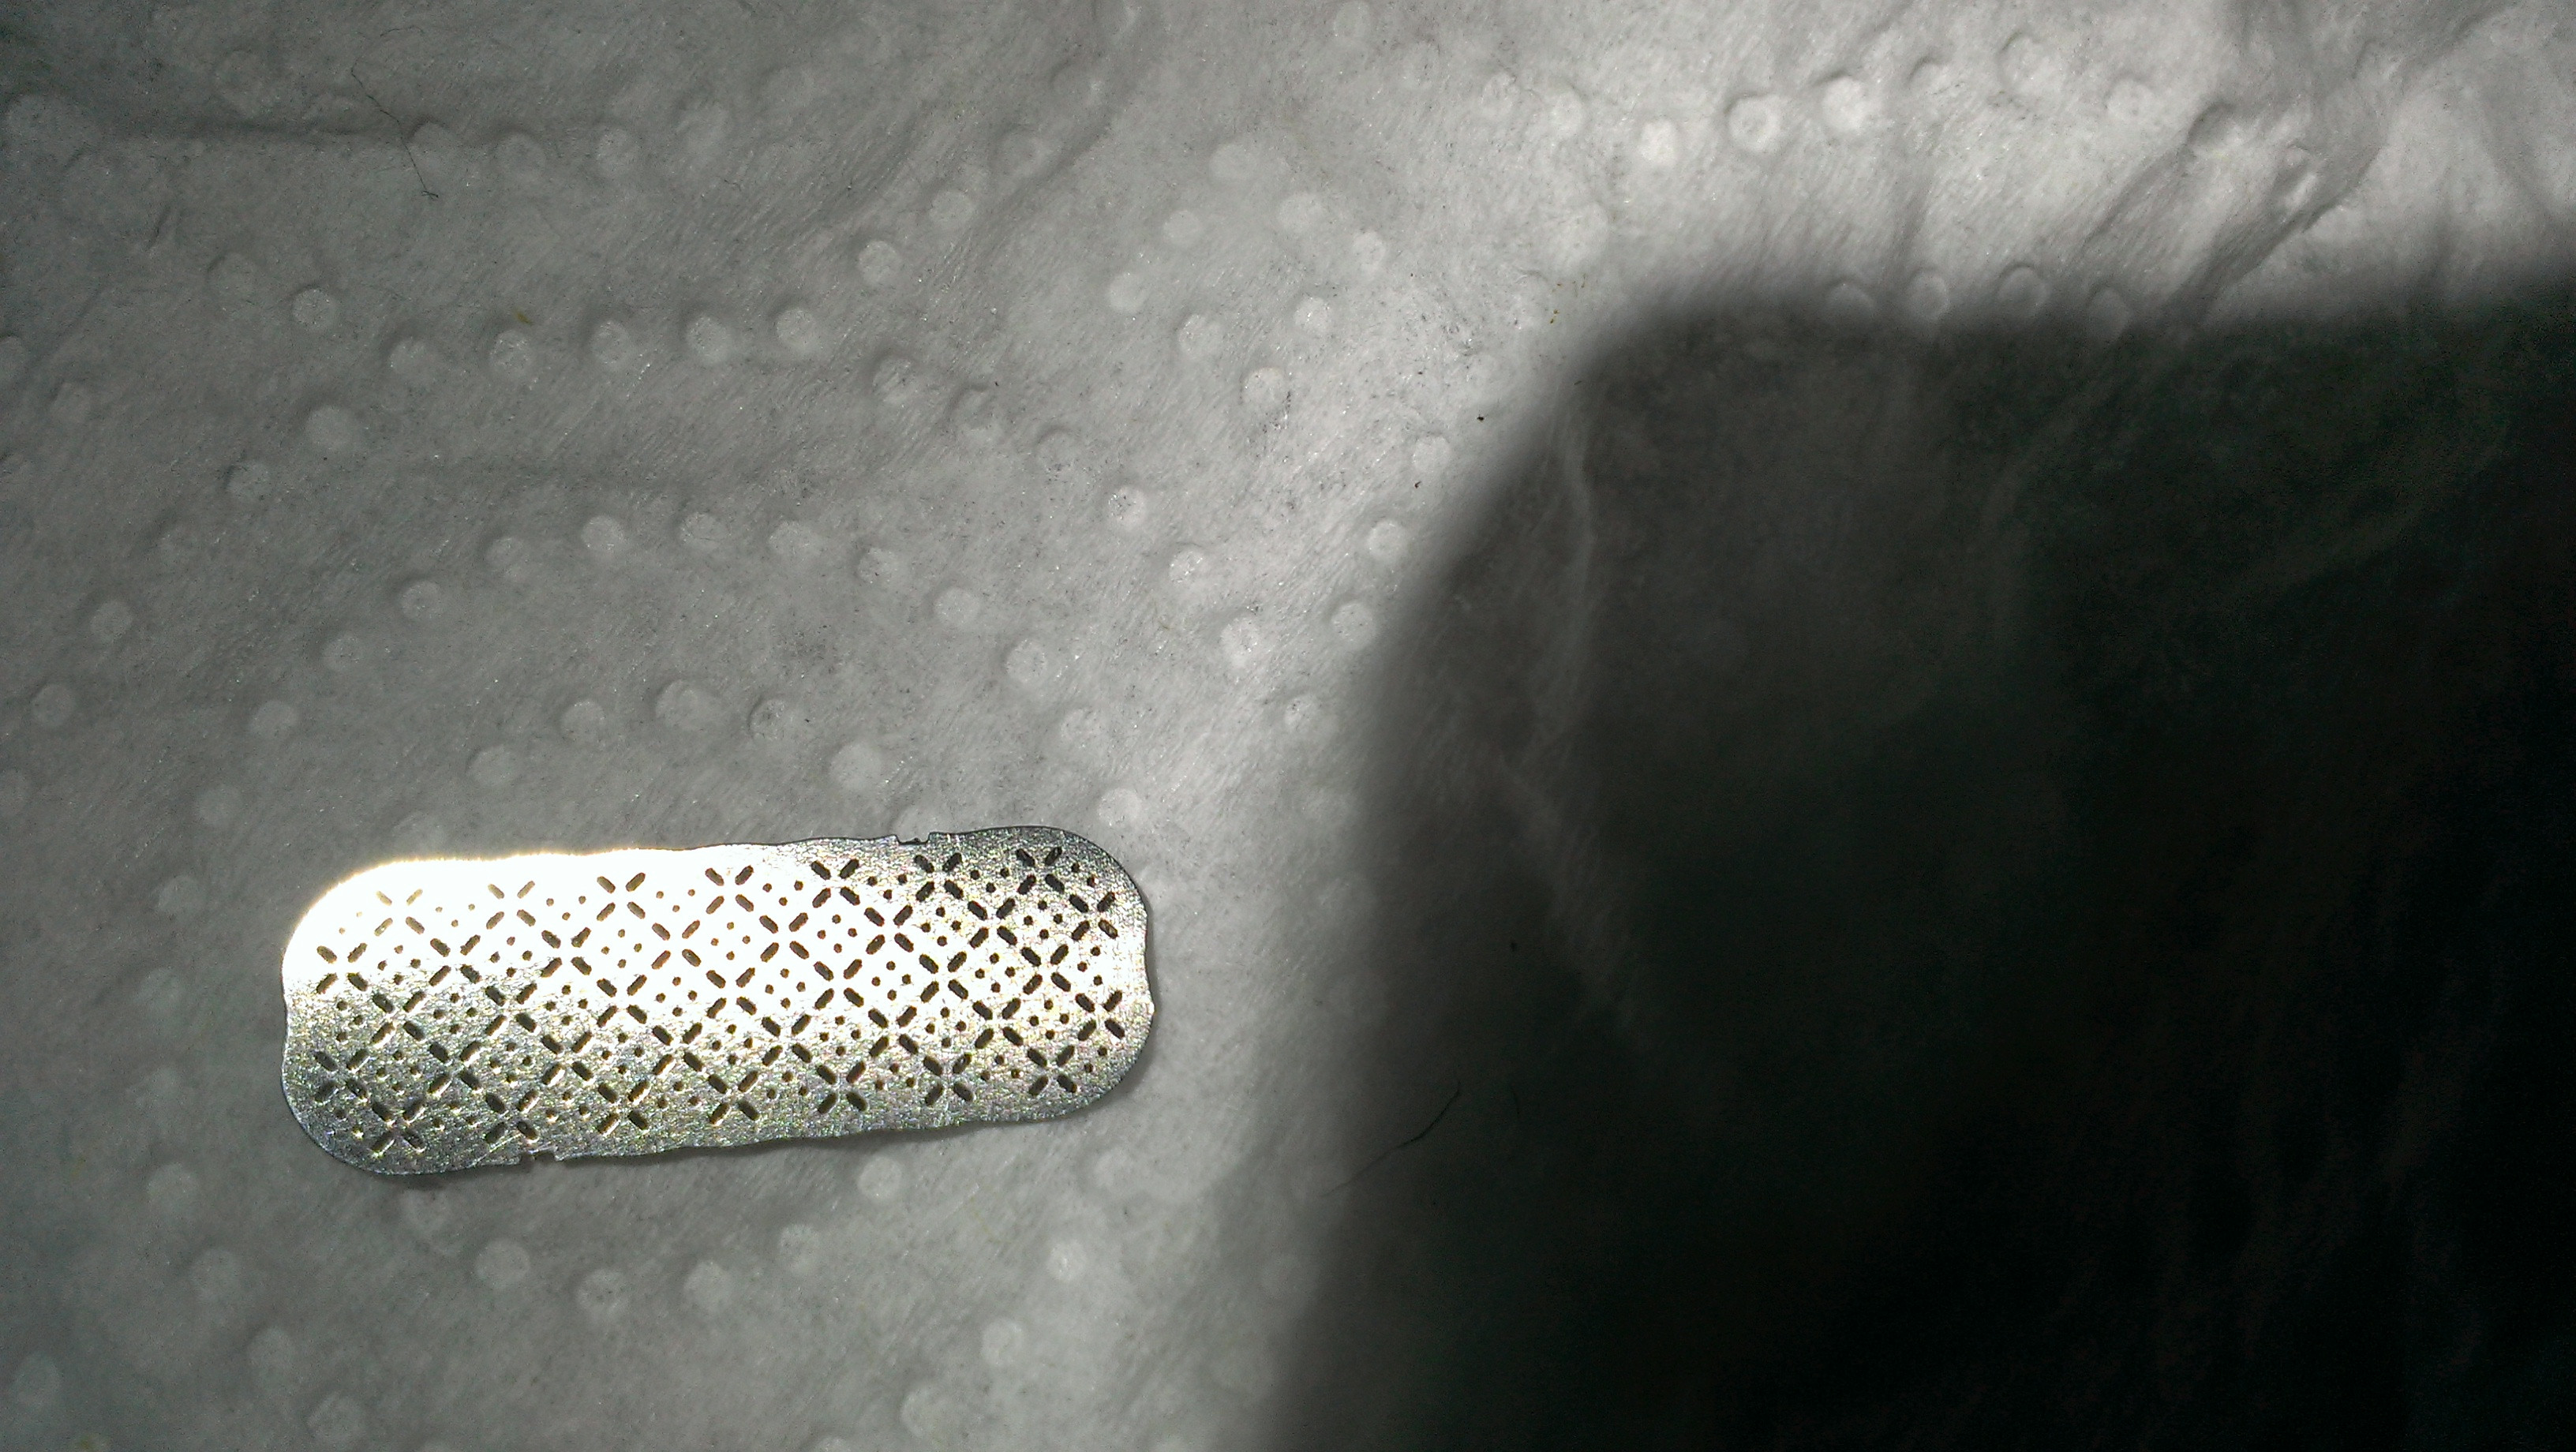
13. Clean that Screen! Remove the screen from the shot glass, and place it on a paper towel to semi-dry it. Take the screen and place it on something sturdy....a piece of glass, glass tabletop, mirror, piece of steel, or I suppose even an old magazine would work. Take the steel wool ball from earlier, dip it in the shot glass, and while holding the screen down with one finger, scrub the crap off the screen...both sides... Here's before and after pics:
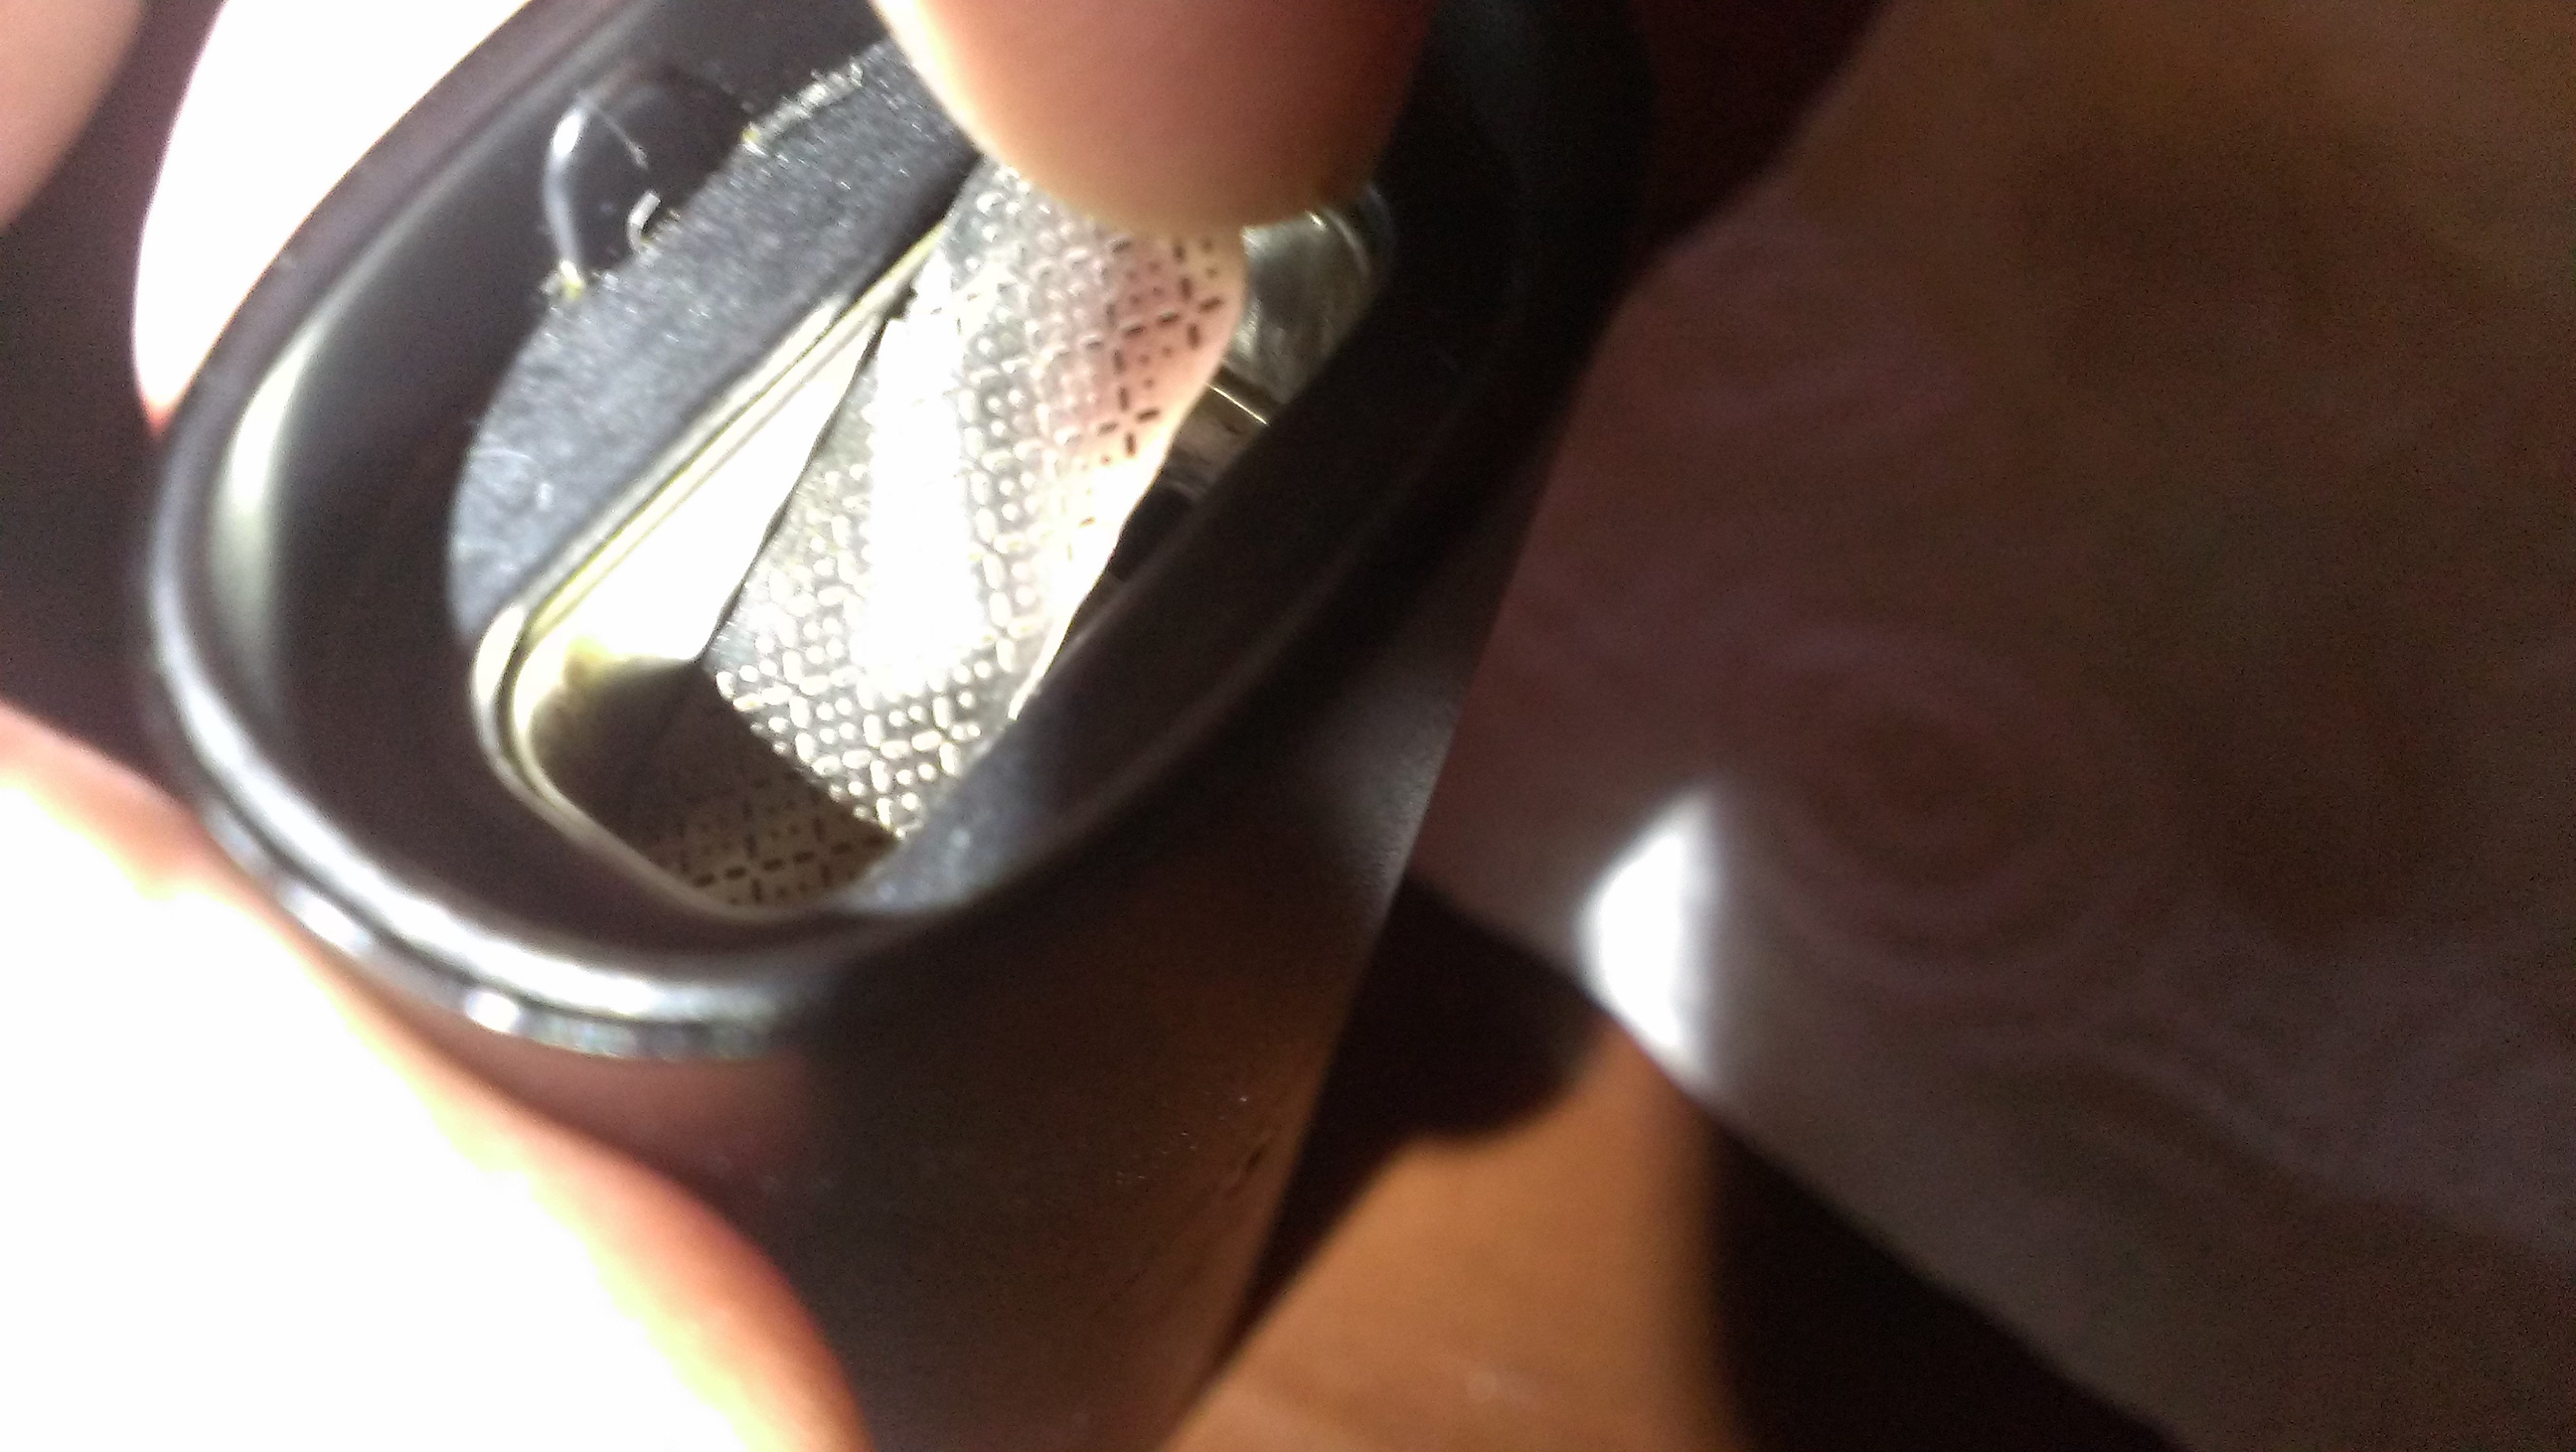
14. Put the screen back into the oven. This isn't really a maintenance step, but given some of the trouble some have with the screens, I thought I'd share how I put mine back in, as shown below. I place one side in the corner furthest from the hole, then let it drop in over the hole. I push the "hole side" into place gently with the skewer tip. This is all important as it leaves the appropriate spaces and gaps that are there by design, ensuring the Pax draws correctly and smoothly. Notice the placement of the screen in the final shot. It's actually bowed on the right side of the image, and the bowed end is over the draw hole. Not on each end, don't push it into place in the middle or just toss it into the oven and push it in. I find this is an important little technique often overlooked.

Now you can reassemble your sparkling clean Pax, pack an oven, and get it dirty again!!")
I hope this helps some out with a solid cleaning routine. There is a lot of info out there, some good, some not so good, some downright awful. I hope I was able to provide some confidence to those worried about how to clean their Pax and keep it clean.
I'm a bit of a systems addict, so I'm not content unless I have a system/routine worked out. This was the result of trying some tips, modifying some tips, and coming up with my own solutions tried and true.
For those that have yet to come up with a system for cleaning, or for the seasoned Pax user, I think you'll find the above constitutes solid advice, reasonable cost supplies, and a routine that will serve you and your Pax well for the life of the unit.
A Clean Pax is a Happy Pax!!
Peace my brothers and sisters, Pax well!
G
Now replace the mouthpiece onto the Pax and give it 10 clicks off/on to move the lubrication around evenly.
13. Clean that Screen! Remove the screen from the shot glass, and place it on a paper towel to semi-dry it. Take the screen and place it on something sturdy....a piece of glass, glass tabletop, mirror, piece of steel, or I suppose even an old magazine would work. Take the steel wool ball from earlier, dip it in the shot glass, and while holding the screen down with one finger, scrub the crap off the screen...both sides... Here's before and after pics:
14. Put the screen back into the oven. This isn't really a maintenance step, but given some of the trouble some have with the screens, I thought I'd share how I put mine back in, as shown below. I place one side in the corner furthest from the hole, then let it drop in over the hole. I push the "hole side" into place gently with the skewer tip. This is all important as it leaves the appropriate spaces and gaps that are there by design, ensuring the Pax draws correctly and smoothly. Notice the placement of the screen in the final shot. It's actually bowed on the right side of the image, and the bowed end is over the draw hole. Not on each end, don't push it into place in the middle or just toss it into the oven and push it in. I find this is an important little technique often overlooked.
Now you can reassemble your sparkling clean Pax, pack an oven, and get it dirty again!!
I hope this helps some out with a solid cleaning routine. There is a lot of info out there, some good, some not so good, some downright awful. I hope I was able to provide some confidence to those worried about how to clean their Pax and keep it clean.
I'm a bit of a systems addict, so I'm not content unless I have a system/routine worked out. This was the result of trying some tips, modifying some tips, and coming up with my own solutions tried and true.
For those that have yet to come up with a system for cleaning, or for the seasoned Pax user, I think you'll find the above constitutes solid advice, reasonable cost supplies, and a routine that will serve you and your Pax well for the life of the unit.
A Clean Pax is a Happy Pax!!
Peace my brothers and sisters, Pax well!
G
CharSadehBeast
Well-Known Member
That's a very good write up on cleaning the Pax. It was annoying at first but now I got it down to a few minutes.
tranceporter
The Cloud Conductor
Haven't been here in a looooooong time, as my Pax is no longer my only vaporizer.
Used my Pax at an event this past weekend for the first time in about 3 months. It is not the only love of my life anymore but this weekend reminded me why I will never get rid of it. The portability and thick hits makes this thing a keeper when I'm out and about. I have never had any issues with the Pax aside from an occasional temp light (which can be prevented with routine cleaning).
It seems like there have been many new ideas with the Pax in regards to using extra screens for efficiency and such. I have much to catch up on.
Mr.Krinkle
Shpooding Time.
I honestly only use wet qtips on a hot oven and that cleans it better than any scraping, whool, magic eraser, etc. has ever done. Steam power! I used to use alcohol on a qtip but water works better go figure. Just be sure the stems on the q tips are not plastic. You honestly couldnt tell the last one was used that I sent back unless you smelt it. I clean my screen this way to, leave it in the pax, let it get hot, and wipe it clean with a wet qtip. It may take a few swipes and several q tips. clean one side, pop it out and flip it over upside down, wipe the other side, then do the oven without a screen in place. boom. your done. I let a little drip of water heat up in the corner of the oven on the side with out the hole in extreme cases.
Your Highness
Cannasseur
Hey guys just checking in.... I haven't pulled out my PAX in a minute. So I figured,with winter storm "PAX" pummeling the Easy Coast.... Why not go full PAX today! Chillin with my PAX while winter Storm "PAX" puts the chill on us...
http://www.weather.com/news/winter-...ntic-new-york-dc-philadelphia-boston-20140211
http://www.weather.com/news/winter-...ntic-new-york-dc-philadelphia-boston-20140211
GraffiX
Well-Known Member
I've moved the excellent cleaning tutorial by @GraffiX to its own thread: Pax Cleaning Tutorial in Vaporization Discussion. It is too good to let it get buried in this thread.
Wow, thanks Pakalolo!! Hope some folks benefit from it, thanks again my friend!!
Personally, I never wait after alcohol usage. It burns off so quickly, even on low heat, that you won't notice any taste from it (if that's what you're worried about). With using the lube, however, I usually wait a day because that shit tastes absolutely ABYSMALLY DISGUSTING. Conversely, you can just do an empty burn session to get the
tast
e out, but I find that boring to have to maintain it not sitting on idol; I hate party mode due to how quickly it burns the battery.
Uhhhh why waste objectively good vodka with just cleaning?
Also, I would suggest adding either a dental pick or the filing part of a pair of nail clippers to get out the crusted vape-bits.
OH MY GOD PLEASE DON'T USE MAGIC ERASER! It has a cleaning solvent on it and is absolutely horrid to use on your unit. Get 0g, 00g, or 000g steel wool (personally, I use 00g). It won't scratch the unit, nor will you be ingesting those chemicals. I know you rinse it off, but just... please don't.
I think this is just with newer models, no? Because mine has a few cool lighting modes (I've gotten two different ones to work), but no simon says.
Heya @Shadowdjinni
I believe that you are correct. I have 2 Paxes, and they both have.serial #s which begin with "B". I seem to recall someone mentioning that "non-B" serials dont have the.Simon feature.

Last edited:
GraffiX
Well-Known Member
It is a good writeup though I'd mention another way to shut unit off after removing mouthpiece is to pop it on/off the charger - that is what I do.
Love this forum, I learn something new every time Im here!!
Just tried that out and it works a treat! Unfortunately I cannot edit the post, but since you posted it here Im sure folks will benefit from the knowledge, thanks again!
JessicaW
New Member
I put my mouthpeice withput putting in the spring in first and now it is stuck!!How the hell did I miss that? I must be confusing it with replacing the MP with the sliding ring missing. I stand corrected.
HELP!!!I put my mouthpeice withput putting in the spring in first and now it is stuck!!
Push the mouthpiece all the way down, then grab it with something like tweezers and pull. It will come right out.
BTW posting your problem once is enough.
")
I use a gun cleaning kit. The one size brass tool fits in there perfectly and you can scrub the sheet out of it and it wont scratch the SS. I actually got it back into new shape a # of times with this techniqueI honestly only use wet qtips on a hot oven and that cleans it better than any scraping, whool, magic eraser, etc. has ever done. Steam power! I used to use alcohol on a qtip but water works better go figure. Just be sure the stems on the q tips are not plastic. You honestly couldnt tell the last one was used that I sent back unless you smelt it. I clean my screen this way to, leave it in the pax, let it get hot, and wipe it clean with a wet qtip. It may take a few swipes and several q tips. clean one side, pop it out and flip it over upside down, wipe the other side, then do the oven without a screen in place. boom. your done. I let a little drip of water heat up in the corner of the oven on the side with out the hole in extreme cases.

JessicaW
New Member
Push the mouthpiece all the way down, then grab it with something like tweezers and pull. It will come right out.
BTW posting your problem once is enough.
Lol, one more thing...How do I put the spring back in before inserting the mouth piece again?
Lol, one more thing...How do I put the spring back in before inserting the mouth piece again?
You just slide it down over the tube and replace the mouthpiece.
bleeh, it's not working. guess im fucked lol
What isn't working?
DHosa713
Member
probably clean out the exterior of the tube where the spring goes in? if not, i just place the spring where its suppose to go and use the mouthpiece to push it down, works for me, if not you probably deformed the spring maybe, you should contact ploom support they might send u another spring or somethingThe spring isnt fitting over the tube for some reason.
berman1125
Active Member
That is my exact cleaning process graffix
MolecularConcept
Well-Known Member
jessica, there is a little metal bar that makes contact with the mouthpiece you just have to kinda force it past the bar. its not that tough.
i only removed my spring twice since ive had my pax its been about a year so thats not to bad!
i want to get a new one i want the simon feature!!!
i only removed my spring twice since ive had my pax its been about a year so thats not to bad!
i want to get a new one i want the simon feature!!!
W
i literally just got my new cobalt one
what is the simon feature pleasejessica, there is a little metal bar that makes contact with the mouthpiece you just have to kinda force it past the bar. its not that tough.
i only removed my spring twice since ive had my pax its been about a year so thats not to bad!
i want to get a new one i want the simon feature!!!
i literally just got my new cobalt one - Status
- Not open for further replies.