You are using an out of date browser. It may not display this or other websites correctly.
You should upgrade or use an alternative browser.
You should upgrade or use an alternative browser.
VapCap Induction Heater for Desktop and in Car Use
- Thread starter Pipes
- Start date
-
- Tags
- dynavap induction heat vapcap
It for safety for the most part. If something goes south in the heater, it's the BMS that prevents the problem from getting into a smoky or even a fire situation. This particular board also has a balancing circuit to help keep the batteries aging evenly. Generally, if over two cells are used in a series configuration, the end cells take more punishment then the center cell(s). No idea why... There was a time I was refurbishing power tool batteries just for the fun of it. The method was to remove the cells from multiple enclosures and test them separately. It would almost always be an end cell that bit the bullet and would just replace with a good one from the cell pool. Would end up yielding 4 out of 5 packs refurbished to be usable again.
There I go, gabbing off topic again...
So to answer the question, yes, for this configuration, I would consider critical.
There was a time I was refurbishing power tool batteries just for the fun of it. The method was to remove the cells from multiple enclosures and test them separately. It would almost always be an end cell that bit the bullet and would just replace with a good one from the cell pool. Would end up yielding 4 out of 5 packs refurbished to be usable again. There I go, gabbing off topic again...
So to answer the question, yes, for this configuration, I would consider critical.
ClearBlueLou
unbearably light in the being....
ClearBlue.....you will rarely if ever have to charge up all 3 batteries like that again. If they are only used in your skelly.....it is super easy to keep them topped off from 60-90+% when you go through your day to day use cycle. The supplied charger does not take very long to charge up if you charge before it drops below say 50%. So when I see my middle light go off....its time to charge up, usually an hour or so is plenty.
Agreed / admitted on all points; and yet I truly had been looking for, essentially, the charger I got. I have never regretted having a better charger, usually regretted the opposite. I made a commitment to rechargeables a few years ago, and I'm very happy with my four new smart charger slots. As for this trio of 18650s, I expect them to live out their lives in El Skel's belly. AND I'm happy to have given myself the chance to see and verify the states of charge, etc. I also expect that a 'smart' initial charge could be a factor in performance / longevity, as compared to the classic dumb charge.
I consider it money well and smartly spent.
Im really liking the skelly so far, i gotta find a temporary enclosure tomorrow.
...and I'm considering cementing mine to a 2.5" square acrylic base w/ felt on the bottom...

Got my skelly on Friday, really liking it so far. Is the height adjustable as far as how deep the vapcap goes in? I feel like it heats too close to the tip as i get both clicks in just over 5 seconds. little to no vapour if I stop at the click, need to count an extra 3 seconds or so after the click and is a bit inconsistent.
Hippie
Well-Known Member
Welcome to the club 
Have a read back a few pages m8, there's lots of dipping techniques to try
3 seconds or so after the click for the 1st dip and 2 seconds or so after the click for subsequent dips is about average, I think.
The SS tip takes a little longer to heat and cool down than a Ti tip, being different materials with different thermal properties, which is worth bearing in mind reading through peoples dipping techniques and dialing in your own timings.
Pipes has posted a video of how to adjust the height, if you need to. Don't do that yet tho, as I doubt you really need to.
I think you just need a lil more dipping practice
This has being reported before and the fix seems to be not to touch the back of the BMS board. There are a couple solder pads for an optional temperature sensor to force protection mode in case of over heating. Touching around this area trips the protection. Inserting the charger resets it.
Let us know if this seems to be the case with yours as well.
Let us know if this seems to be the case with yours as well.
Grifo
Well-Known Member
yep most likely cause it's been when I pick it up and take it some where.This has being reported before and the fix seems to be not to touch the back of the BMS board. There are a couple solder pads for an optional temperature sensor to force protection mode in case of over heating. Touching around this area trips the protection. Inserting the charger resets it.
Let us know if this seems to be the case with yours as well.
ClearBlueLou
unbearably light in the being....
I see you messing with my mobile-skeletor game-plan here;yep most likely cause it's been when I pick it up and take it some where.
I shall order more strategery...
Awesome project, thanks a lot for sharing.
I've been considering making one, with a PC ATX power supply.
I don't understand what the FET is for, though. Safety? Why not just a simple switch connected to the power? Would it reduce the current that goes through the button switch?
This thread is huge, will take time going through all of it... or I could just buy one from you when I stop being so broke.
Welcome to the club! Definitely some fun to be had.
The FET is so a light tactile type switch can be used. You want just a little pressure to active the coil. The switch is activated by dipping the VC in and acts as a dead mans switch so there is little chance of the device being left on.
You could use a heavy duty switch externally but should be a non-latching variety. Most will be tempted to use a 3 amp switch for the size, which should be OK, but 5+ amp is best.
Good luck.
as pipes mentioned, its the circuit board on the back of the battery holder, avoid touching it and you shouldnt have any issues.. ive noticed the same thing.
you can see a picture of mine in its temporary enclosure (back a few pages: http://fuckcombustion.com/threads/v...top-and-in-car-use.23211/page-52#post-1170477). i put that plastic gift card between the BMS board and the rest of the electronics.. this kept me from touching the board accidentally while on the go.
have not have any issues since i did this and once its gets put in its final enclosure, i suspect this wont be an issue at all.
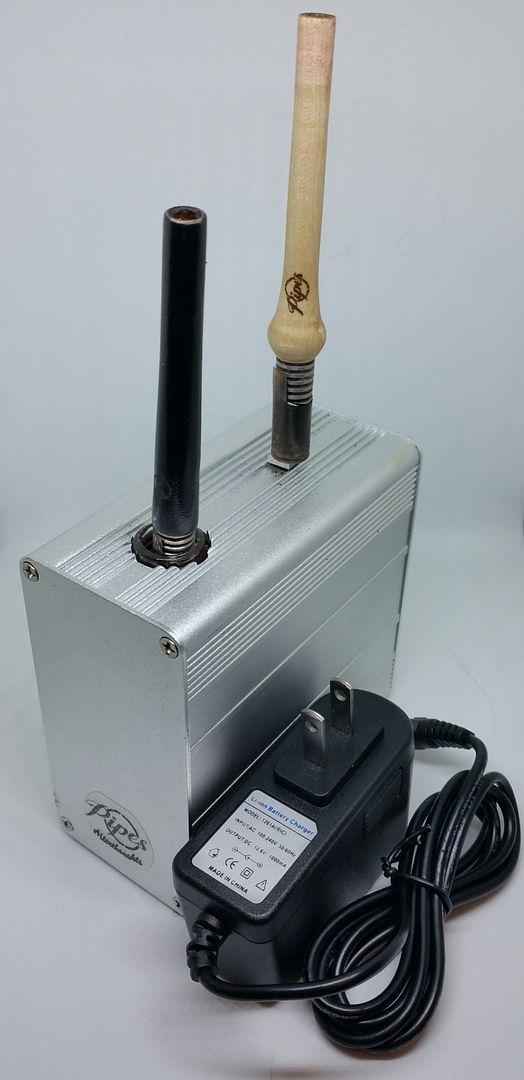
edit: @Pipes i wanted to ask, what do the LED colors mean on the charger?
green = plugged into wall, no load (not charging)
orange = actively charging
blinking between orange and green = ??
you can see a picture of mine in its temporary enclosure (back a few pages: http://fuckcombustion.com/threads/v...top-and-in-car-use.23211/page-52#post-1170477). i put that plastic gift card between the BMS board and the rest of the electronics.. this kept me from touching the board accidentally while on the go.
have not have any issues since i did this and once its gets put in its final enclosure, i suspect this wont be an issue at all.
edit: @Pipes i wanted to ask, what do the LED colors mean on the charger?
green = plugged into wall, no load (not charging)
orange = actively charging
blinking between orange and green = ??
Last edited:
ClearBlueLou
unbearably light in the being....
So my Skeletor arrived today, and it does everything except heat the tip. 40 sec is the longest I've waited for the click, and there is none; pull the cap from the tip, and it is cold.
Charger is plugged in and its light is on.
Test strip shows one red and four blue lights.
Insert the cap, hear the switch click, see the light at the base of the coil light up.
Count forever waiting for the cap to click.
What am I doing wrong?
Charger is plugged in and its light is on.
Test strip shows one red and four blue lights.
Insert the cap, hear the switch click, see the light at the base of the coil light up.
Count forever waiting for the cap to click.
What am I doing wrong?
WoodVillain
Backwoods Rated
So my Skeletor arrived today, and it does everything except heat the tip. 40 sec is the longest I've waited for the click, and there is none; pull the cap from the tip, and it is cold.
Charger is plugged in and its light is on.
Test strip shows one red and four blue lights.
Insert the cap, hear the switch click, see the light at the base of the coil light up.
Count forever waiting for the cap to click.
What am I doing wrong?
Are you trying to power the unit with the charger?
I think i read that you need a different power supply cord to power it if not using batteries... and only with batteries not installed...
ClearBlueLou
unbearably light in the being....
It's powered by fully-charged LG HE2, which I received earlier; the Pipes-supplied charger was plugged in to both power and the Skelly in order to get the test lights to come on, per recent posts.Are you trying to power the unit with the charger?
I think i read that you need a different power supply cord to power it if not using batteries... and only with batteries not installed...
I just disconnected the charger from the Skelly and the test lights light up no more.
Reconnect the charger, and the test lights come back.
I get the test lights no matter what the position of the kill-switch (0 or 1) when the charger is connected, and not when it's not - and again, no matter what the switch says; I get the 'heater-in-use' light only when the switch in ON (1), but NOTHING heats up.
Last edited:
I dont want to insult you w the easy questions.. but... Have you put the batteries in correctly? 1 is positive end up and 2 are positive end down..
Sorry, just trying to make sure all the obvious is covered..
Also, if you haven't already, shoot Pipes a PM, he will troubleshoot w you as well.
Edit: revised my explanation of battery orientation
Sorry, just trying to make sure all the obvious is covered..
Also, if you haven't already, shoot Pipes a PM, he will troubleshoot w you as well.
Edit: revised my explanation of battery orientation
Last edited:
kaisersosay415
Well-Known Member
Is there a list or website to get one of these. Looked over the thread but can not find it.
@ClearBlueLou, as @xlr8shun stated, it sounds like no power from the battery/BMS unit.
For sure check battery polarities. The two outer cells should be + down and center cell + up.
If this is not the issue, please take a couple close up shots of the BMS wiring and send to me via a PM.
I admit, I only QC test with a power supply so actual heater "should" be good.
@kaisersosay415, I take orders via PM.
ClearBlueLou
unbearably light in the being....
And it was JUST that simple: I managed to COMPLETELY ignore the diagrams showing how each battery was supposed to go. After correcting that, I have lights without the charger connected (tho only three blue); the rim of the glass lit up when I pressed the contact switch; and I got a click after a few seconds.
Feeling old now...and righteous: click, 1, 2 gave me a nice lungful with no spillover...
Kudos to xlr8shun for taking it to the mat - well-done, and thank you!
Tonight's buzz is dedicated to you and to Pipes - alakaZAM, y'all, and blessings on your heads!
Feeling old now...and righteous: click, 1, 2 gave me a nice lungful with no spillover...
Kudos to xlr8shun for taking it to the mat - well-done, and thank you!
Tonight's buzz is dedicated to you and to Pipes - alakaZAM, y'all, and blessings on your heads!
Kudos all around, to @WoodVillain also, reading his post really kind of popped into my head.. like a vision.. in first person view, gazing at the 3 batteries, all in the same orientation.