The Nomad From Morwood

sixstringsmash

Well-Known Member
f3rrq8.jpg


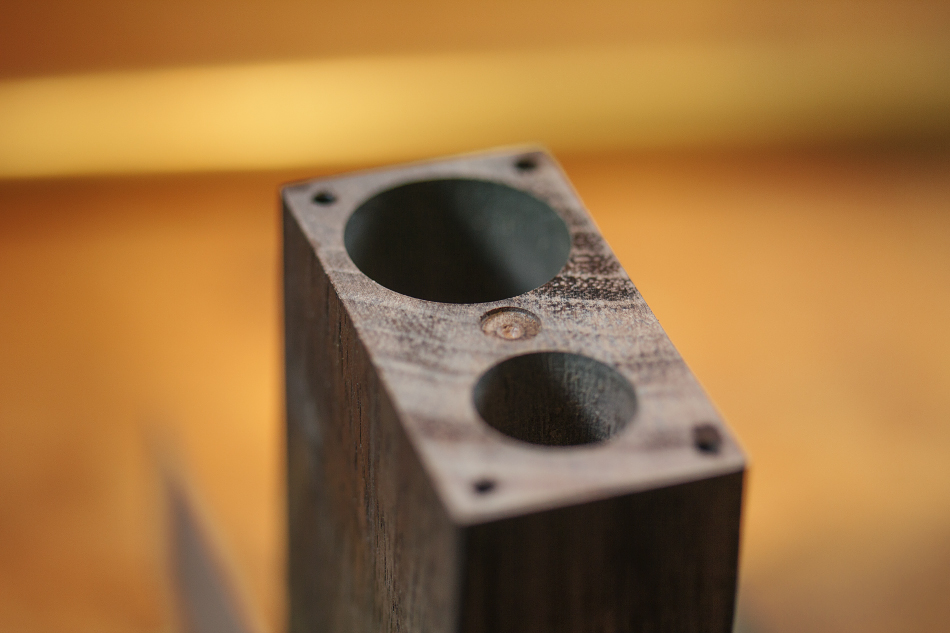
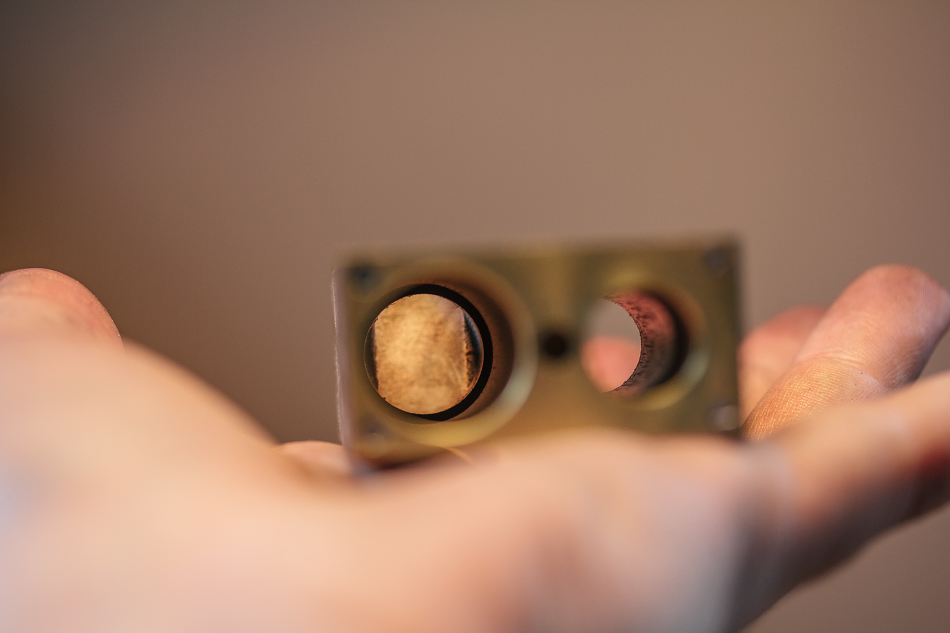
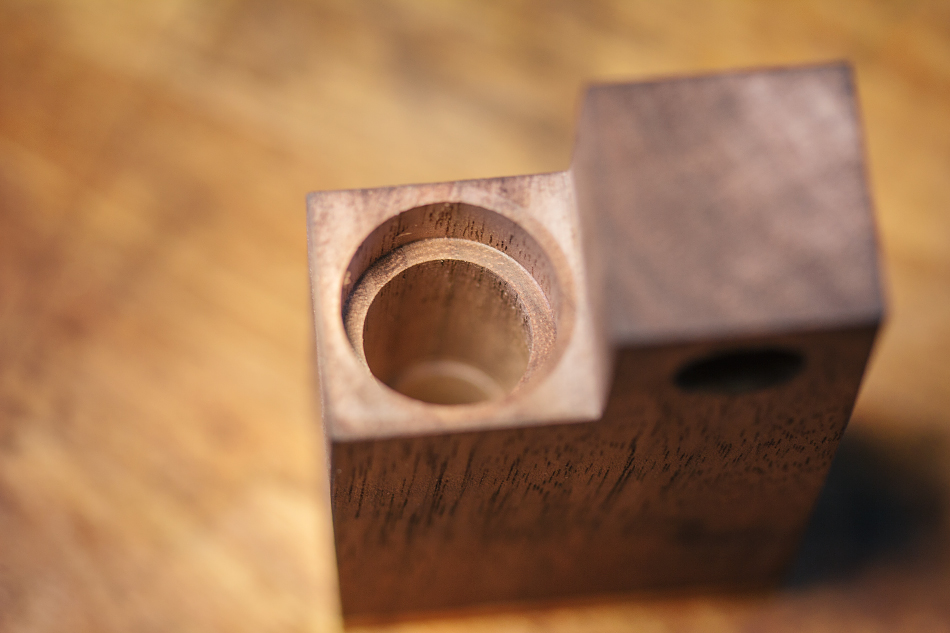
How about not having the tray slide out, but make it another little cube that will klick in place above the heater? Maybe with magnets to hold it together? Hope that makes sense
I don't think using *that* vaporizer is a very good representation of the pod system. I had an Air One and all I remember from using it was all the vapor that leaked out from it.

If we're going to look at pod chambers from my experience I think the minivap flexicone baskets are the best design of pod loading in a vaporizer yet. No leaked vapor and airtight seals into the air path.

mVbskt.jpg
 

Shit Snacks

Milaana. Lana. LANA. LANAAAA! (TM2/TP80/BAK/FW9)
@Shit Snacks, Thats the idea! Modules man! Modules!

Thinking more on it.. it makes no diference in crafting time/cost, making stem packed style or heater module packed style. Both need to be explored further, no clear winner yet. Would definitely offer both options if thats what someone wanted.

Being able to adjust distance between heater and chamber isn't such a big deal. Button hold-down-let-off time along with draw speed is all you really need to control the heat.

A heater module with an all glass casing is definitely doable, so that would cut down on conduction if you wanted to have the herb chamber as part of the heater module, while retaining that pure convection functionality.

Alright I'm convinced, forget the stem, that all sounds pretty good and an all module system is simpler with less variables (but I suppose both will always be possible anyway) plus unique
 

Dan Morrison

Well-Known Member
Manufacturer
I guess you guys have a point!

I suppose I was thinking about the fact that to ramp up to the correct temperature, then hold it there, would take some serious button control. With a heater that heats up that true, on-demand, style...

But then again.. Using a more massive heater, with a slower heat up time, ~15 seconds, would also give you a slower cooldown time...so the up and down temp waves are not so violent.. if that makes sense? Could be the way to go!
 

Dan Morrison

Well-Known Member
Manufacturer
Essentially that's what I was getting at @RelaxedNow.

You need some sort of temperature indicator with conduction. Whether it's a click, a sight window, temperature probe..etc.. You don't have the air flow to help you as a gauge and heat controller.

100% conduction is a bit of a pickle with manual electronic control and no temp indicator.

Not to say it's impossible to build a module with built in temp indicator.. but it's just not my focus at the moment.
 

GreenHopper

20 going on 60
I'm all for a convection/hybrid heating unit.

In regards to a conduction heating module, you should check out what @Pipes, @rz and @hardboiledfrog are up to in the 'VapCap Induction Heater for Desktop and in Car Use' thread.

It's well beyond my knowledge area but it's fun trying to work out what they are saying.

I don't know if it could be scaled down into a module or not but it seems like they are onto something in regards to temp control and induction heating.
 

ZC

Well-Known Member
RE: Loading and multiple screens.

What I've been doing with the Milaana is having one basket screen pushed into the stem a bit. Then I fill the screen, and pop in one of the small ELB/DDave style rimmed basket screens to close it up. Gives all the perks of a two-screen system but is much easier to deal with than using two basket screens. If the sizing works out for your system it could solve your issue of easy loading and not having a heater screen, though personally I'd prefer to have a heater screen no matter what.
 

hippogriff

Well-Known Member
Milaana & Firewood4 are right in your niche (on-demand convection portable) and good examples of stem-loading vs capsule-loading (Firewood4 is my daily driver and Milaana is my heavy hitter/camping vape).

Milaana has a permanent screen above the heater, had it almost a year w/ almost zero maintenance and no problems. Occasionally a few bits fall out of the stem and need to be dislodged w/ a pointy tool, but loading the stem basket-style, even w/ kief, just isn't a problem - weed is sticky enough to stay in place w/ the lightest tamping. When I'm going for deep extraction I'll unpack and grind to powder in my fingers, suck the powder back into the basket, and just to be safe I'll take the next hit upside down, and the heat from that hit is enuf to make the almost-spent powder sticky to stay in place. The downside to this method is I can't load and go (also not good to leave glass stem in glass female when not in use).

Firewood4 has no permanent screen above the heater. The capsule is easy to reverse for loading w/ straw method (not so great for hand or funnel methods), a good feature, which also means a couple times I've -cough- forgotten to un-reverse it and material has fallen into the heater for a little combustion event. So a permanent screen would be nice, but it's only happened a couple times so I haven't felt compelled to add one. The capsule is perfect for load and go, that and the no-look interface (and compactness) is why it's my daily driver. Some folks don't love the capsule system, other's buy extra capsules for easy/fast reloads (glass capsule is too hot for all of 30 seconds).

So I'd say 1) yes, protect heater w/ screen, 2) yes, don't need variable distance, draw speed takes care of it, and 3) a capsule system is a great match for your compact size, as long as you can load via straw method.
 

Dan Morrison

Well-Known Member
Manufacturer
@GreenHopper Very neat stuff linked there! The scaling down part is an issue though, haha. Inspiring non-the-less.

@ZC, Very good point. That works!

I think what I will do is offer both options. Removing the glass stem to re-load is faster than removing the heater module. So there is definitely some advantage to having both.

@hippogriff, Great points all around! Thanks!

It won't be an issue to add a screen to the top of the heater. The only issue here is that a metal screen can rob some heat from the air... but it also acts as a sort of heat diffuser.. so.. zero sum game I guess. Either way the heater screen is removable.

In my design, the stem itself is the "capsule". You swap stems. OR, as discussed above, if you have your setup where the chamber is part of the heater module, you swap heater modules.

This gives you the advantage of pairing your heater with your material for different experiences with each change out.

I think that one of the first aux. accessories will be a small wooden box, with sleeve cover, that holds about 6 or so modules all nice and neat and ready to go.
 

sixstringsmash

Well-Known Member
@GreenHopper Very neat stuff linked there! The scaling down part is an issue though, haha. Inspiring non-the-less.

@ZC, Very good point. That works!

I think what I will do is offer both options. Removing the glass stem to re-load is faster than removing the heater module. So there is definitely some advantage to having both.

@hippogriff, Great points all around! Thanks!

It won't be an issue to add a screen to the top of the heater. The only issue here is that a metal screen can rob some heat from the air... but it also acts as a sort of heat diffuser.. so.. zero sum game I guess. Either way the heater screen is removable.

In my design, the stem itself is the "capsule". You swap stems. OR, as discussed above, if you have your setup where the chamber is part of the heater module, you swap heater modules.

This gives you the advantage of pairing your heater with your material for different experiences with each change out.

I think that one of the first aux. accessories will be a small wooden box, with sleeve cover, that holds about 6 or so modules all nice and neat and ready to go.
Well shit I don't even have the vape yet and I already want the accessories.
 

Dan Morrison

Well-Known Member
Manufacturer
The last prototype. A lazy Saturday evening in the shop.

As you can see, a slightly different body shape compared to the last prototype.

IueE7ob.jpg


Paper template on the bottom plate.

4BfWSTu.jpg


5OrkPwa.jpg


My favourite hammer.

C1VXl9V.jpg


Magnification can get you really darn close to perfect with the center punch.

lg7KB1p.jpg


MkbmsPr.jpg


The Okin charcoal drill helping out with the starting of the holes.

t6TVkOz.jpg


Ready to be screwed onto the bottom of the body.

47Azi91.jpg


Playing around with some metal stamping... just a test. The patina on this brass is really great... it's the natural patina from leaving it in my shop for years. I'm shooting for a patina a bit like this with the brass parts.

eU48NJk.jpg
 

almost there

Well-Known Member
The last prototype. A lazy Saturday evening in the shop.

As you can see, a slightly different body shape compared to the last prototype.

IueE7ob.jpg


Paper template on the bottom plate.

4BfWSTu.jpg


5OrkPwa.jpg


My favourite hammer.

C1VXl9V.jpg


Magnification can get you really darn close to perfect with the center punch.

lg7KB1p.jpg


MkbmsPr.jpg


The Okin charcoal drill helping out with the starting of the holes.

t6TVkOz.jpg


Ready to be screwed onto the bottom of the body.

47Azi91.jpg


Playing around with some metal stamping... just a test. The patina on this brass is really great... it's the natural patina from leaving it in my shop for years. I'm shooting for a patina a bit like this with the brass parts.

eU48NJk.jpg
Thanks Dan, these amazing photos help make the wait more bearable:nod:. Keep them coming!!
 

Dan Morrison

Well-Known Member
Manufacturer
Well, we're back on the lathe. Boring out the hole for the fire button. Why not just drill it you ask? Well, a drill bit never makes an accurately round hole.. and as you'll see this hole has two diameters, with a flat "step".

t8ix2kd.jpg


qkBsIro.jpg


Here's that step I was talkin' about.

se6wcdc.jpg


Back on the drill press. Really wishing I had a proper milling machine right about now.

Prototyping is all about working with the tools you have, so you can eventually afford the tools you need, ha.

VPn4dNr.jpg


Back to the lathe again. A view through the microscope lens helps to get awkward tiny parts back on center.

c61Vadf.jpg


Boring the battery hole.

h0JEVVn.jpg


3NWk1Ly.jpg


And another hole that'll make more sense later..

3iQCRBQ.jpg


Bottom plate pretty much done.

euAyigu.jpg


Matching holes in the wood.

MVvTz3Z.jpg


Fits in the palm of your hand.

4g9RKPr.jpg


More boring on the lathe. This block is starting to look like swiss cheese.

fRagfYe.jpg


Mortise for the stem collar.

tjogEFm.jpg


As it stands right now... starting to take shape!

M9pXt3J.jpg
 
Top Bottom