This is your lucky day! The all titanium Omnivap vaporizer is already available. It is a beast and it is indestructible! The titanium mouthpiece has an adjustable air flow feature unlike the wood mouthpieces.
That new titanium body is real slick and looks great with the new tip prototype. BEAUTIFULLLLL.
Here's mine, with the shiny ti body and its Wenge DynastashER...I LOVE IT!!!
[/URL][/IMG]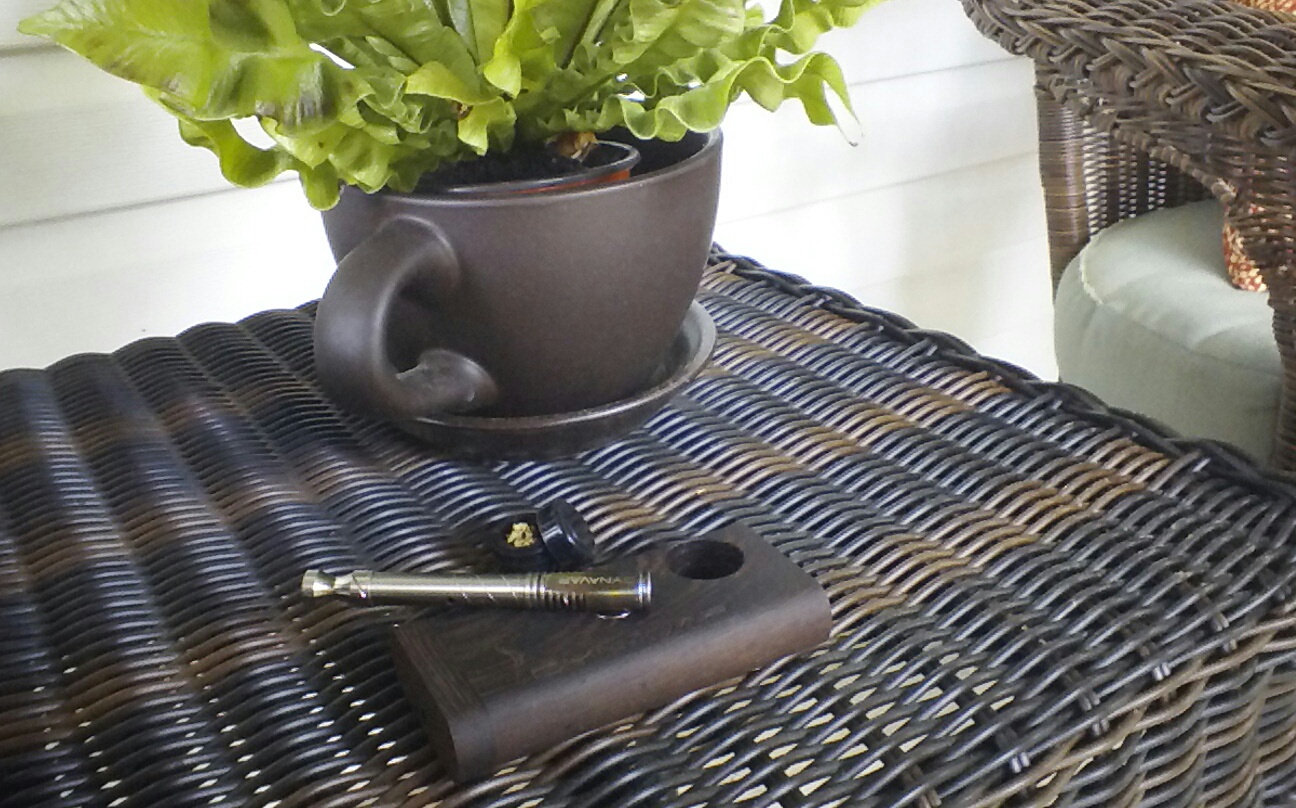
@little maggie
You are going to LOVE the Copper Stoned body. It's my overall favourite. It is a great body because it does not roll on a flat surface and I find the thicker bumpier body easier to twirl when heating. It is beautiful and you will find yourself staring at the interesting patterns the copper and stainless steel create. I also like the extra weight of it. It is the heaviest of the Vapcaps (except maybe the Damascus) and I really like the feel of it in my hand. Great choice!
But then again, I haven't seen a Vapcap that I didn't like. These are the best vaps money can buy. Beautiful, efficient and modular.
Here's my beloved Copper Stoned with it's Raw Edge Burl Dynastash.
[/URL][/IMG]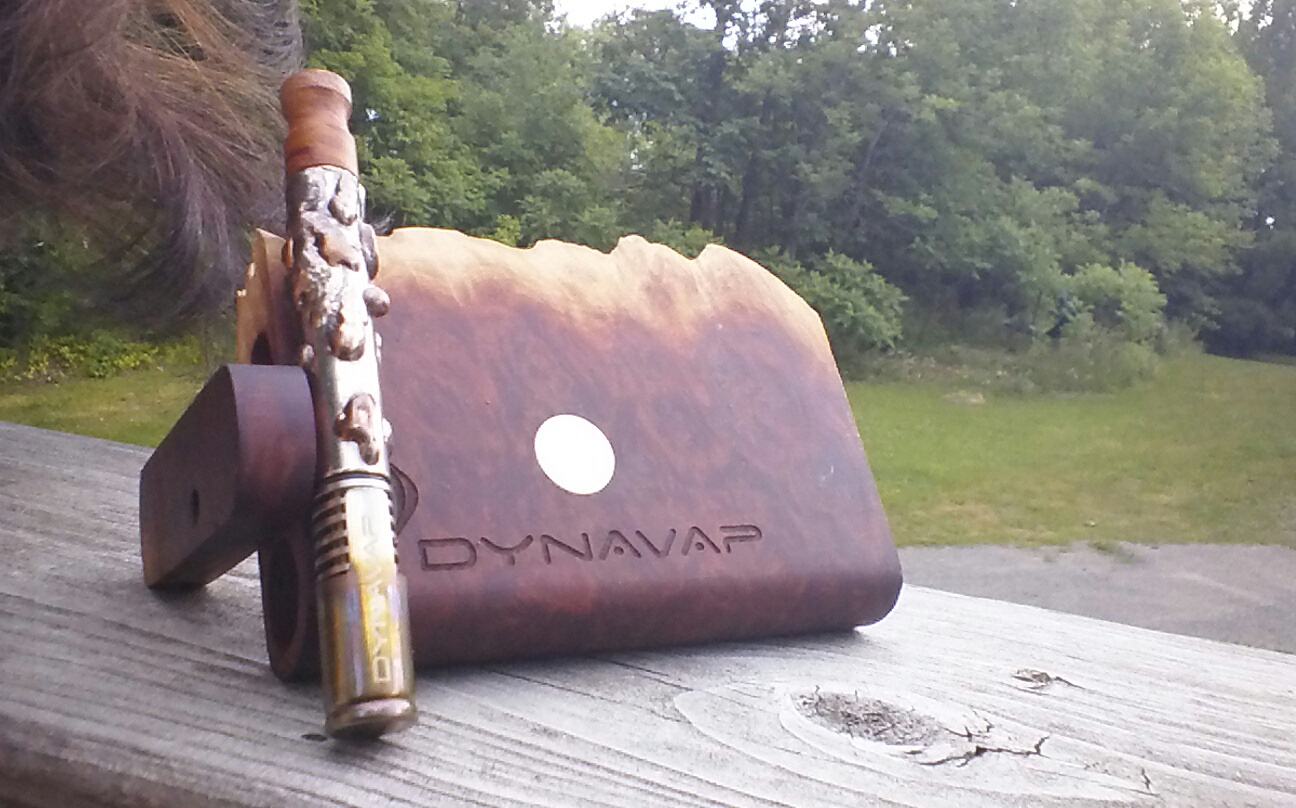

You are using an out of date browser. It may not display this or other websites correctly.
You should upgrade or use an alternative browser.
You should upgrade or use an alternative browser.
Dynavap VapCap
- Thread starter Fenton Mewley
- Start date
Copacetic
Somewhere North of The Wall
Well, it isn't what you asked for, but it's what I've got!:Please somebody on here please post the measurements of the bodies, stems, XLS, S, mps, hell if you got it measure the damn thing and post it. Maybe then I can wrap my head around what can be done with this little vape. I'll click like or give you ten "atta boys" if it helps.
Everytime I go to order something, I wind up ordering the wrong thing because I have called it the wrong name. I'm sure I wouldn't be the only one that prints it up and tapes it to the wall for future reference.
Folks I would do this myself, but I'm in the "IDKS Club" (I don't know shit). I learned a long time ago if you don't know what you are doing, leave it alone. So that's what I'm going to do with this subject.
Please clear up the confusion. Doc
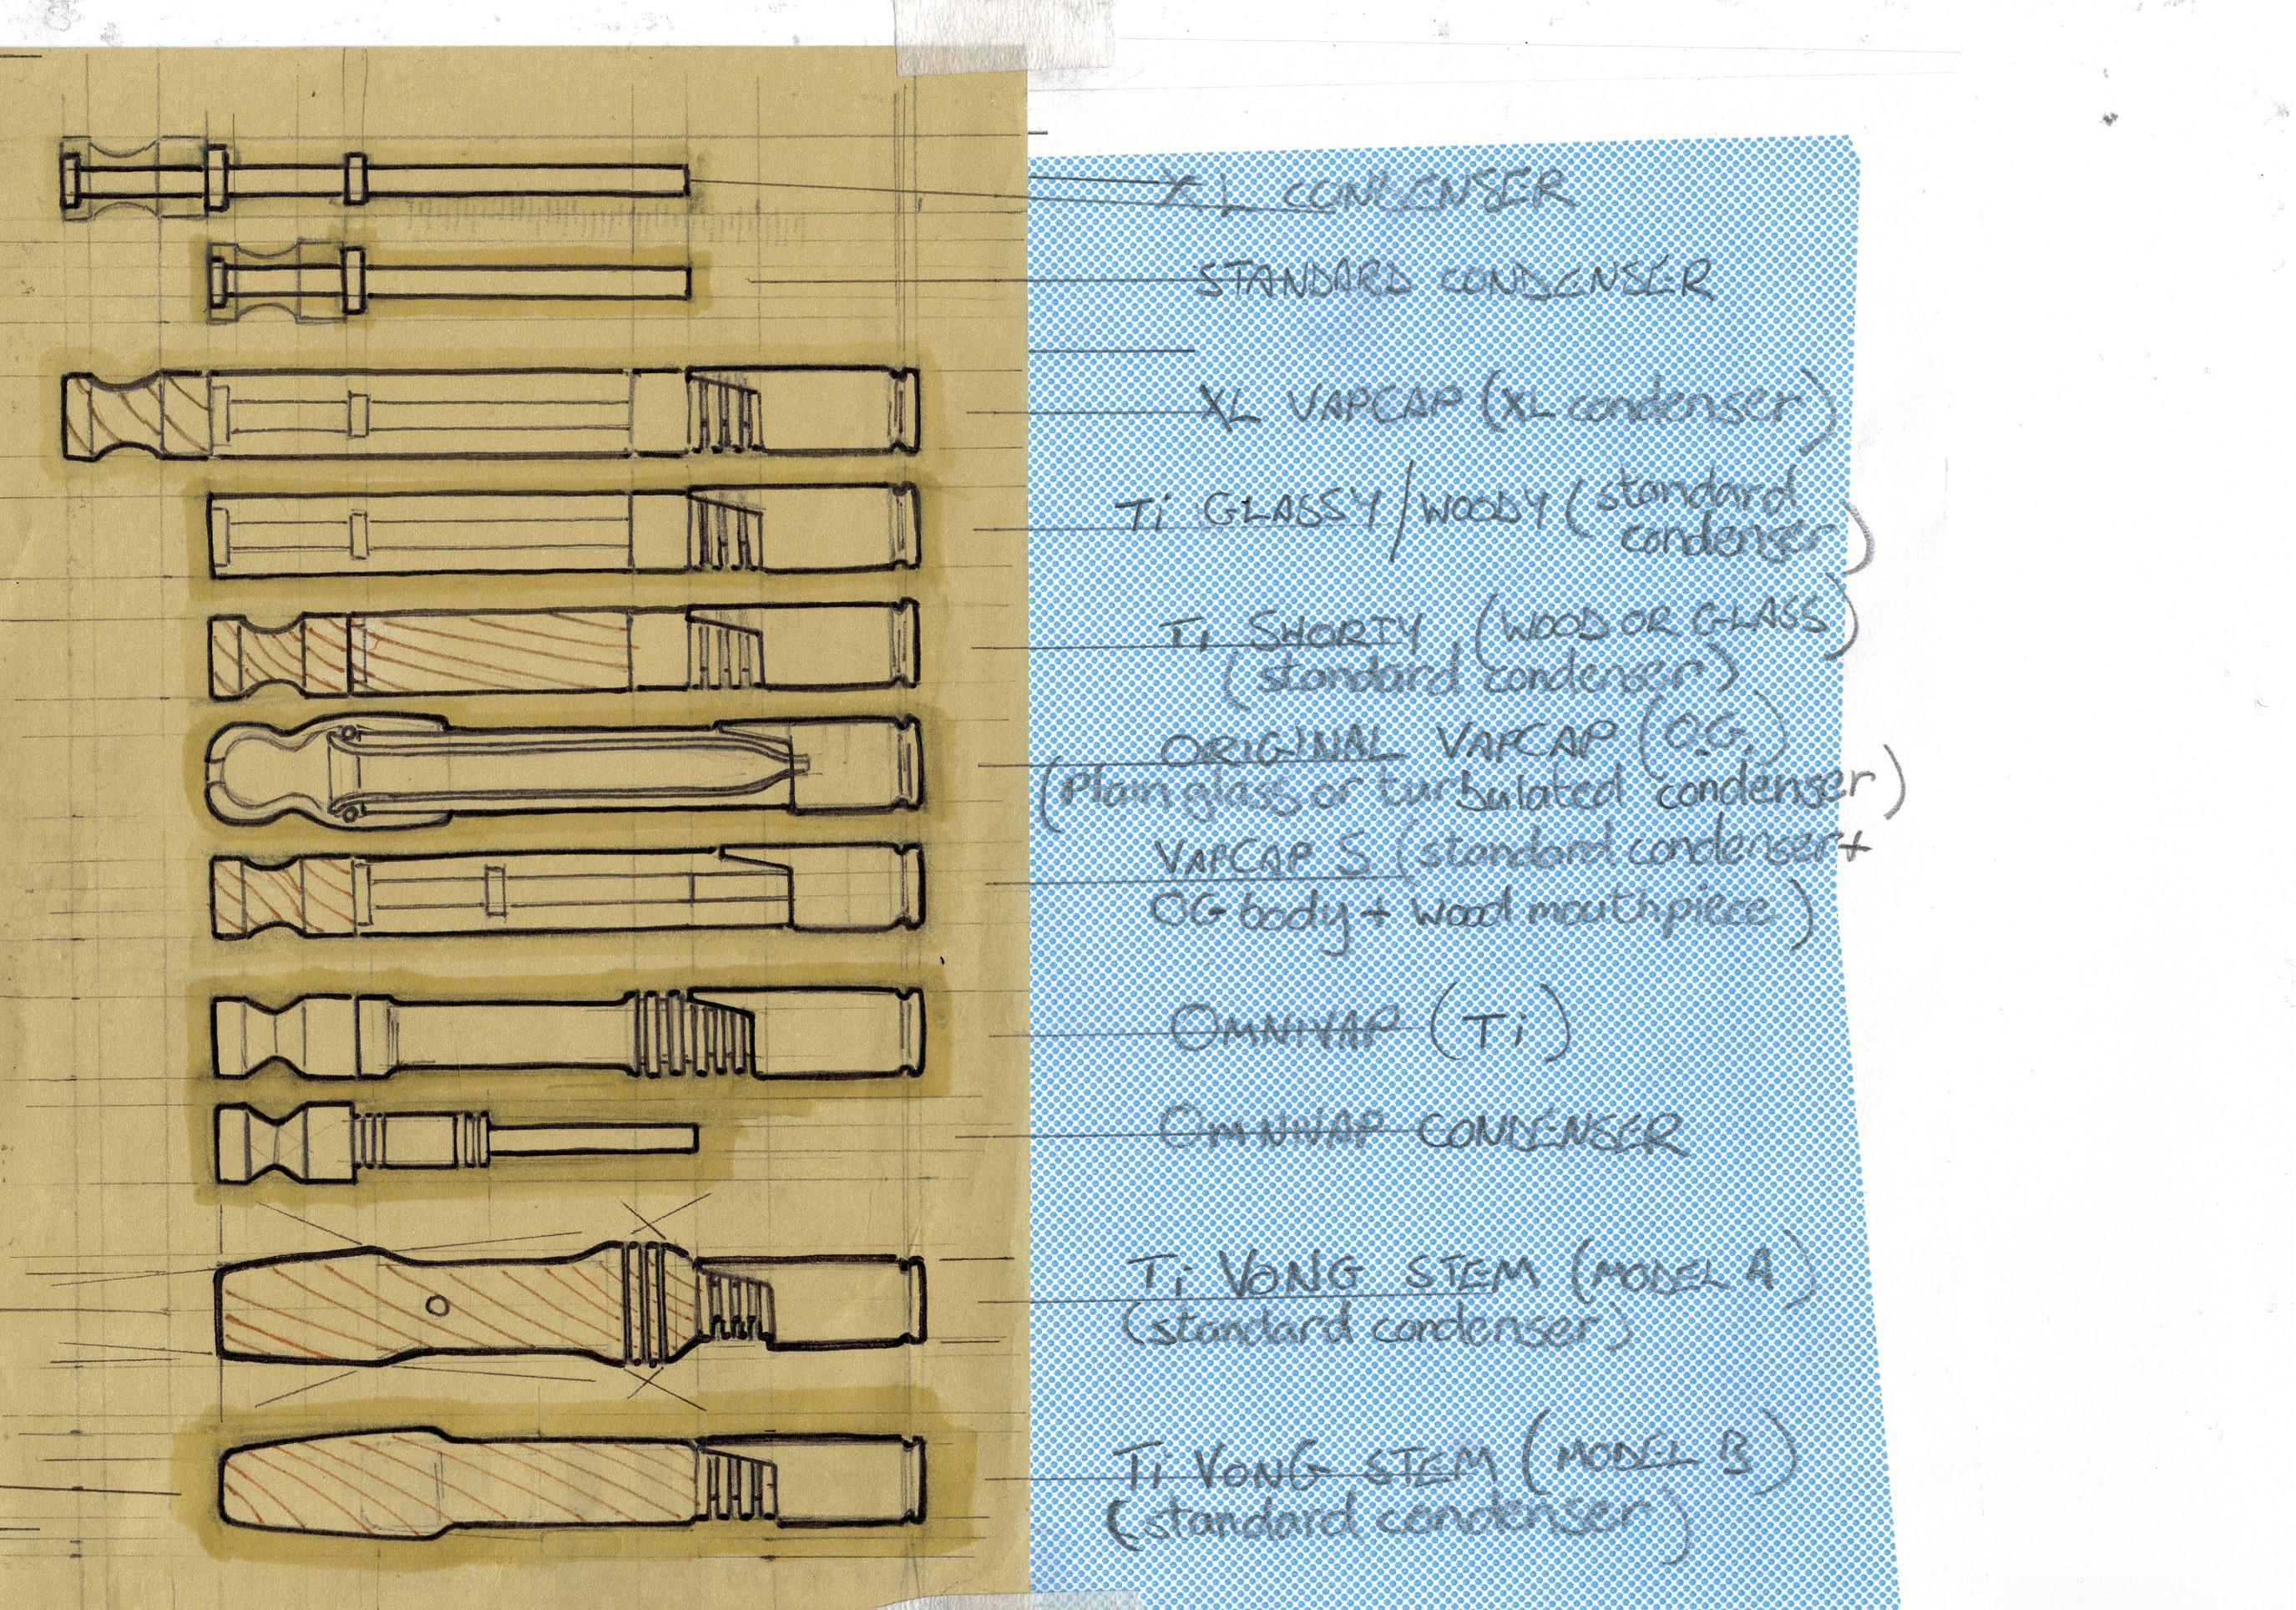
Please note that although I drew this, and have permission to post it here, the image belongs to George @VapCap
I realize there aren't any dimensions on the drawings, but at least you can see which stems and condensers go together.
If anyone spots any errors please alert me and anyone else who I may have misled!

Last edited by a moderator:
Squiby
Well-Known Member
Everytime I go to order something, I wind up ordering the wrong thing because I have called it the wrong name.
The Ti Vapcap 101
There are very few parts to a Ti Vapcap:
- The Bowl (refered to as a TIP). This holds your herb.
Here is a handful of love.
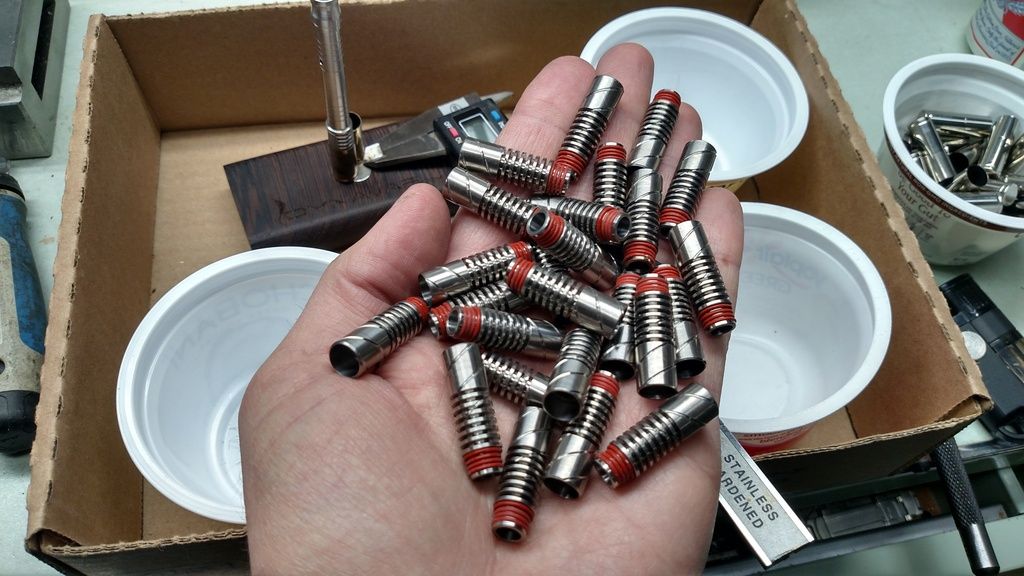
- The stainless steel CAP. This covers the tip and it is the area you heat with your lighter.
Here is the cap beside a Blackwood Ti Woody.
- The CONDENSER. It connects into the tip, through the midsection of choice and through the mouthpiece, if there is one. The length of the condenser determines the overall length of the VAPCAP. It is what ties the Vapcap all together and provides a dedicated air stream for your vapour.
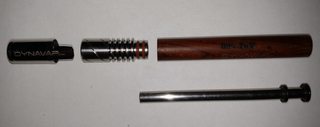
This is an exploded view of a Cocobolo Ti Woody. The condenser is on the bottom.
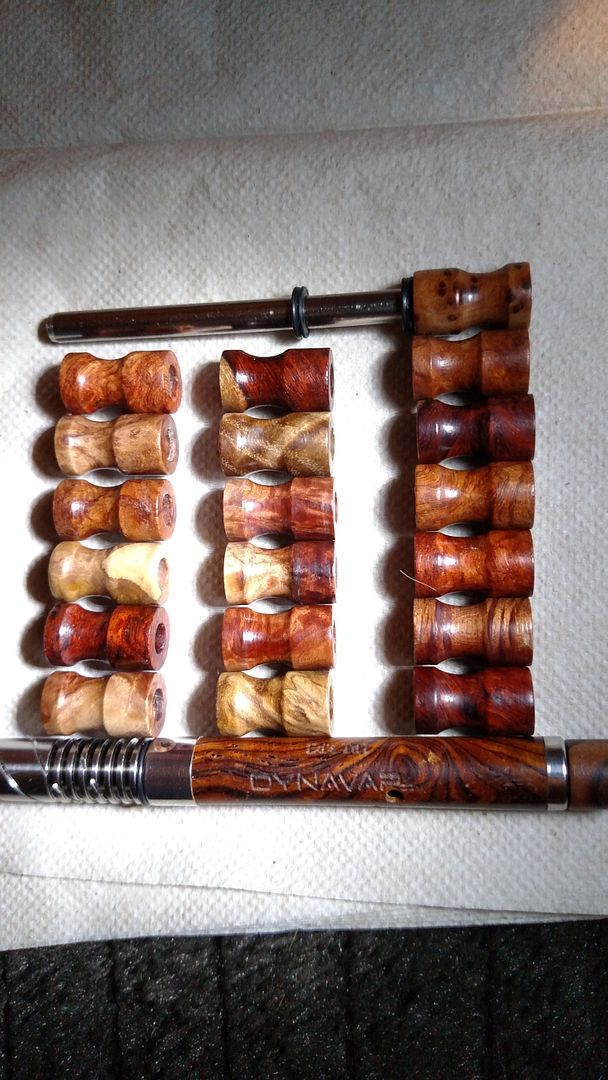
- The MIDSECTION. This is the part you hold onto. There are straight tube like ones and those that have a turned sculpted profile.
The straight midsection are offered in two different lengths. Their girth is 10mm.
- BODIES are the shortest midsection available, measuring up at 45mm.
- The longer midsections are called STEMS and are 62mm in length.
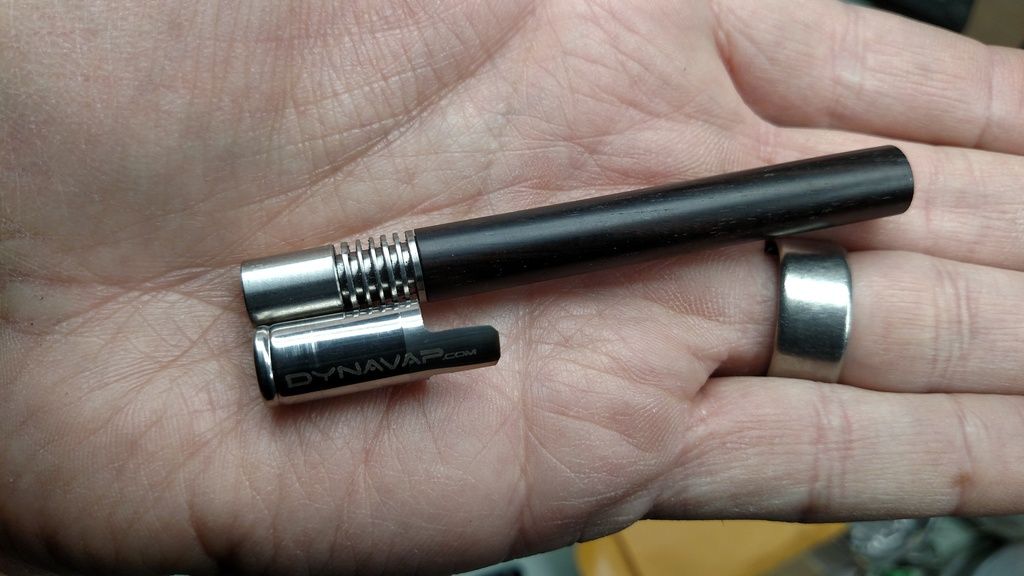
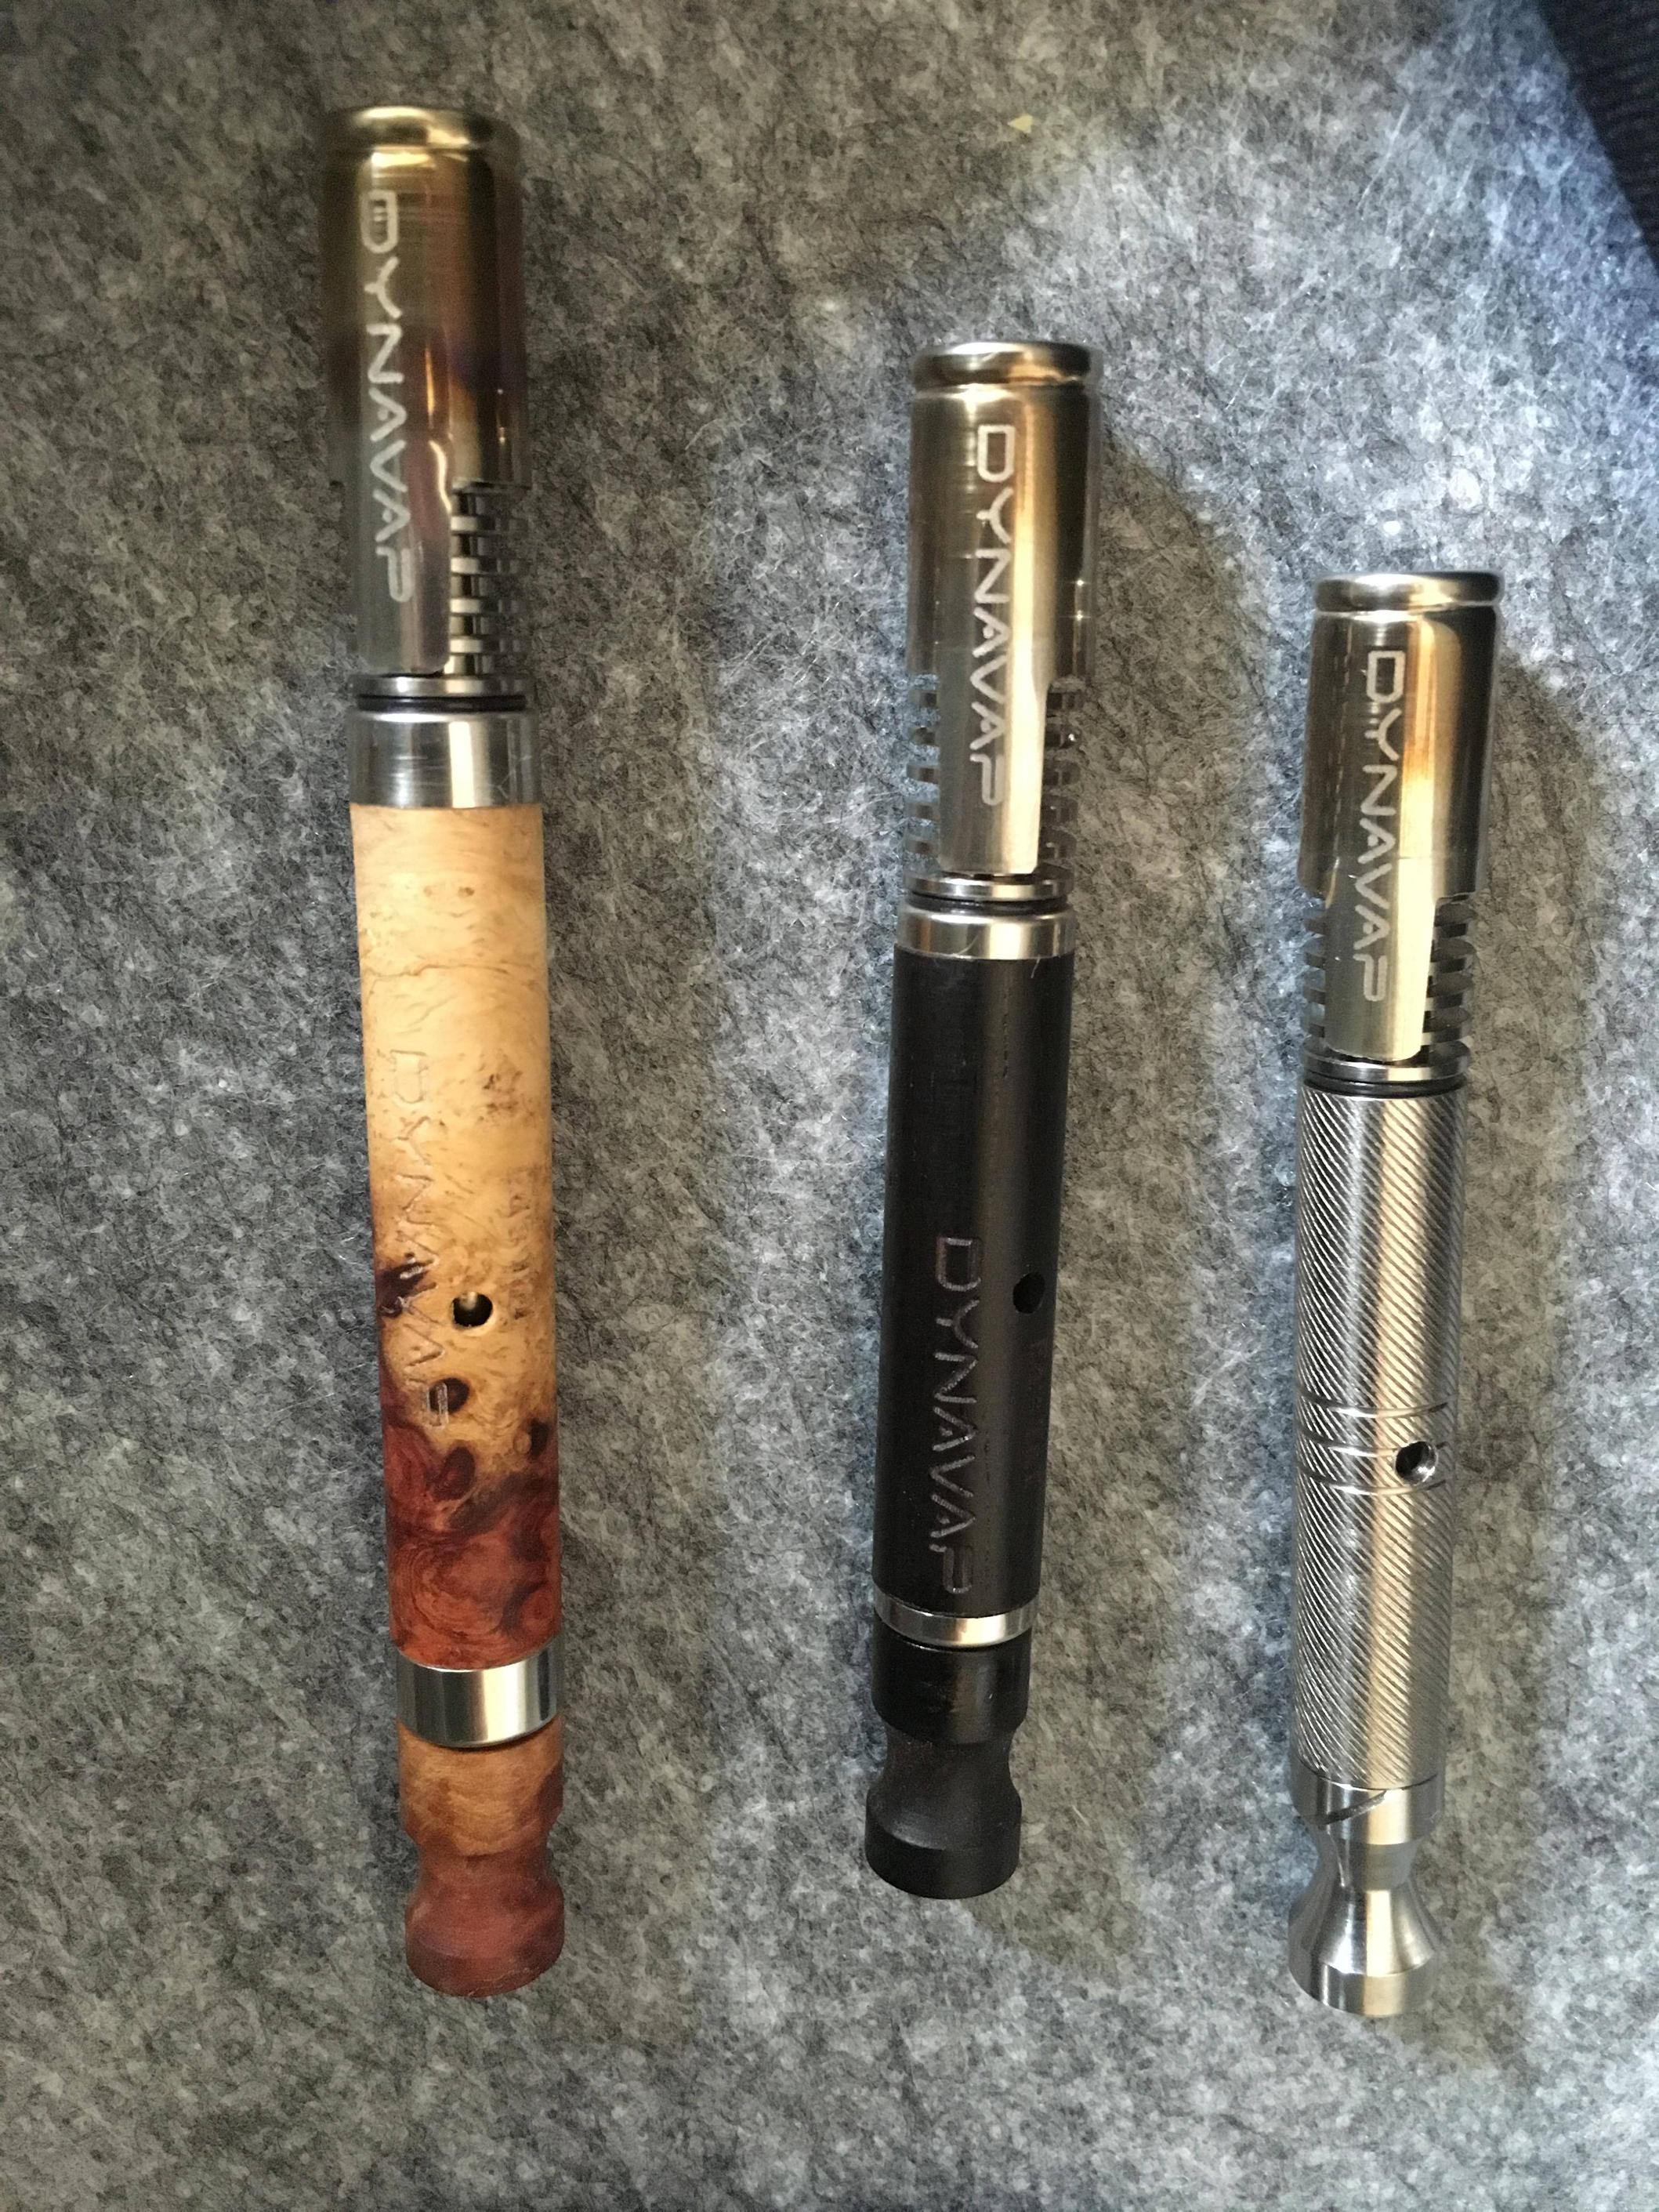
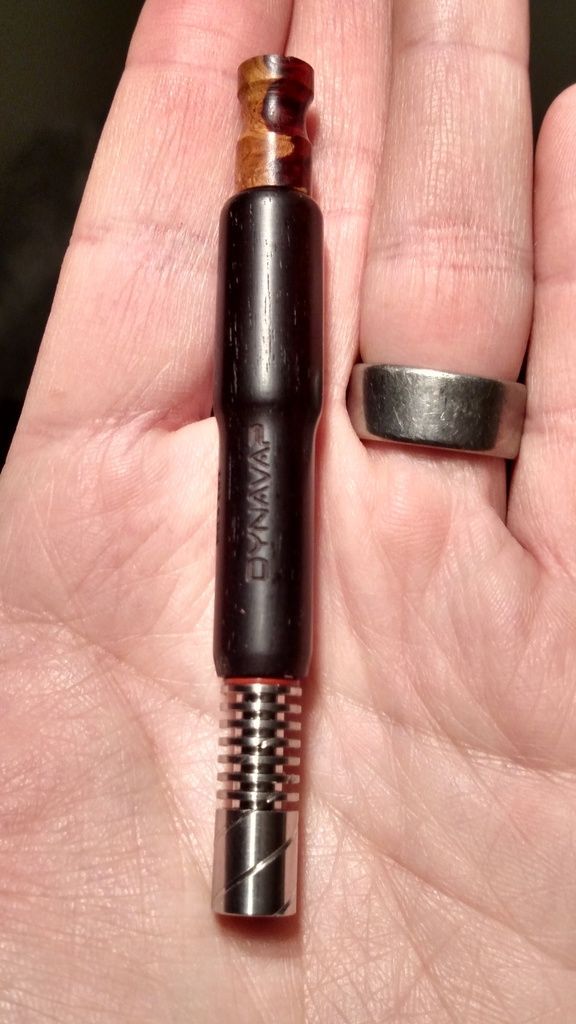
Below is a Ti Woody with a Burl STEM and mp, a Ti Woody S with a Blackwood BODY and an Omnivap. The Omni and Ti Woody S are the same length.
The turned midsections are called VONGs. They have the added functionality of being able to connect with water devices.
The VonG BODIES are 45mm long just like the straight bodies. However, they fit into either a 14mm or 18mm female connector on your water pipe.
14mm and 18mm VonG BODIES.
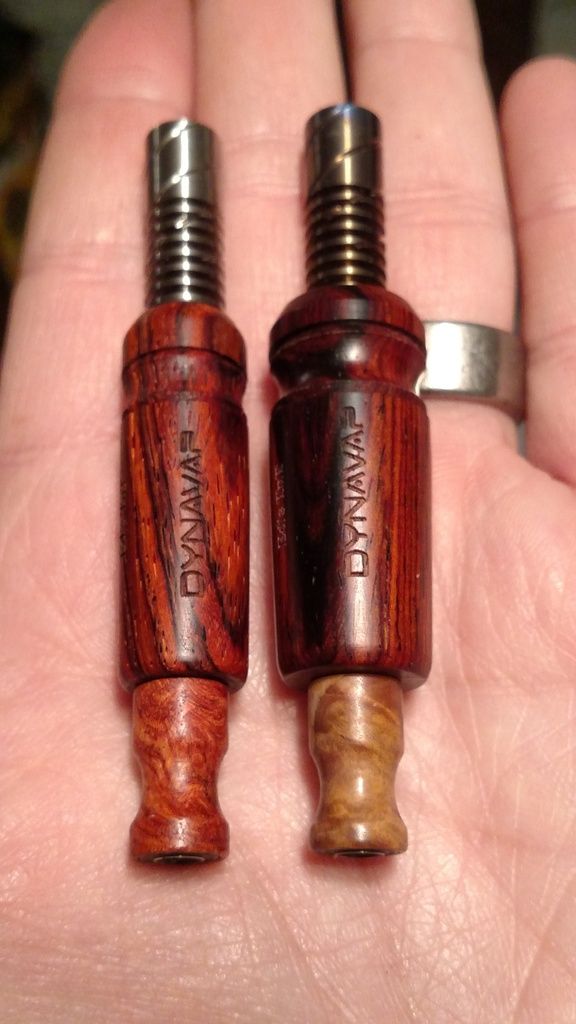
There are also VonG STEMS and they measure 62 mm, just like the straight stems. Their girth is 12mm at one end and 14mm at the other.
To VonG with a Blackwood STEM and Burl mp.
- The Mouthpiece. These are tiny turned wood mouth pieces and come in a variety of wood species. They are 17mm long.
the measurements of the bodies, stems, XLS, S, mps
A standard condenser fits a 62mm configuration;
- a body (45mm) and mp (17mm) configuration
or
- a stem (62mm)
If you add a mp (17mm) to a stem (62mm) you need the XL Condenser.
The assembled Ti Woody S is 3.5 inches long including the required mp. It has a short BODY
The assembled Ti Woody is 3.5 inches long. It has a STEM midsection.
The assembled Ti Woody with the XL Condenser and wood mp is 4.25 inches long.
Last edited by a moderator:
Jaydubya710
Well-Known Member
The Ti Vapcap 101
There are very few parts to a Ti Vapcap:
- The Bowl (refered to as a TIP). This holds your herb.
Here is a handful of love.
- The stainless steel CAP. This covers the tip and it is the area you heat with your lighter.
Here is the cap beside a Blackwood Ti Woody.
- The CONDENSER. It connects into the tip, through the midsection of choice and through the mouthpiece, if there is one. The length of the condenser determines the overall length of the VAPCAP. It is what ties the Vapcap all together and provides a dedicated air stream for your vapour.
This is an exploded view of a Cocobolo Ti Woody. The condenser is on the bottom.
- The MIDSECTION. This is the part you hold onto. There are straight tube like ones and those that have a turned sculpted profile.
The straight midsection are offered in two different lengths. Their girth is 10mm.
- BODIES are the shortest midsection available, measuring up at 45mm.
- The longer midsections are called STEMS and are 62mm in length.
Below is a Ti Woody with a Burl STEM and mp, a Ti Woody S with a Blackwood BODY and an Omnivap. The Omni and Ti Woody S are the same length.
The turned midsection are called VONGs. They have the added functionality of being able to connect with water devices.
The VonG BODIES are 45mm long just like the straight bodies. However, they fit into either a 14mm or 18mm female connector on your water pipe.
14mm and 18mm VonG BODIES.
There are also VonG STEMS and they measure 62 mm, just like the straight stems. Their girth is 12mm at one end and 14mm at the other.
To VonG with a Blackwood STEM and Burl mp.
- The Mouthpiece. These are tiny turned wood mouth pieces and come in a variety of wood species. They are 17mm long.
A standard condenser fits a 62mm configuration;
- a body (45mm) and mp (17mm) configuration
or
- a stem (62mm)
If you add a mp (17mm) to a stem (62mm) you need the XL Condenser.
The assembled Ti Woody S is 3.5 inches long including the required mp. It has a short BODY
The assembled Ti Woody is 3.5 inches long. It has a STEM midsection.
The assembled Ti Woody with the XL Condenser and wood mp is 4.25 inches long.
This needs to be saved some how. This kind gentleman took his time to do this, we need to keep it around for reference. Imgur album maybe?
StormyPinkness
Rhymenocerous ʕ•ᴥ•ʔ
Very well explained, you've totally convinced me to start doing it. It also helps explain some weird lighter behavior I've had. Thank you sir.turn to the lowest setting is not necessary for all the lighters but some have something like a memory and so if you refill it with the setting in the middle for example, it will work like the middle setting is the new lowest setting... hope that it's clear, english is not my first language")
@kellya86 Here are the torches I've tried and my views on them.
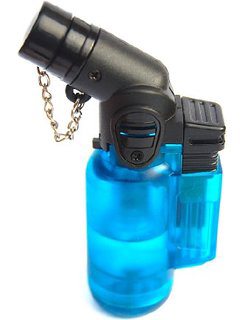
LHS. Single flame from Go Outdoors. Waste of money it gets far too hot on the thumb. £4.50.
RHS. Another single, Ebay purchase £3.50, too much faffing to move it and spin the cap to get an even heat. Went to Glasgow so my friend had one to get him going when I sent him up a Ti glassy. He got a quad and still uses it.


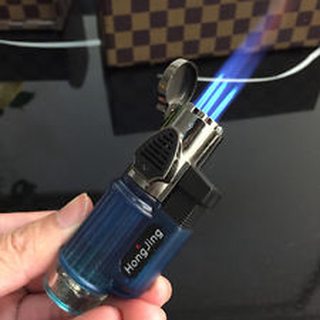
LHS. Dual Flame again Go Outdoors. Didn't work so it got returned, it may have just needed burping, something I've learned since using my VC. @Ruta has had one for ages and it has been running fine for him. £11.00.
RHS. Cheap dual off Ebay £3.49. Works fine but won't readily accept my wind shield so it is on loan to a friend whose Amazon £6 quad went up in flames and then out the nearest window.

LHS. Triple jet £2 Ebay again. My triple torch has been taken to bits so I could replace the silicone tubing which feeds the jets. One tube slipped off leaving me with a handful of flames which is what I think happened to the afore mentioned quad. I removed the sprung cap as soon as I got it and then re-purposed an ally flashlite. I can't fault it for the money.
RHS. How mine looks with wind shield.
@Squiby another excellent post, Imgur must groan every time you open it up. lol
@Copacetic lovely drawings again and I'm glad you like the wood finish. It's a @RastaVapa idea originally and it is really nice to use and totally in keeping given the subject matter.
LHS. Single flame from Go Outdoors. Waste of money it gets far too hot on the thumb. £4.50.
RHS. Another single, Ebay purchase £3.50, too much faffing to move it and spin the cap to get an even heat. Went to Glasgow so my friend had one to get him going when I sent him up a Ti glassy. He got a quad and still uses it.
LHS. Dual Flame again Go Outdoors. Didn't work so it got returned, it may have just needed burping, something I've learned since using my VC. @Ruta has had one for ages and it has been running fine for him. £11.00.
RHS. Cheap dual off Ebay £3.49. Works fine but won't readily accept my wind shield so it is on loan to a friend whose Amazon £6 quad went up in flames and then out the nearest window.
LHS. Triple jet £2 Ebay again. My triple torch has been taken to bits so I could replace the silicone tubing which feeds the jets. One tube slipped off leaving me with a handful of flames which is what I think happened to the afore mentioned quad. I removed the sprung cap as soon as I got it and then re-purposed an ally flashlite. I can't fault it for the money.
RHS. How mine looks with wind shield.
@Squiby another excellent post, Imgur must groan every time you open it up. lol
@Copacetic lovely drawings again and I'm glad you like the wood finish. It's a @RastaVapa idea originally and it is really nice to use and totally in keeping given the subject matter.
BabyFacedFinster
Anything worth doing, is worth overdoing.
This torch has lasted me the longest so far and has worked pretty damn well. The QC on these lighters is pretty poor, so I could buy another one that works like shit.
https://www.amazon.com/Scorch-Torch...8&qid=1469662934&sr=1-1&keywords=scorch+torch
https://www.amazon.com/Scorch-Torch...8&qid=1469662934&sr=1-1&keywords=scorch+torch
It's always the igniters that go for me.Pick whatever lighter you like guys just buy a few if they are cheapies but bad butane is what kills lighters.
://www.amazon.com/dp/B00G9GOOBU/ref=cm_sw_r_cp_apa_eZuMxb3ASAGBK
This one has a one year warranty and has been awesome so far. Only 11 bucks!
StormyPinkness
Rhymenocerous ʕ•ᴥ•ʔ
I don't really notice a difference in number of jets with taste or heat up time really, but I love my triple jet for using my vapcap outside. Sunlight and wind always made a single jet torch a pain to use outside for me, now I just put the cap in front of the jets and listen for the click. I've been using the below scorch one, but I'm sure the triple and quad ones they sell on the site work just as well or better.

Edmond Dantes
420 Bern it
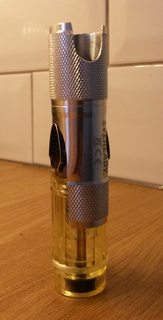
So my glassy body broke a while back while at a wedding. i love this thing, but money is tight, luckily with a little help from George and my dad's workshop I was able to reassemble it! check out my minor woodworking skills in homage to Ed's TnT. and if you see this George, I'd like to formally apply for an interview, because I need a job and I believe in this things future =D
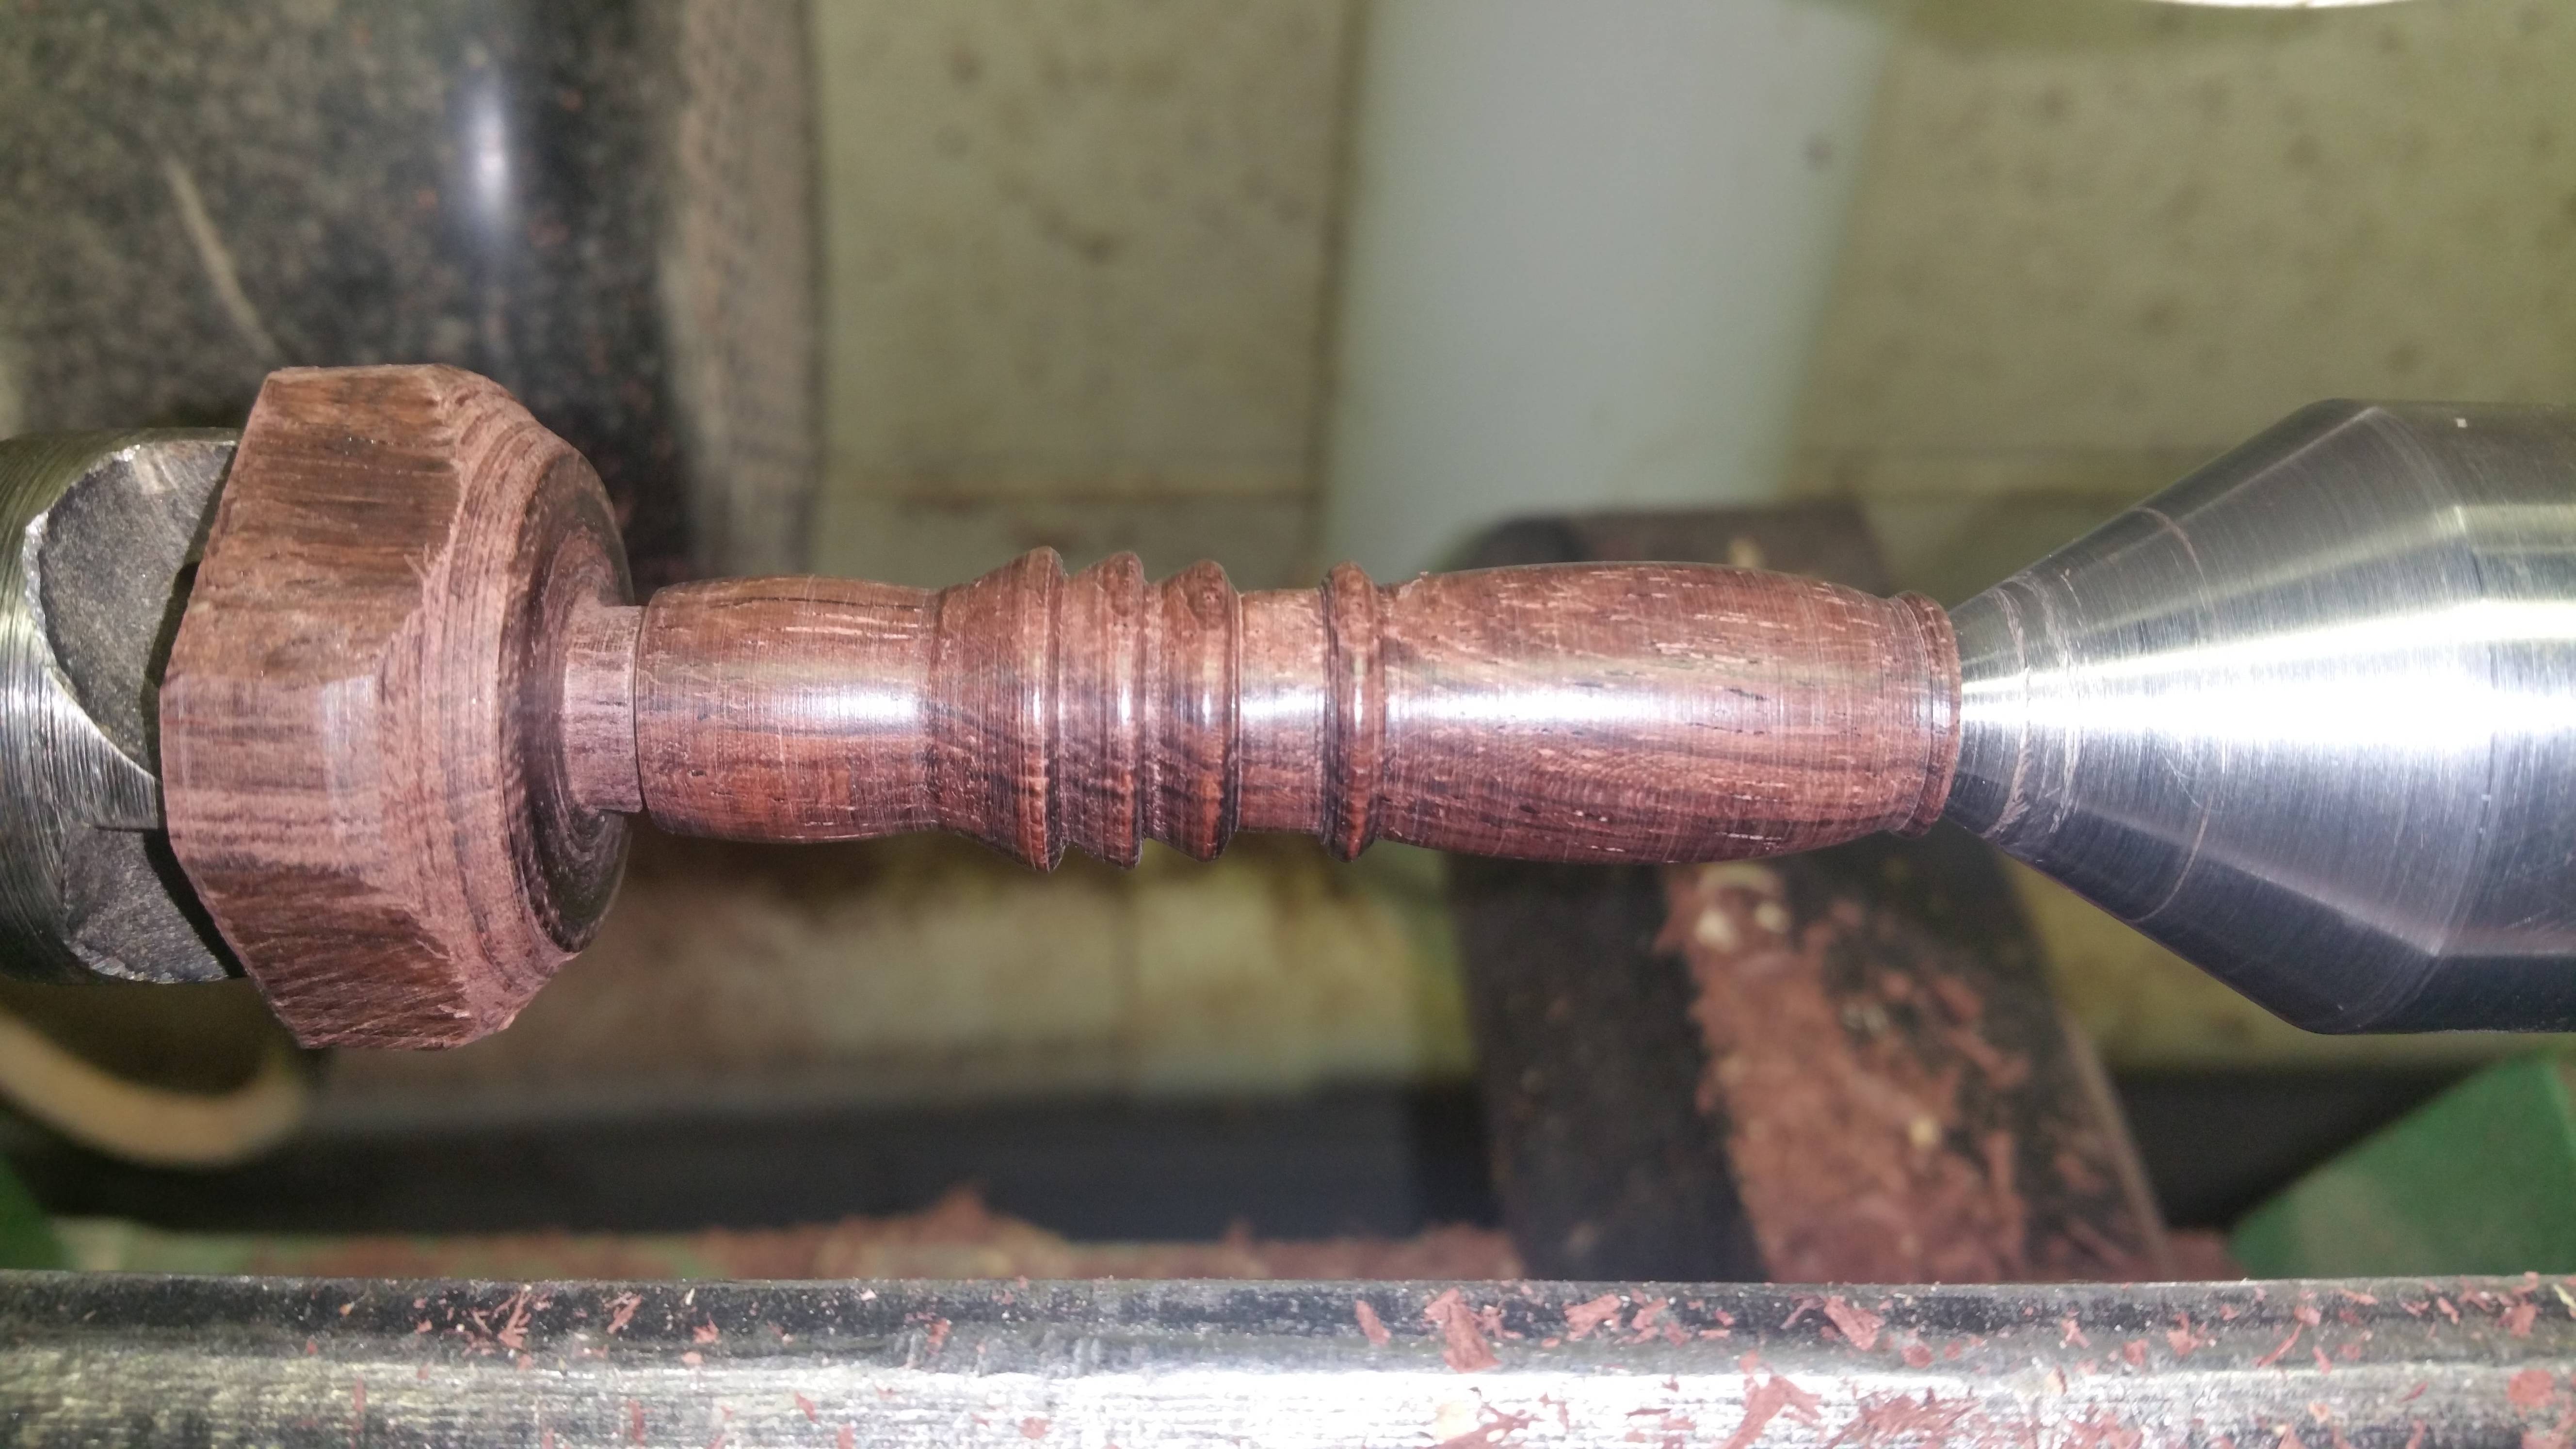
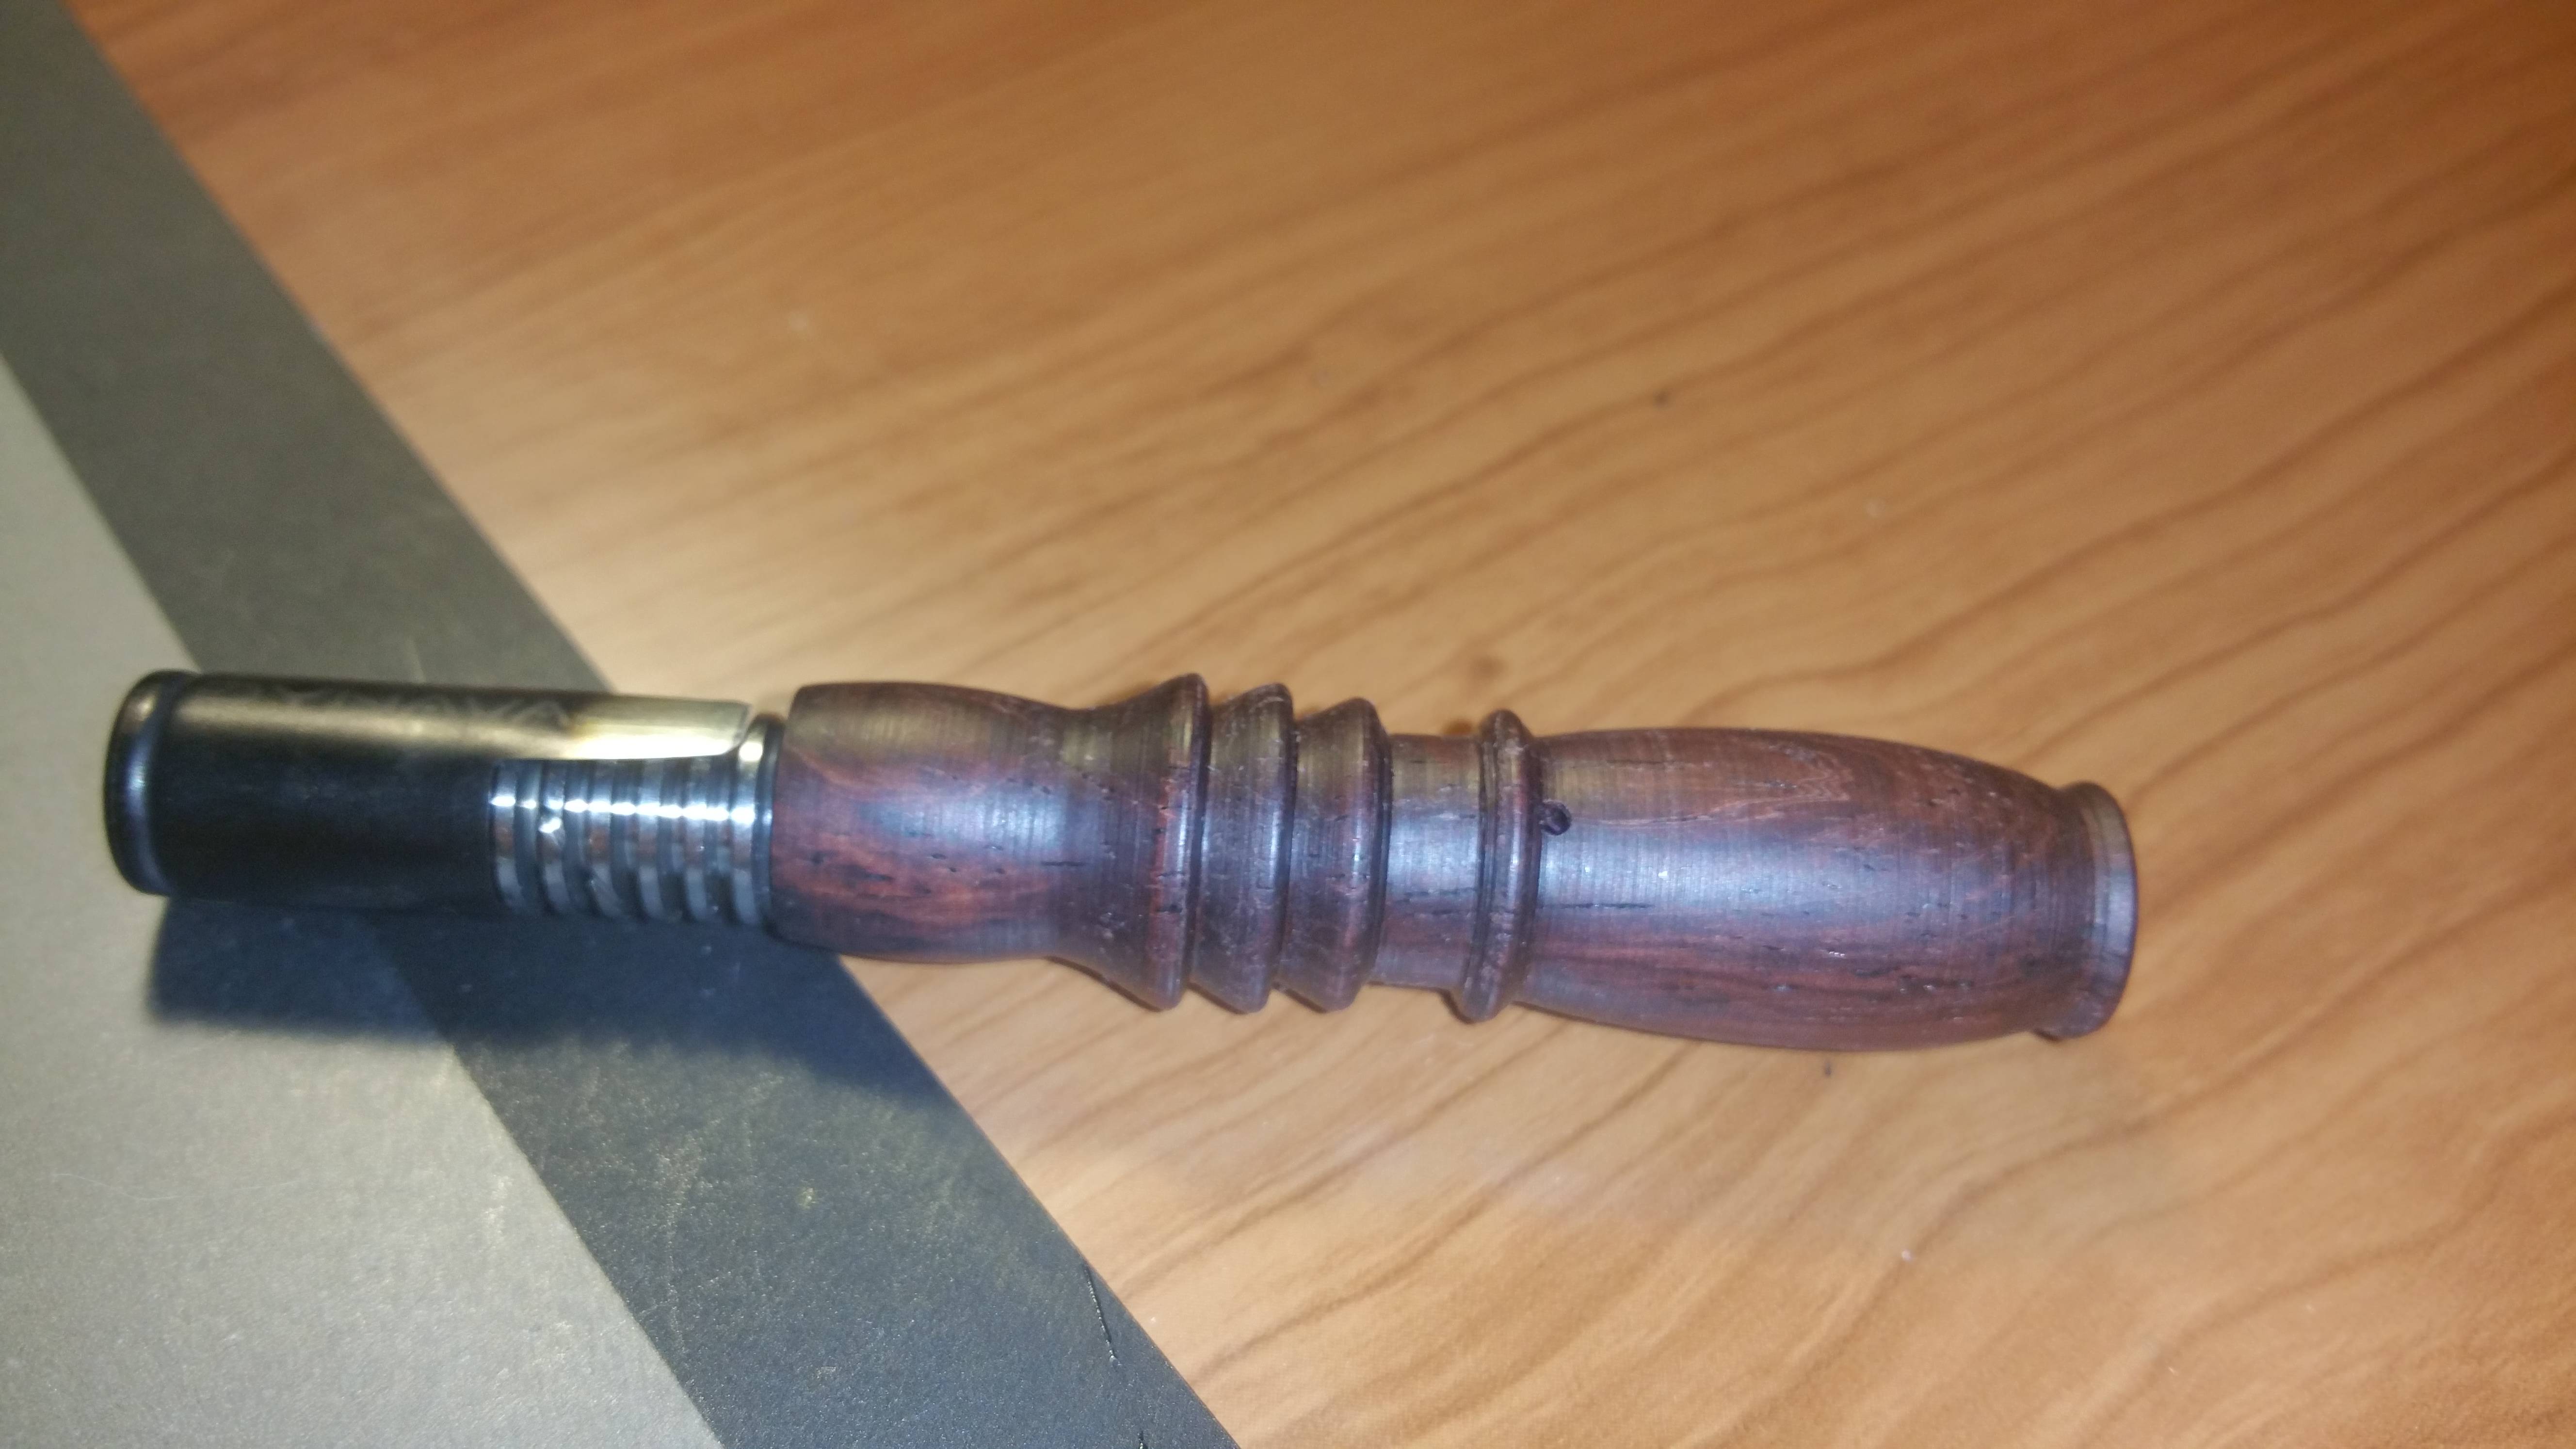
for a half-hearted how-to, check out the album at http://imgur.com/a/Zn6Zw
for a half-hearted how-to, check out the album at http://imgur.com/a/Zn6Zw
Puffitup and VapCap together?!
https://www.instagram.com/p/BIYl--FjiLJ/
http://www.puffitup.com/SearchResults.asp?Search=Vapcap+&Submit=
https://www.instagram.com/p/BIYl--FjiLJ/
http://www.puffitup.com/SearchResults.asp?Search=Vapcap+&Submit=
little maggie
Well-Known Member
I bought several torches after I got my dynavap. Cheap but none of them really worked well. I like the one I bought with my ti woody from George but I mainly use my original torch. I bought it a couple of years ago and it's still working well.
https://www.amazon.com/Scorch-Torch...1469685673&sr=8-2&keywords=zico+torch+lighter
https://www.amazon.com/Scorch-Torch...1469685673&sr=8-2&keywords=zico+torch+lighter
Baron23
Well-Known Member
Well, it isn't what you asked for, but it's what I've got!:
Please note that although I drew this, and have permission to post it here, the image belongs to George @VapCap
I realize there aren't any dimensions on the drawings, but at least you can see which stems and condensers go together.
If anyone spots any errors please alert me and anyone else who I may have misled!
Outstanding, thank you.

 I actually saved that off to my hard drive for future reference.
 While I still like my OG, I hit my new Ti Woody Stem with double crown last night (yeah, the options on the website had my head spinning too but thanks to good folks in this thread, I was able to pick this out). I like it a LOT. I do note, however, that the carb hole is smaller and with it open there is still a good bit of draw resistance. Fine with me since it worked just fine.
With the OG I would draw with the carb hole closed and just feather my finger on it a bit to let in some fresh air. I think with the Ti Woody, I could almost just leave the hole open and pull.
My Ti Woody does have the ceramic screen and I'm looking forward to George releasing the Ti diffuser/screen for the Ti as my OG has the diffuser and I like it a lot.
Question, please: I will look at his site for videos that may explain, but how do you remove the ceramic screen to clean....push from MP end and out the chamber like with the Ti diffuser??
Stevenski
Enter the Dragon
Question, please: I will look at his site for videos that may explain, but how do you remove the ceramic screen to clean....push from MP end and out the chamber like with the Ti diffuser??
I use my UD NonG dowel to push it out & it fits perfectly. Something 3-4mm in diameter should do the trick & gentle but firm pressure should get the screen out.
Ace of Space
Well-Known Member
@Squiby Thanx for all that info, really nice! I have been emailing with Matt and he has been really helpful, but there is just too much happening with the vapcap to keep up with, and your posts basically answer all the quistions i could possibly have
I ordered an Omni with cocobolo body and 18mm vong yesterday, thinking i would have to insert the vapcap in the vong, but judging your pictures i can just use the vong as a body by itself, wow!
That just makes things even better, i can't wait for it to find it's way to my home
I ordered an Omni with cocobolo body and 18mm vong yesterday, thinking i would have to insert the vapcap in the vong, but judging your pictures i can just use the vong as a body by itself, wow!
That just makes things even better, i can't wait for it to find it's way to my home
Jaydubya710
Well-Known Member
Puffit up has the OG, Blackwood Ti, Cocobolo Ti and Omni's in stock so for those of you that don't want to wait
http://www.puffitup.com/category-s/229.htm
http://www.puffitup.com/category-s/229.htm
Squiby
Well-Known Member
Dynalowrider
Well-Known Member
Well, I now know where they got the saying "The squeaking wheel gets the grease."
I'm in debt to Squiby, Copacetic, and anybody else I missed, for this awesome response. There is about a couple hundred "atta boys" heading your way. Just remember one "ah sh_t" cancels out ten "atta boys"
Thank you, thank you, thank you. You people are awesome. I have been so confused as to what goes where. This is printed and on the wall.
Maybe someone with the skills could make this stuff into a sticky on this thread. I would do it but I have "IDKS". Thanks again. Doc
Well, it isn't what you asked for, but it's what I've got!:
Please note that although I drew this, and have permission to post it here, the image belongs to George @VapCap
I realize there aren't any dimensions on the drawings, but at least you can see which stems and condensers go together.
If anyone spots any errors please alert me and anyone else who I may have misled!
I really like your drawing style. Just seeing this makes me want to go order more stuff from George.
Copacetic
Somewhere North of The Wall
Thanks man, glad it's of use.I really like your drawing style. Just seeing this makes me want to go order more stuff from George.
you should go back and re-visit some of the awesome photos in this thread, there would be no way to resist a purchase then!
I keep going back to Squiby's post and 
 ing.
ing.Squiby
Well-Known Member
You're drawings are outstanding. Really beautiful. Those bubblers you did last time were off the charts. And the Damascus!!!! I'm gonna try and get me one. Now the Vapcap drawings!!
Love them! They should be framed and displayed. Beautiful work!
Last edited:
Baron23
Well-Known Member
Thank you, I have sets of pin punches in various sizes for gunsmithing.I use my UD NonG dowel to push it out & it fits perfectly. Something 3-4mm in diameter should do the trick & gentle but firm pressure should get the screen out.
But please, just to make sure...I push the screen out the chamber side and reinsert from the chamber side, right?
I ask because that's exactly what I did with the Ti diffuser in my OG then I see George's recommendation to insert it from the mouthpiece end (but it seemed to worked just as well the way I did it)
Thanks
CharmCityVapeGuy
Known to some and enigma to others
This is much more simple but I sometimes balance my Vapcap on top of a mason jar lid. The pop top action really amplifies it.Everyone talks about the cooling clicks.
Not sure who, but someone said they use an ammo can to amplifie the cooling click. Gave me an idea. I found a small metal breath mint container. Ordered a magnet from George, and placed it in the center of the can. I put coins in the can for weight. The can and magnet are enough mass to speed up the cooling of the cap. The can amplifies the click.
I'm working on a little rack to hold the Vapcap mouthpiece against a small cow bell, while heating. Any ideas? Doc